Dinner · Part 3 of 3: Tips & recipe card
Shattering Crust Artisan Bread Rolls Tips, FAQ & printable recipe
- Prep
- Cook
- Total
- Serves
- 8
Tips for success
For an even more dramatic crust, you can increase the oven temperature to 450°F (232°C) for the first 10 minutes, then reduce to 425°F (220°C) for the remaining time.
This initial blast of heat helps the rolls rise quickly and creates a thinner, crispier shell. Just keep an eye on them to prevent burning.
If you don't have a baker's razor, use a sharp serrated knife or a lame. The slash should be about 1/2 inch deep and angled slightly; this allows the dough to expand in a controlled way, creating a beautiful ear.
Dusting the rolls with flour before scoring gives them a rustic appearance and also helps the crust crisp.
Variations
- Whole Wheat: Replace 1 cup of the bread flour with whole wheat flour. The rolls will be denser and slightly nuttier. Increase the water by 2 tablespoons to compensate for the extra absorption of the whole wheat.
- Seeded Crust: Before baking, brush the rolls lightly with water and sprinkle with sesame seeds, poppy seeds, or flaky sea salt. The seeds add texture and flavor to the crackly crust.
- Garlic Herb: Add 1 teaspoon of dried rosemary or thyme and 1/2 teaspoon of garlic powder to the dry ingredients. The herbs infuse the crumb with savory flavor, perfect for serving with olive oil.
- Cheese-Stuffed: After shaping each roll, press a cube of cheddar or mozzarella into the center before sealing. The cheese melts into a gooey pocket, creating a delicious surprise inside the crusty roll.
Storage and make-ahead
- Fridge
- Store in a paper bag at room temperature for up to 2 days. For longer storage, wrap tightly and freeze. Refresh in a 350°F oven for 5 minutes.
- Freezer
- Wrap tightly in plastic wrap and freeze for up to 3 months. Thaw at room temperature and reheat in a 350°F oven for 5-7 minutes.
- Reheat
- Reheat in a 350°F (175°C) oven for 5 minutes to restore the crackly crust.
Store the rolls in a paper bag at room temperature for up to 2 days. The crust will soften slightly but can be refreshed by reheating in a 350°F (175°C) oven for 5 minutes.
For longer storage, wrap the rolls tightly in plastic wrap and freeze for up to 3 months. Thaw at room temperature and reheat in the oven to restore the crust.
You can prepare the dough up to 24 hours in advance. After the first rise, cover the bowl tightly and refrigerate. The cold dough is easier to shape.
On baking day, let the shaped rolls rise at room temperature for 45 to 60 minutes before baking. This slow fermentation adds extra flavor and a chewier texture.
Serving ideas
These rolls are best served warm, with the crust crackling and the crumb soft. Split them open and let a pat of butter melt into the airy pockets, or use them to mop up soups, stews, or sauces. The shattering crust makes them a fun and impressive addition to any dinner table.
They also make excellent sandwich rolls—the sturdy crust holds up to hearty fillings without becoming soggy. For a simple appetizer, slice the rolls in half, toast them lightly, and top with olive oil and sea salt. The contrast of the crisp exterior and the tender interior is irresistible.
Frequently asked questions
Can this bread be made without a stand mixer?
Why does the crust not crackle after baking?
Can the dough be made ahead and refrigerated?
What is the best way to reheat leftover rolls?
Can this recipe be scaled up or down?
Shattering Crust Artisan Bread Rolls
Ingredients
- 2 cups warm water (450ml)
- 1 tbsp active dry yeast (10g)
- 1 tbsp granulated sugar
- 4 1/2 cups bread flour (550g)
- 1 1/2 tsp fine sea salt
- 1 tbsp olive oil
- all-purpose flour, for dusting, to taste
Instructions
- In a large glass mixing bowl, combine the warm water, active dry yeast, and granulated sugar. Whisk gently until the yeast and sugar are dissolved. Let the mixture sit for 5 to 10 minutes until it becomes bubbly and frothy on top, indicating the yeast is active.
- Add the bread flour, fine sea salt, and olive oil to the bowl with the yeast mixture. Stir with a wooden spatula until a shaggy, wet, sticky dough forms and no dry flour remains. The dough will be loose and sticky, not a kneaded ball.
- Cover the bowl with a damp kitchen towel or plastic wrap. Let the dough rise in a warm, draft-free place for about 1 hour, or until it has doubled in volume and is puffy and full of air bubbles.
- Turn the dough out onto a lightly floured surface. Using a bench scraper or floured hands, divide the dough into 8 equal pieces. Gently shape each piece into a round by folding the edges toward the center and pinching the seams. Place the rolls seam-side down on a baking sheet lined with parchment paper, leaving space between them.
- Cover the shaped rolls loosely with the damp towel and let them rise for 30 to 45 minutes, until they are puffy and almost doubled in size. The rolls should feel light and airy when gently pressed.
- About 30 minutes before baking, place a rack in the middle of the oven and preheat to 425°F (220°C). Place an empty metal pan or a cast-iron skillet on the bottom rack to preheat as well; this will be used to create steam.
- Just before baking, dust the tops of the risen rolls generously with all-purpose flour. Using a baker's razor or a sharp knife, make a single deep slash across the center of each roll, about 1/2 inch deep. This allows the bread to expand in the oven.
- Place the baking sheet on the middle rack. Carefully pour about 1 cup of hot water into the preheated pan on the bottom rack to create steam. Close the oven door immediately. Bake the rolls for 22 minutes, until the crust is deeply browned and blistered.
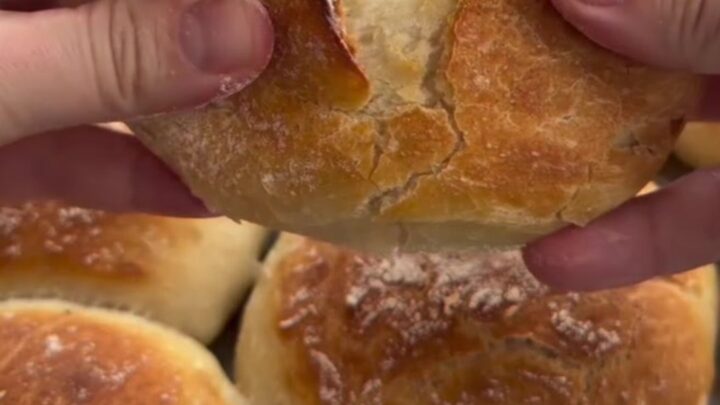
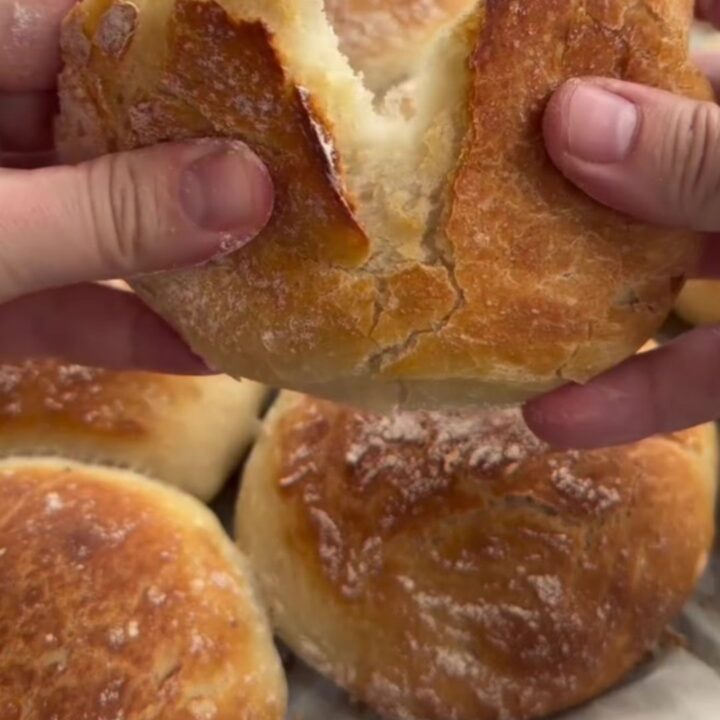
- Remove the baking sheet from the oven and transfer the rolls to a wire rack. Let them cool for at least 10 minutes before serving. Press the crust gently between your hands to hear the shattering crackle.
Estimated nutrition per serving
- Calories
- 280
- Protein
- 9 g
- Carbohydrates
- 55 g
- Fat
- 3 g
Next recipe

One-Pot Garden Veggie Fettuccine with Melted Mozzarella
See the recipe → →This recipe is based on a short cooking video and is published under the pen name Clara Weller. It was checked before publication, but errors can slip through. Nutrition, when shown, is an estimate. Read more in our editorial policy and on our food safety page.
More recipes to try

Homemade Manti with Garlic Yogurt and Aleppo Butter
Total time: 1 h 20 min
Crispy Chicken Caesar Wrap with Chili Dressing
Total time: 35 min
Crispy Chicken Shawarma Wrap with Garlicky Layers
Total time: 27 min
Spicy Chili Chicken Penne in Creamy Parmesan Sauce
Total time: 25 min
Crispy Honey Sriracha Chicken Tenders
Total time: 40 min