Dinner · Part 1 of 3: Ingredients
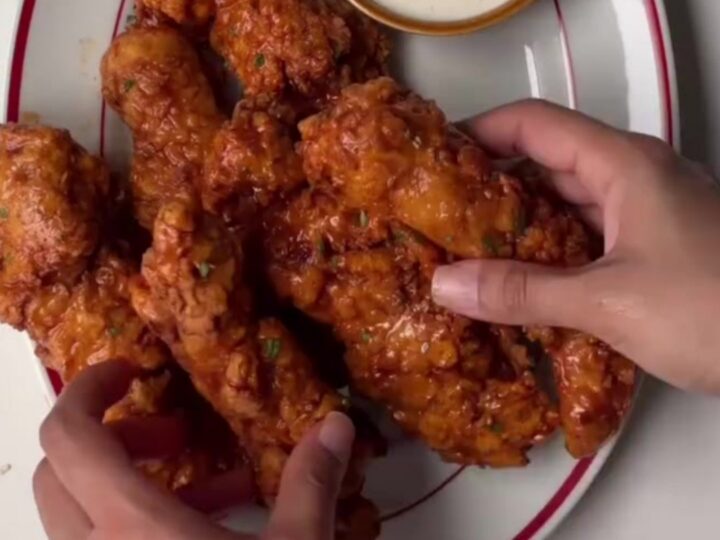
Crispy Honey Sriracha Chicken Tenders
- Prep
- Cook
- Total
- Serves
- 4
These honey sriracha chicken tenders are the perfect balance of crispy, sticky, sweet, and spicy. The cornstarch coating creates an incredibly crunchy crust that stays crisp even after being tossed in the glossy glaze.
Ready in under 30 minutes, this one-pan dish is ideal for busy weeknights. The buttermilk marinade keeps the chicken juicy inside, while the fiery honey sriracha glaze adds a punch of flavor. Serve them as a main course with rice or as a crowd-pleasing appetizer.
Crispy chicken tenders are a beloved favorite, but they can sometimes be dry and bland. This recipe solves that by marinating the chicken in a seasoned buttermilk mixture, which tenderizes and flavors the meat. The coating, made with cornstarch and flour, creates an exceptionally crunchy exterior that rivals any restaurant version.
The real star is the honey sriracha glaze—a perfect blend of sweet honey, spicy sriracha, and savory soy sauce that clings to every bite. Whether you're cooking for the family or hosting a game-day gathering, these tenders are sure to impress.
Ingredients
- 1 lb chicken breast strips
Marinade
- 1 cup buttermilk
- 1 large egg
- 1 tsp garlic powder
- 1 tsp smoked paprika
- 1 tsp onion powder
- 1/2 tsp black pepper
- 1/2 tsp white pepper
Coating
- 1 1/2 cups cornstarch
- 1/2 cup all-purpose flour
- 1 tsp paprika
- 1 tsp salt
Glaze
- 2 tbsp butter
- 1 tbsp minced fresh garlic
- 1/2 cup pure honey
- 1/3 cup sriracha chili sauce
- 2 tbsp soy sauce
Garnish
- 1 tbsp toasted sesame seeds
- 2 tbsp chopped fresh scallions
Why this recipe works
The buttermilk marinade serves a dual purpose. It not only infuses the chicken with flavor from the garlic, smoked paprika, and peppers, but its acidity also helps break down the proteins, ensuring the chicken stays moist and tender during cooking.
The egg in the marinade helps the coating adhere better, creating a thicker, crunchier crust.
The cornstarch-based coating is the key to that ultra-crispy texture. Cornstarch absorbs moisture and fries up to a light, shattery crispness that all-purpose flour alone cannot achieve.
Pressing the coating onto the chicken creates shaggy ridges that increase the surface area, resulting in more crunchy bits and a better grip for the glaze.
Notes and substitutions
For the best texture, use chicken breast strips cut into even-sized pieces so they cook evenly. If you prefer dark meat, chicken thighs work just as well and are even more forgiving. Buttermilk is traditional, but you can make a quick substitute by adding lemon juice to regular milk and letting it sit for a few minutes.
The glaze is a simple combination of honey, sriracha, and soy sauce. Adjust the amount of sriracha to suit your heat preference. If you want extra garlic flavor, add more fresh garlic. Toasting the sesame seeds in a dry pan until golden enhances their nutty flavor—keep an eye on them as they burn easily.
- buttermilk: 1 cup whole milk mixed with 1 tbsp lemon juice, let sit 5 minutes
- sriracha: Use your favorite hot sauce, adjusting to taste
- soy sauce: Use tamari or coconut aminos for a gluten-free option
- chicken breast: Use chicken thighs for extra juiciness
Equipment
- Large mixing bowl
- Whisk
- Shallow dish for dredging
- Nonstick skillet
- Tongs
- Plate lined with paper towels
Up next · Part 2 of 3
8 steps · 15 min of cooking · what to look for at each stage
Step-by-step instructions (Part 2)