Dinner · Part 1 of 3: Ingredients
Shattering Crust Artisan Bread Rolls
- Prep
- Cook
- Total
- Serves
- 8
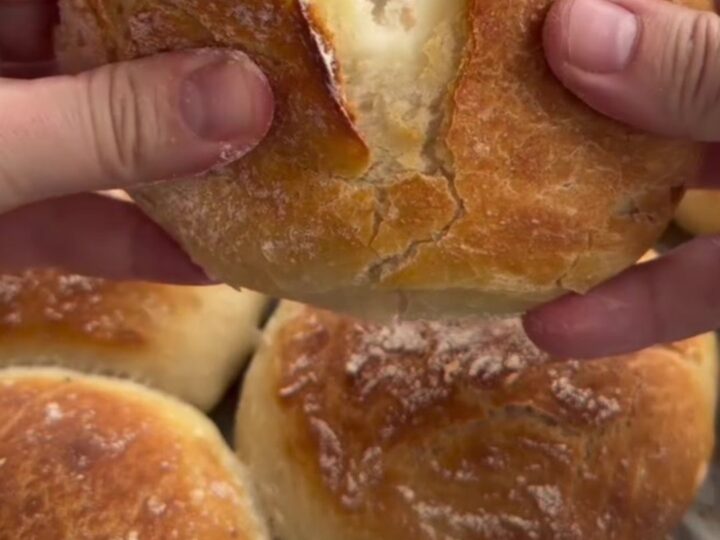
These artisan bread rolls are the ultimate showstopper: a deeply blistered, crackly crust that shatters when you press it, revealing a soft, pillowy honeycomb crumb inside. The magic comes from a high-hydration dough, a hot oven, and a burst of steam that creates that dramatic, crisp shell. With just six ingredients and no kneading, these rolls are surprisingly simple to make at home.
There's something deeply satisfying about pulling a warm, crusty roll from the oven and hearing it crackle as it cools. These artisan bread rolls deliver that experience with a shattering crust and an airy, open crumb that's perfect for sopping up soups, building sandwiches, or simply slathering with butter.
The dough comes together in minutes with a wooden spoon, then rises slowly to develop flavor and structure. Baking at high heat with steam transforms the humble dough into a bakery-worthy loaf.
Ingredients
- 2 cups warm water (450ml)
- 1 tbsp active dry yeast (10g)
- 1 tbsp granulated sugar
- 4 1/2 cups bread flour (550g)
- 1 1/2 tsp fine sea salt
- 1 tbsp olive oil
- all-purpose flour, for dusting, to taste
Why this recipe works
The high hydration of the dough—2 cups of water to 4 1/2 cups of flour—creates a wet, sticky dough that bakes into a light, open crumb with large irregular holes.
This is the same technique used in rustic artisan breads: the extra water encourages steam inside the loaf, puffing up the dough and creating that honeycomb texture. No kneading is needed because the long rise develops the gluten naturally, giving the bread a chewy, satisfying bite.
The combination of a very hot oven (425°F) and steam is what creates the crackly crust. When the dough hits the heat, the steam keeps the surface moist and elastic, allowing the rolls to expand fully.
As the moisture evaporates, the starches on the surface crisp and crack, forming a thin, brittle shell that shatters with a satisfying crunch. The steam also gives the crust a deep golden color and a glossy sheen.
Notes and substitutions
Bread flour is key here because its higher protein content builds more gluten, which gives the rolls structure and chew. If you only have all-purpose flour, you can use it, but the crumb will be slightly less open and the crust less crackly. The yeast needs warm water (about 110°F) to activate; too hot will kill it, too cool will slow it down. The sugar feeds the yeast and helps the crust brown.
A baking sheet lined with parchment is all you need for shaping; no special pans required. A baker's razor makes clean slashes, but a sharp knife works too.
For the steam, you'll need a metal pan or cast-iron skillet that can withstand the heat. You can also use a spray bottle to mist the oven, but pouring hot water into a preheated pan is more effective and creates a bigger burst of steam.
- bread flour: All-purpose flour can be used, but the rolls will be slightly less chewy and the crust may not shatter as dramatically.
- active dry yeast: Instant yeast can be substituted; use the same amount and skip the proofing step, mixing it directly with the flour.
- olive oil: Any neutral oil like canola or vegetable oil works; it adds moisture and helps the crust brown.
Equipment
- large glass mixing bowl
- wooden spatula
- baking sheet
- parchment paper
- baker's razor or sharp knife
- spray bottle for water
- kitchen towel
- wire rack
Up next · Part 2 of 3
9 steps · 22 min of cooking · what to look for at each stage
Step-by-step instructions (Part 2)