Breakfast · Part 3 of 3: Tips & recipe card
Two-Tone Chocolate Croissant Buns: Easy French-Style Pastry Tips, FAQ & printable recipe

- Prep
- Cook
- Total
- Serves
- 12
Tips for success
For the best texture, make sure the dough is not too dry. If it feels stiff, add a teaspoon of milk at a time until it becomes soft and pliable.
When rolling the stacked dough, use a light touch to avoid squishing the layers. If the dough springs back, let it rest for a few minutes before rolling again. This relaxes the gluten and makes it easier to shape.
To get clean, defined spirals, use a very sharp knife or pizza cutter to slice the triangles. A dull blade will drag and smear the layers.
When rolling, start with the wide end and roll tightly but not too tightly – you want the layers to have room to expand during baking. Brushing the dough with melted butter before cutting adds flavor and helps the layers separate.
Variations
- Add Fillings: Before rolling, sprinkle the dough with chocolate chips, cinnamon sugar, or chopped nuts. The filling will be encased in the layers as you roll, adding extra flavor and texture.
- Make It Citrusy: Add the zest of one orange or lemon to the dough along with the sugar. The bright citrus flavor pairs beautifully with the chocolate and adds a fresh twist.
- Use Whole Wheat: Replace half of the all-purpose flour with whole wheat flour for a heartier texture. You may need to add a little extra milk to keep the dough soft.
- Go Gluten-Free: Use a gluten-free all-purpose flour blend. The dough will be stickier, so add extra flour as needed. The buns will be slightly more delicate but still delicious.
Storage and make-ahead
- Fridge
- Store in an airtight container at room temperature for up to 2 days. For longer storage, refrigerate for up to 5 days.
- Freezer
- Freeze baked buns in a zip-top bag for up to 2 months. Thaw at room temperature or reheat directly from frozen.
- Reheat
- Reheat in a 300°F (150°C) oven for 5-7 minutes until warm and crisp.
Store the cooled buns in an airtight container at room temperature for up to 2 days. They are best enjoyed fresh, but you can refresh them in a 300°F (150°C) oven for 5 minutes to restore crispness.
You can prepare the dough the night before and refrigerate it after the first rise. The next day, let it come to room temperature, then proceed with shaping and proofing. The shaped buns can also be frozen before baking – just thaw in the refrigerator overnight, then proof and bake as directed.
Serving ideas
Serve these buns warm from the oven, when the chocolate is still slightly melty and the layers are at their flakiest.
They are wonderful on their own, but a dusting of powdered sugar or a drizzle of extra chocolate sauce would be lovely. Pair them with a cup of coffee or tea for a truly indulgent breakfast or afternoon treat.
For a brunch spread, arrange the buns on a platter and let everyone pull them apart. The zebra pattern makes them a stunning centerpiece.
They also reheat well – a few minutes in a toaster oven brings back the crisp exterior. If you have leftovers, they make a great base for bread pudding or French toast.
Frequently asked questions
Can these buns be made gluten-free?
Why did your buns not get the zebra effect?
Can the dough be prepared ahead of time?
What is the best way to reheat leftover buns?
Can the egg wash be omitted?
Two-Tone Chocolate Croissant Buns: Easy French-Style Pastry

Ingredients
- 1 cup warm milk
- 1 cup warm water
- 1/2 cup vegetable oil
- 1 tbsp active dry yeast
- 3 tbsp granulated sugar
- 4 cups all-purpose flour
- 3 tbsp dark Dutch cocoa powder
- 2 tbsp milk
- 1/4 cup unsalted butter, melted
- 1 egg, beaten (for egg wash)
- 1/4 cup simple sugar syrup
Instructions
- In a large bowl, whisk together the warm milk, warm water, oil, yeast, and sugar. Let stand for 5 minutes until foamy. Gradually add the flour, stirring until a soft dough forms. Turn out onto a floured surface and knead for 5-7 minutes until smooth and elastic. Place in a greased bowl, cover, and let rest for 10 minutes.
- Divide the dough into two equal parts. Keep one part plain. To the other part, add the cocoa powder and the 2 tablespoons of milk. Knead until the cocoa is fully incorporated and the dough is a deep chocolate color. If the dough becomes too dry, add a splash more milk.
- On a lightly floured surface, roll out the white dough into a thin wide rectangle. Roll out the chocolate dough into a similar rectangle. Carefully place the chocolate sheet directly over the white sheet. Use a rolling pin to press them together gently. Brush the top with a little of the melted butter.
- Using a pizza cutter or sharp knife, slice the stacked sheet into long slender triangles. You should get about 12 triangles, depending on the size of your rectangle. Make sure the cuts are clean for neat spirals.
- Starting from the wide base of each triangle, roll the dough up tightly toward the pointy tip. Tuck the tip underneath the bun to secure it. Place the buns on a baking sheet lined with parchment paper, leaving space between them.
- Cover the baking sheet with a clean kitchen towel and let the buns proof in a warm place for 20 minutes, or until they have doubled in size. They should look puffy and slightly spring back when gently pressed.
- Preheat the oven to 360°F (182°C). Gently brush the proofed buns with the beaten egg, being careful not to deflate them. This will give them a golden, shiny crust.
- Bake the buns in the preheated oven for 22 minutes, until they are puffed and deep golden brown. The internal temperature should register 160°F (71°C) to ensure the egg wash is fully cooked. If the tops brown too quickly, loosely cover with foil.
- Remove the buns from the oven and immediately brush them with the simple sugar syrup. This gives them a beautiful mirror shine. Let the buns cool on the baking sheet for 5 minutes, then transfer to a wire rack to cool completely.
Estimated nutrition per serving
- Calories
- 320
- Protein
- 6 g
- Carbohydrates
- 45 g
- Fat
- 13 g
Next recipe

Hashbrown Smash Burger with Maple Sausage and a Fried Egg
See the recipe → →This recipe is based on a short cooking video and is published under the pen name Clara Weller. It was checked before publication, but errors can slip through. Nutrition, when shown, is an estimate. Read more in our editorial policy and on our food safety page.
More recipes to try

Turkey Sausage, Apple and Cheddar Breakfast Strata (Make-Ahead)
Total time: 1 h 25 min
Crockpot Sausage Hash Brown Breakfast Casserole, Assembled in 15 Minutes
Total time: 4 h 25 min
Impossible Bacon Swiss Pie: Crustless, One Dish, Weekend Easy
Total time: 1 h 5 min
Slow-Cooker Maple Apple & Sage Breakfast Pork Sausage Casserole
Total time: 4 h 40 min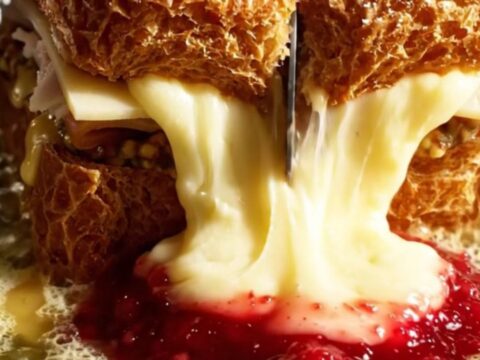
Crispy Monte Cristo Melt with Raspberry Jam
Total time: 21 min