Breakfast · Part 1 of 3: Ingredients
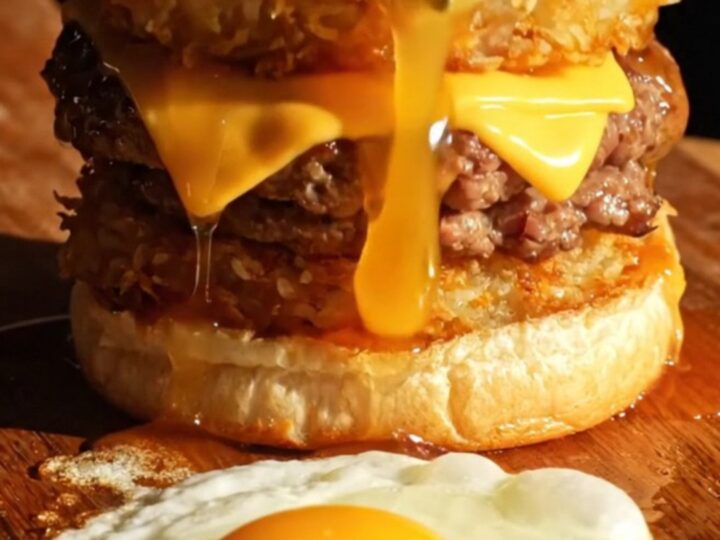
Hashbrown Smash Burger with Maple Sausage and a Fried Egg
- Prep
- Cook
- Total
- Serves
- 1
One pan, eight minutes of cooking, and the most talked-about bite of the weekend: a smash burger built for breakfast. Beef and maple sausage are blended into loose balls, smashed thin on a screaming-hot griddle, blanketed in American cheese, then stacked with a shattering hashbrown and a lacy fried egg on toasted brioche. A thread of maple syrup ties the whole thing together.
This is the burger that proves brunch deserves the smash treatment. The method borrows the best of two worlds: the fast, crust-building smash technique from the burger joint, and the sweet-savory flavor map of a full diner plate. Ground beef brings the char and beefiness; maple breakfast sausage brings warm spice and sweetness that caramelizes beautifully against the hot iron.
A frozen hashbrown patty does double duty as crunch and potato side, fried egg sits on top like a sauce you can see, and American cheese melts into every crack. The whole build lands on a toasted brioche English muffin, sturdy enough to hold, tender enough to bite through. From bowl to table it takes about 25 minutes, and every layer is cooked in one or two pans.
Ingredients
- 4 oz ground beef (80/20)
- 4 oz maple breakfast sausage meat, removed from casing
- 1 frozen hashbrown patty (about 3 oz)
- 2 slices American cheese
- 1 large egg
- 1 tbsp bacon fat (or unsalted butter)
- 1 brioche English muffin, split
- 1 tbsp maple syrup, for drizzling
Why this recipe works
The smash method works because contact, not time, builds flavor. When a loose ball of the beef-sausage blend hits a 450°F (230°C) griddle and gets pressed flat, the meat's surface area doubles instantly.
The proteins and sugars in the maple sausage caramelize against the iron within two minutes, creating the lacy, deeply browned crust that defines a great smash burger. Blending the two meats, rather than cooking them separately, means every bite carries sweetness and spice at once, and the sausage fat bastes the beef from the inside as it renders.
The architecture is just as deliberate. The hashbrown goes beneath the patties, where its crisp, dry surface shields the bread from the yolk and syrup. American cheese is chosen for how it melts, flowing into the crust's nooks instead of stiffening. The egg fries in bacon fat for frilled, lacy edges, and the maple drizzle lands on the egg, not the bread, so it flavors the richest layer without soaking the crumb.
Notes and substitutions
Choose an 80/20 ground beef; leaner blends dry out at smash thickness. Buy maple breakfast sausage links or rolls and remove any casing, or use plain sausage with a splash of maple syrup mixed in.
A frozen hashbrown patty is the reliable choice here because it holds a rigid, shattering shape; shredded hashbrowns work if pressed firmly into a patty first. American cheese is worth keeping for this recipe specifically: emulsified cheeses melt smoothly at griddle temperature in a way cheddar does not.
Equipment matters more than technique. A cast-iron griddle or a heavy skillet that can hold 450°F (230°C) is essential, along with a stiff metal spatula for the initial smash. Use a separate small nonstick skillet for the egg so the lace edges stay intact.
An instant-read thermometer takes the guesswork out of both the patties and the yolk. If brioche English muffins are hard to find, any sturdy brioche bun or plain English muffin works.
- maple breakfast sausage meat: Use plain breakfast sausage and add 2 tsp maple syrup to the meat mix for the same sweet-savory blend.
- American cheese: Mild cheddar or Colby Jack melts well, though American gives the smoothest, creamiest blanket over smashed patties.
- frozen hashbrown patty: Form 1 cup shredded hashbrowns into a compact patty and pan-fry in fat over medium heat until deeply golden on both sides.
- brioche English muffin: A plain toasted English muffin or buttered brioche bun holds the stack just as well.
Equipment
- Large cast-iron griddle or heavy skillet
- Stiff metal spatula
- Mixing bowl
- Small nonstick skillet
- Instant-read thermometer
- Flexible turner
Up next · Part 2 of 3
11 steps · 15 min of cooking · what to look for at each stage
Step-by-step instructions (Part 2)