Dinner · Part 3 of 3: Tips & recipe card
Artisan Sourdough Mini Loaves with Crackly Crust Tips, FAQ & printable recipe
- Prep
- Cook
- Total
- Serves
- 6
Tips for success
For the best crust, use a baking stone and a cast iron pan for steam. Preheat the stone for at least 45 minutes. Right before baking, pour hot water into the cast iron pan to create a burst of steam.
This helps the crust stay flexible while the loaves expand, then crisp up beautifully. Another tip is to score the loaves with confidence—a quick, decisive slash will produce a better ear than a hesitant one.
If you want a more tangy flavor, extend the cold proof in the refrigerator to 24 hours. The longer cold ferment develops complexity. For a milder taste, shorten the bulk fermentation or reduce the starter amount slightly.
Always use a digital scale for accuracy; baking is a science. And remember to keep your starter healthy by feeding it regularly. A happy starter makes a happy loaf.
Variations
- Seeded Sourdough: Add 50 g of toasted sesame seeds, poppy seeds, and sunflower seeds to the dough during the final stretch and fold. Press additional seeds onto the shaped loaves before proofing for a crunchy crust.
- Rosemary and Sea Salt: Fold in 1 tablespoon of chopped fresh rosemary and 1 teaspoon of flaky sea salt during the final stretch and fold. Sprinkle a little extra salt on top before baking for a fragrant, savory loaf.
- Whole Wheat Blend: Replace 100 g of the bread flour with whole wheat flour. Increase the water by 25 ml and extend the autolyse to 90 minutes for better hydration and a heartier texture.
- Olive Oil and Herb: Add 2 tablespoons of extra-virgin olive oil and 1 teaspoon of dried Italian herbs to the dough during mixing. This yields a softer crumb and a subtle herbal note that pairs well with pasta dishes.
Storage and make-ahead
- Fridge
- Store the baked loaves in a paper bag at room temperature for up to 2 days. For longer storage, slice and freeze in a zip-top bag for up to 3 months.
- Freezer
- Freeze the baked loaves whole or sliced in a zip-top bag for up to 3 months. Thaw at room temperature or toast directly from frozen.
- Reheat
- To refresh, place the loaves in a 350°F (175°C) oven for 5-10 minutes. The crust will crisp up again.
Store the cooled loaves in a paper bag at room temperature for up to 2 days. The crust will soften slightly, but the bread will still be delicious. For longer storage, slice the loaves and freeze them in a zip-top bag.
Toast the slices directly from the freezer for a quick breakfast. Avoid storing sourdough in plastic, as it makes the crust chewy and can promote mold. If the bread becomes stale, refresh it in a 350°F (175°C) oven for 5-10 minutes.
The dough can be mixed, shaped, and proofed in the refrigerator overnight. After shaping, place the loaves in the fridge for 8 to 12 hours. The cold temperature slows fermentation, allowing flavors to develop.
In the morning, preheat the oven and bake the loaves directly from the fridge. You may need to add 5 minutes to the baking time. This makes it easy to have fresh bread for breakfast or lunch.
Serving ideas
Serve the mini loaves warm with a pat of butter and a sprinkle of flaky salt. The contrast of the crackly crust and the soft, tangy crumb is irresistible. They’re perfect for dipping into soups or stews, or for making small sandwiches. Slice them in half and toast for a crunchy texture. They also make a great base for bruschetta or crostini.
For a simple dinner, serve the loaves alongside a salad or a cheese board. The bread’s tangy flavor pairs well with creamy cheeses, cured meats, and fresh fruit. You can also use them to make garlic bread or panzanella. The mini size makes them great for portion control and sharing. However you serve them, these loaves are sure to impress.
Frequently asked questions
Why is the dough so sticky and hard to handle?
Can the dough be proofed in the refrigerator overnight?
Why didn't the loaves rise in the oven?
Can this recipe be made without a baking stone?
How do you know when the loaves are fully baked?
Artisan Sourdough Mini Loaves with Crackly Crust
Ingredients
- 510 g bread flour
- 350 ml water
- 100 g active bubbly sourdough starter
- 10 g fine sea salt
Instructions
- In a large bowl, combine the bread flour and water. Mix with a spatula until no dry flour remains. Cover the bowl and let rest for 1 hour. This autolyse step hydrates the flour and starts gluten development. After the rest, add the active sourdough starter and fine sea salt. Mix with wet hands or a dough whisk until the starter and salt are fully incorporated. The dough will be shaggy and sticky.
- Over the next 2 hours, perform a series of stretch and folds. Every 30 minutes, lift one side of the dough and fold it over the center, then repeat with the other three sides. This builds strength without kneading. After each fold, the dough becomes smoother and more elastic. Let the dough rest between folds. After the final fold, cover the bowl and let the dough ferment at room temperature until it has increased in volume by about 50% and shows bubbles on the surface.
- Turn the dough out onto a lightly floured work surface. Using a bench scraper, divide the dough into 6 equal pieces, about 160 g each. Gently shape each piece into a rough ball by folding the edges into the center and flipping it seam-side down. Let the dough balls rest, covered, for 20 minutes. This relaxes the gluten and makes final shaping easier.
- After the rest, flip each dough ball seam-side up. Gently press it into a rectangle, then fold the top third down and the bottom third up. Press the seam to seal. Starting from the top, roll the dough into a tight cylinder. Pinch the seam and taper the ends to form a batard shape. Place each shaped loaf seam-side up into a floured proofing basket or a bowl lined with a floured kitchen towel.
- Cover the proofing baskets with a damp towel or plastic wrap. Let the loaves proof at room temperature for 1 to 2 hours, or until they have puffed up and feel airy when gently pressed. For a more developed flavor, refrigerate the covered baskets overnight for a cold proof. The loaves are ready to bake when they have increased in volume and a finger pressed into the dough leaves a slight indentation that slowly springs back.
- Place a baking stone or heavy sheet pan on the middle rack of the oven. Place a cast iron pan on the bottom rack. Preheat the oven to 250°C (480°F) for at least 45 minutes. The stone needs to be thoroughly hot to give the loaves a strong oven spring. Just before baking, carefully pour about 1 cup of hot water into the cast iron pan to create steam.
- Turn the proofed loaves out onto a piece of parchment paper. Using a razor blade or bread lame, score each loaf down the center with a quick, confident slash. The cut should be about 1/2 inch deep. Working quickly, transfer the loaves onto the hot baking stone using the parchment as a sling. Close the oven door and bake for 20 to 25 minutes, until the crust is deep golden brown and the loaves sound hollow when tapped on the bottom.
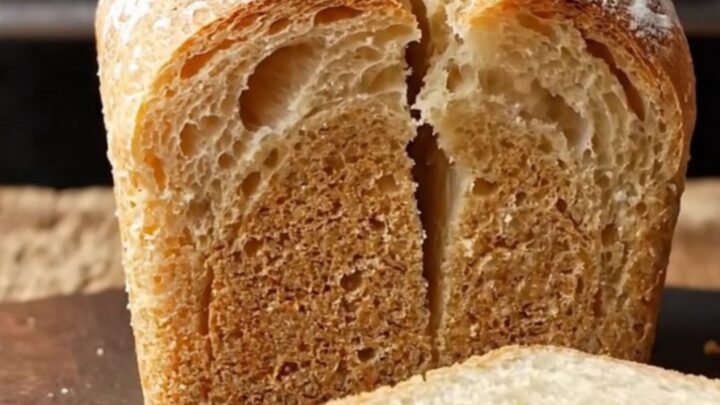
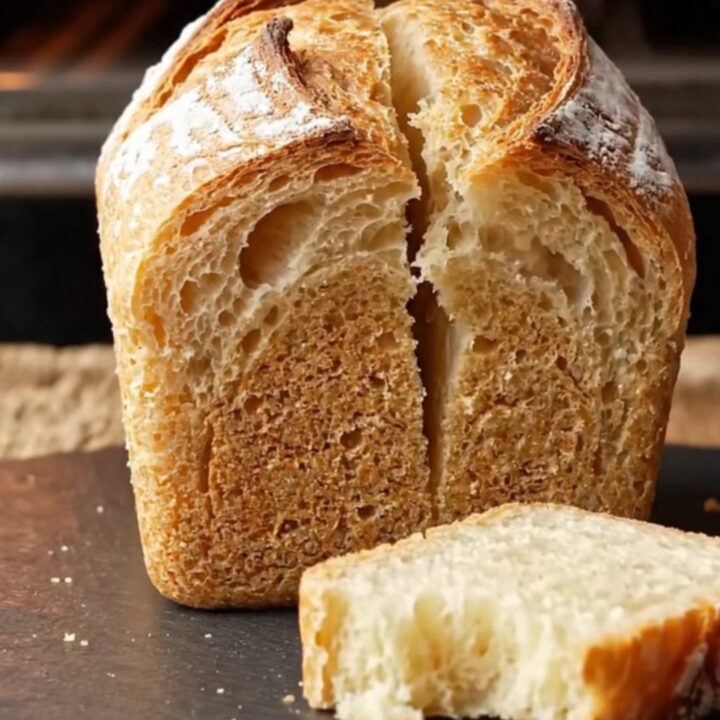
- Transfer the baked loaves to a wire rack. Let them cool for at least 30 minutes before slicing. This allows the crumb to set and prevents it from becoming gummy. When ready to serve, use a serrated knife to slice the loaves. The crust should crackle loudly as you cut, revealing the open, glossy crumb inside.
Estimated nutrition per serving
- Calories
- 260
- Protein
- 8 g
- Carbohydrates
- 52 g
- Fat
- 1 g
Next recipe

Golden Crispy Turkish Twisted Börek with Herby Cheese Filling
See the recipe → →This recipe is based on a short cooking video and is published under the pen name Clara Weller. It was checked before publication, but errors can slip through. Nutrition, when shown, is an estimate. Read more in our editorial policy and on our food safety page.
More recipes to try

Cheesy Chicken Taquitos: Crispy, Golden, Ready in 30 Minutes
Total time: 30 min
Creamy Tuscan Chicken Rigatoni: One-Pan Weeknight Dinner
Total time: 30 min
Caramelized Onion Pasta: Rich, Silky One-Pan Dinner
Total time: 45 min
Turkish Eggplant Meatball Skillet with Melted Cheese
Total time: 40 min
Crispy Cheesy Beef Pockets: Golden, Gooey, and Ready in 30 Minutes
Total time: 36 min