Dinner · Part 1 of 3: Ingredients
Cheesy Chicken Taquitos: Crispy, Golden, Ready in 30 Minutes
- Prep
- Cook
- Total
- Serves
- 6
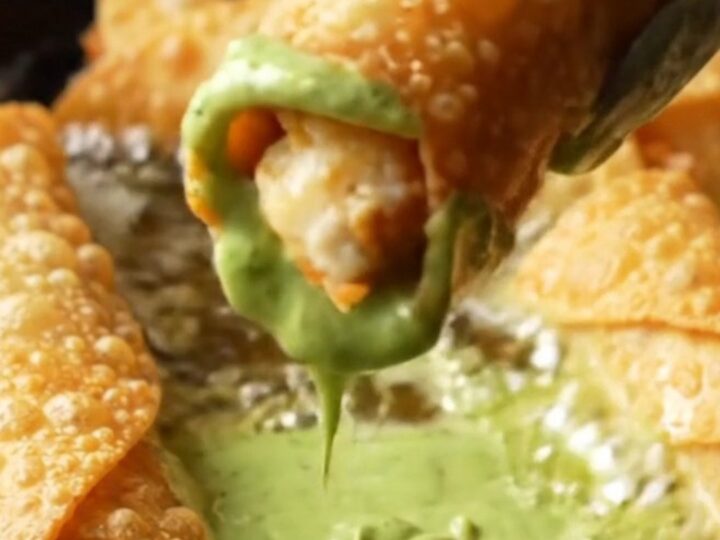
These Cheesy Chicken Taquitos are the ultimate crispy, golden snack or dinner. Shredded chicken is tossed with warm spices, cream cheese, and plenty of cheddar, then rolled into small flour tortillas and fried until shatteringly crunchy.
A cool, tangy cilantro lime crema is the perfect counterpoint to the crispy, cheesy filling. Ready in about 30 minutes, they're perfect for game day, weeknight dinners, or any time you crave something indulgent and satisfying.
Taquitos—also called flautas when made with flour tortillas—are a beloved Mexican-inspired comfort food. This version features a creamy, spiced chicken filling that stays moist and flavorful, wrapped in a crisp golden shell.
The key is to season the chicken generously and to fry the taquitos at the right temperature so they turn out crunchy, not greasy. The accompanying cilantro lime crema adds brightness and a tangy finish that makes every bite irresistible. Whether served as an appetizer or a main course, these taquitos are sure to become a favorite.
Ingredients
- 1 lb cooked chicken breast, shredded
- 1 tsp smoked paprika
- 1 tsp garlic powder
- 1 tsp ground cumin
- 1 tbsp taco seasoning
- 1/2 cup sour cream
- 4 oz cream cheese, softened
- 1 cup shredded cheddar cheese
- 12 small flour tortillas (6-inch)
- 2 cups vegetable oil, for frying
Cilantro Lime Crema
- 1/2 cup sour cream
- 1/4 cup mayonnaise
- 1 garlic clove, minced
- 2 tbsp fresh lime juice
- 1/4 cup fresh cilantro, chopped
Why this recipe works
The combination of sour cream and cream cheese in the filling does double duty. The sour cream adds a slight tang and moisture, while the cream cheese provides richness and helps bind the filling so it doesn't dry out during frying.
This creamy mixture also helps the filling stay put inside the tortillas, so the taquitos hold together beautifully. Seasoning the chicken with paprika, garlic powder, cumin, and taco seasoning gives it a deep, savory flavor that stands up to the crispy shell.
Frying the taquitos in 350°F oil achieves that perfect golden, shatteringly crisp exterior. At this temperature, the tortillas fry quickly, absorbing minimal oil, and the cheese inside melts to a gooey, molten state.
The seam-side-down placement ensures the taquitos stay closed while frying, and turning them with tongs guarantees even browning. The result is a crunchy shell that gives way to a creamy, cheesy, and well-seasoned filling—a textural contrast that's pure magic.
Notes and substitutions
Use cooked chicken breast for convenience—rotisserie chicken works wonderfully. Shred it while still warm, as it's easier to pull apart and will absorb the seasonings better. If you have leftover roasted or grilled chicken, that's perfect too. The spices can be adjusted to your heat preference; add a pinch of cayenne for extra kick. The cream cheese should be softened to room temperature so it blends into the filling without lumps.
Small flour tortillas (6-inch) are ideal for rolling. If they crack, warm them briefly in a dry skillet or microwave to make them pliable. The oil should be a neutral high-smoke-point oil like vegetable or canola. For the crema, use full-fat sour cream and good-quality mayonnaise for the best flavor. Fresh lime juice is essential—bottled won't give the same brightness. Taste the crema and adjust the salt and lime to your liking.
- cooked chicken breast: Rotisserie chicken or leftover roasted chicken works perfectly. Shred while still warm for easier handling.
- flour tortillas: Corn tortillas can be used, but they need to be warmed and may crack when rolled. Use two layers if needed.
- cheddar cheese: Pepper Jack or Monterey Jack adds a nice kick or extra creaminess.
- vegetable oil: Canola or peanut oil are great for frying due to their high smoke point.
Equipment
- Large skillet for frying
- Tongs
- Cutting board
- Chef's knife
- Mixing bowls
- Measuring cups and spoons
- Paper towels
Up next · Part 2 of 3
7 steps · 10 min of cooking · what to look for at each stage
Step-by-step instructions (Part 2)