Desserts · Part 2 of 3: Instructions
Velvety Chocolate Mousse Cake with Cocoa Dusting Step-by-step instructions
- Prep
- Cook
- Total
- Serves
- 8
Before you start
Before starting, gather all your ingredients and equipment. Have the springform tin ready, and measure out the milk, sugar, cornstarch, and heavy cream. Chop the chocolate into small, even pieces so they melt quickly and smoothly.
Brew the espresso and mix it with milk to create the espresso milk for dipping the ladyfingers. Ensure the ladyfingers are fresh and not stale, as they need to absorb the liquid without falling apart.
Ingredients at a glance (8)
- 1/2 cup milk
- 2 tbsp sugar
- 1 heaping tbsp cornstarch
- 1 1/2 cups heavy cream
- 200 g chopped milk and dark chocolate
- ladyfinger biscuits, to taste
- brewed espresso milk, to taste
- unsweetened cocoa powder, for dusting, to taste
Instructions
Make the Chocolate Cream
- Make the Chocolate CreamIn a saucepan, whisk together the milk, sugar, and cornstarch until smooth. Place over medium heat and cook, whisking constantly, until the mixture thickens into a custard-like consistency. Stir in the heavy cream and continue to whisk until fully incorporated and hot.Look for The mixture should be thick enough to coat the back of a spoon.Tip Keep whisking to prevent lumps from forming.
- Melt the ChocolateRemove the saucepan from the heat. Add the chopped milk and dark chocolate to the hot cream mixture and stir continuously until the chocolate is completely melted and the mixture is glossy, silky, and deeply velvety.Look for The cream should be smooth and shiny with no chocolate bits.Tip If the chocolate doesn't melt fully, return to low heat briefly.
At the end of this phase, you should have a thick, glossy chocolate cream that coats the back of a spoon.
It should be smooth and velvety, with no lumps or streaks of unmelted chocolate. The aroma should be intensely chocolatey with a hint of cream.
Assemble the Cake
- Soak the LadyfingersPour the brewed espresso milk into a shallow dish. Quickly dip each ladyfinger biscuit into the espresso milk, turning to coat both sides, but do not soak them for too long.Look for The ladyfingers should be moistened but still hold their shape.Tip Work in batches to keep the biscuits from getting soggy.
- Layer the BaseArrange the soaked ladyfingers in a tight, uniform layer at the bottom of a springform cake tin. Break a few biscuits to fill any gaps, ensuring the base is completely covered.Look for The base should be even and without large holes.Tip Use a springform tin for easy removal later.
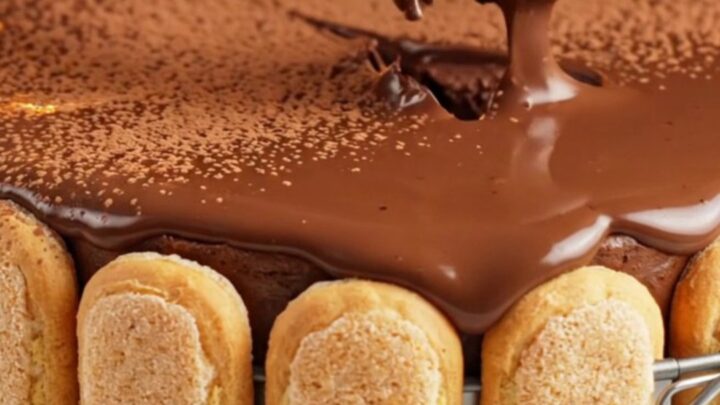
- Pour the Chocolate CreamPour the warm, luscious chocolate custard cream over the biscuit base. Use an offset spatula to smooth the top into an even layer.Look for The top should be smooth and level.Safe temperature 160°F (71°C) internal temperature (egg dishes)Tip Tap the tin gently to release any air bubbles.
The base should be a tight, even layer of espresso-soaked ladyfingers, and the chocolate cream should be poured over and smoothed to an even surface. The cake should look neat and inviting, with the cream covering the biscuits completely.
Chill and Serve
- Chill Until SetPlace the cake in the refrigerator and chill for at least 4 hours, or until the cream is firmly set and the cake holds its shape when sliced.Look for The surface should feel firm to the touch.Tip Chill overnight for the best texture.
- Dust and ServeBefore serving, dust the top generously with unsweetened cocoa powder. Slice a tall, clean slice using a sharp knife, and serve chilled.Look for The cocoa layer should be even and snowy.Tip Warm the knife under hot water and dry it before slicing for clean cuts.
After chilling, the cake should be firm to the touch and hold its shape when sliced. The cocoa dusting should create a beautiful contrast against the dark chocolate cream. Each slice should be clean and neat, with a smooth, creamy interior.
Common mistakes
Common mistakes include overheating the cream mixture, which can cause the cornstarch to clump or the chocolate to seize. Always whisk constantly and remove from heat before adding the chocolate.
Over-soaking the ladyfingers is another pitfall – they should be dipped quickly, not submerged. Finally, don’t skip the chilling time; without it, the cake won’t set properly and will be messy to slice.
How to tell it’s done
The cake is done when the cream has set firmly and the surface is no longer sticky. When you gently press the center, it should feel firm and spring back slightly.
The cake should hold its shape when sliced, with clean edges and a smooth, glossy interior. If you’re unsure, chill it for an extra hour – it’s better to have a firmer set than a runny one.
- Egg dishes: 160°F (71°C) in the thickest part
Up next · Part 3 of 3
4 variations · storage & make-ahead · 5 answers · printable card
Tips, FAQ & printable recipe (Part 3)← Back to the ingredients (Part 1)