Desserts · Part 1 of 3: Ingredients
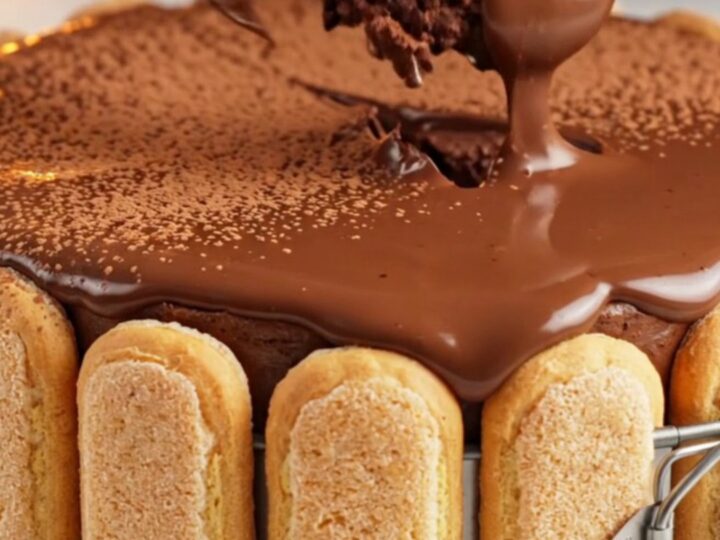
Velvety Chocolate Mousse Cake with Cocoa Dusting
- Prep
- Cook
- Total
- Serves
- 8
This velvety chocolate mousse cake is the dessert you’ve been craving – a no-bake marvel that combines espresso-soaked ladyfingers with a glossy, silky chocolate cream. The result is a melt-in-your-mouth texture that feels both elegant and comforting.
Topped with a generous dusting of cocoa powder, each slice is a visual and sensory delight. Perfect for dinner parties, holidays, or a simple weekend treat, this cake comes together with minimal effort and maximum impact. The rich chocolate flavor is balanced by the subtle coffee notes, making every bite deeply satisfying.
This recipe transforms a handful of simple ingredients into a stunning dessert that looks and tastes like it came from a patisserie. The process begins with a quick custard made from milk, sugar, and cornstarch, which is then enriched with heavy cream and melted chocolate.
The warm, glossy cream is poured over a layer of espresso-soaked ladyfingers, creating a harmonious blend of textures. After a few hours in the refrigerator, the cake sets into a firm yet creamy mousse-like consistency. The final dusting of cocoa powder adds a touch of bitterness that cuts through the sweetness, making each forkful unforgettable.
Ingredients
- 1/2 cup milk
- 2 tbsp sugar
- 1 heaping tbsp cornstarch
- 1 1/2 cups heavy cream
- 200 g chopped milk and dark chocolate
- ladyfinger biscuits, to taste
- brewed espresso milk, to taste
- unsweetened cocoa powder, for dusting, to taste
Why this recipe works
The method here relies on a simple cornstarch-thickened custard to create a stable, creamy base without the need for eggs or gelatin.
When combined with heavy cream and high-quality chocolate, the mixture sets beautifully in the refrigerator, yielding a mousse-like texture that is both light and rich. The cornstarch also prevents the cream from separating, ensuring a glossy, silky finish every time.
The ladyfingers are soaked in espresso milk, which not only adds a subtle coffee flavor but also softens them to a cake-like consistency. This layer provides a sturdy base that contrasts nicely with the smooth cream.
The chilling step is crucial – it allows the cream to firm up enough to slice cleanly, while the flavors meld together for a more cohesive dessert.
Notes and substitutions
For the best flavor, use a combination of milk and dark chocolate – the milk chocolate adds sweetness and creaminess, while the dark chocolate provides depth and richness. If you prefer a more intense chocolate flavor, use all dark chocolate; for a sweeter dessert, all milk chocolate works well. Choose a good-quality chocolate that melts smoothly.
The ladyfingers should be dipped in espresso milk just briefly – a quick dunk on each side is enough. Over-soaking can make them mushy and cause the cake to become soggy. If you don’t have espresso, strong brewed coffee can be used. The cake is best made a day ahead to allow the flavors to fully develop.
- milk: Any milk (whole, 2%, or plant-based) works; whole milk gives a richer custard.
- heavy cream: Half-and-half can be used but will result in a lighter, less creamy texture.
- milk and dark chocolate: Use all dark chocolate for a more intense flavor, or all milk chocolate for a sweeter result.
- ladyfinger biscuits: Savoiardi or sponge fingers are the same; or use thin slices of pound cake.
Equipment
- saucepan
- whisk
- springform cake tin
- offset spatula
- mixing bowls
- measuring cups and spoons
Up next · Part 2 of 3
7 steps · 10 min of cooking · what to look for at each stage
Step-by-step instructions (Part 2)