Dinner · Part 2 of 3: Instructions
Urfa Baked Chickpea Tava with Warm Flatbread Step-by-step instructions
- Prep
- Cook
- Total
- Serves
- 4
Before you start
Before you start, make sure the chickpeas are cooked and drained well—if using canned, rinse and drain them thoroughly. Slice the onions, chop the tomatoes and peppers, and slice the garlic so everything is ready to go.
Preheat the oven to 400°F (200°C). Tear a sheet of parchment paper large enough to cover the baking dish, then crumple it under running water and squeeze out the excess. This will be your 'lid' for the first part of baking.
Ingredients at a glance (13)
- 3 cups cooked chickpeas
- 2 medium onions, sliced
- 3 medium ripe tomatoes, chopped
- 2 medium green bell peppers, chopped
- 4 cloves garlic, sliced
- 1 tbsp pepper paste (biber salçası)
- 1 tsp Urfa isot chili flakes
- 1 tsp ground cumin
- 1 tsp paprika (sweet or smoked)
- Salt, to taste
- Black pepper, to taste
- 1/2 cup extra virgin olive oil
- Warm Turkish flatbread, for serving
Instructions
Prep and Mix
- Prepare the Vegetables and SeasoningsPreheat the oven to 400°F (200°C). Spread the cooked chickpeas evenly in a round glass baking dish. Scatter the sliced onions, chopped tomatoes, and green bell peppers over the chickpeas. Add the sliced garlic cloves, pepper paste, Urfa isot chili flakes, cumin, paprika, salt, and black pepper. Use your hands or a spoon to toss everything together until the chickpeas are well coated with the spices and the vegetables are distributed throughout.Look for The chickpeas should look glossy with spice and the vegetables evenly mixed in.Tip Use ripe, juicy tomatoes for the best sauce; if tomatoes are firm, add a splash of water to help them break down.
- Drizzle with Olive Oil and TossDrizzle the extra virgin olive oil evenly over the chickpea mixture. Using two spoons or your hands, toss the mixture thoroughly, making sure every chickpea glistens with oil and the spices are well incorporated. The oil helps the spices bloom and creates a rich, silky sauce as the dish bakes.Look for Every chickpea should be coated with a reddish-orange sheen from the oil and spices.Tip Don't skimp on the olive oil—it's essential for the texture and flavor of the tava.
At this stage, the chickpeas and vegetables are coated in a vivid red-orange spice mixture, glossy with olive oil. The onions and peppers are still crisp, but everything is well combined and fragrant with cumin, paprika, and Urfa pepper. The dish looks vibrant and appetizing, ready for the oven. Give it a final toss to ensure every chickpea is seasoned, then proceed to cover and bake.
Covered Bake and Caramelize
- Cover and BakeTear a sheet of parchment paper large enough to cover the dish. Crumple it under running water, then squeeze out the excess water. Unfold the damp parchment and press it directly onto the surface of the chickpea mixture, tucking the edges over the rim. Place the dish in the preheated oven and bake for 30 minutes, until the vegetables are soft and the chickpeas are tender.Look for After 30 minutes, the parchment will be slightly browned and the dish will be bubbling at the edges.Tip The wet parchment traps steam, helping the vegetables soften and meld without drying out.
- Stir and Continue Baking UncoveredCarefully remove the dish from the oven and lift off the parchment. Stir the chickpea mixture well, scraping up any browned bits from the bottom. Return the dish to the oven, uncovered, and bake for 10 more minutes, until the top is caramelized and the edges are slightly crispy.Look for The chickpeas should look sticky and caramelized, with some darkened edges.Tip Stirring once ensures even caramelization; avoid stirring too often or the chickpeas may break apart.
After the covered bake, the dish is bubbling and steamy, with softened vegetables and a saucy base. The chickpeas have absorbed the flavors and are tender but still hold their shape.
After the uncovered bake, the top is caramelized, with sticky edges and a deep, roasted aroma. The sauce should be thickened and glossy, clinging to the chickpeas. The kitchen smells wonderfully savory and slightly sweet from the caramelized peppers.
Serve and Enjoy
- Serve with Warm FlatbreadRemove the tava from the oven and let it rest for a couple of minutes. Serve warm, with torn pieces of Turkish flatbread for pinching up the chickpeas, roasted garlic, and peppers. The bread soaks up the savory, smoky sauce perfectly.Look for The dish should be fragrant with roasted garlic and Urfa pepper, with a glistening, caramelized top.Tip Warm the flatbread in the oven or on a skillet just before serving for the best texture.
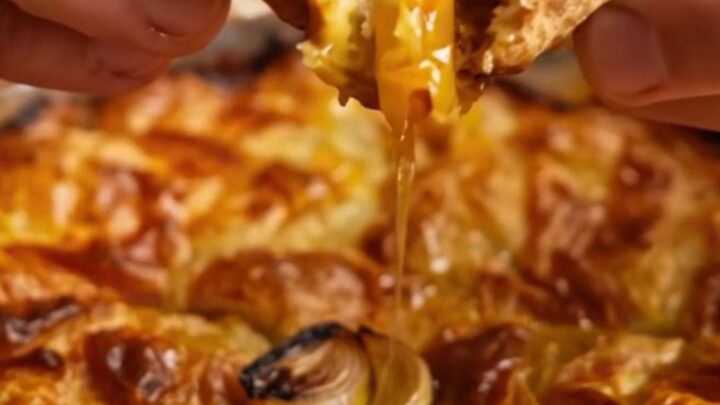
The finished tava is a golden, bubbling skillet of chickpeas, roasted garlic, and peppers, with a rich, dark sauce. The edges are slightly crispy and caramelized, and the aroma is intensely savory with smoky, sweet notes. When you pinch a chickpea with flatbread, it should be tender but not mushy, coated in a thick, flavorful sauce. Serve immediately while warm, with extra flatbread for sopping up every last bit.
Common mistakes
One common mistake is skipping the wet parchment or removing it too early, which can cause the chickpeas to dry out before the vegetables release their juices. Another is stirring too aggressively during the final uncovered bake, which can break the chickpeas into mush.
Also, be careful not to overseason with salt before baking, as the pepper paste and spices already contain salt. Taste the mixture before baking and adjust lightly, then season again at the end if needed. Finally, don't use a metal dish that could react with the tomatoes and give an off flavor.
How to tell it’s done
The tava is done when the chickpeas are tender and the sauce has thickened to a glossy, spoon-coating consistency. The top should be caramelized in spots, with some edges looking slightly darkened and crispy. The vegetables should be completely soft and melded into the sauce.
If you insert a spoon and lift some of the mixture, it should hold together without being watery. Since there are no raw proteins, there's no minimum internal temperature to check—just look for that rich, jammy texture.
Up next · Part 3 of 3
4 variations · storage & make-ahead · 5 answers · printable card
Tips, FAQ & printable recipe (Part 3)← Back to the ingredients (Part 1)