Dinner · Part 1 of 3: Ingredients
Urfa Baked Chickpea Tava with Warm Flatbread
- Prep
- Cook
- Total
- Serves
- 4
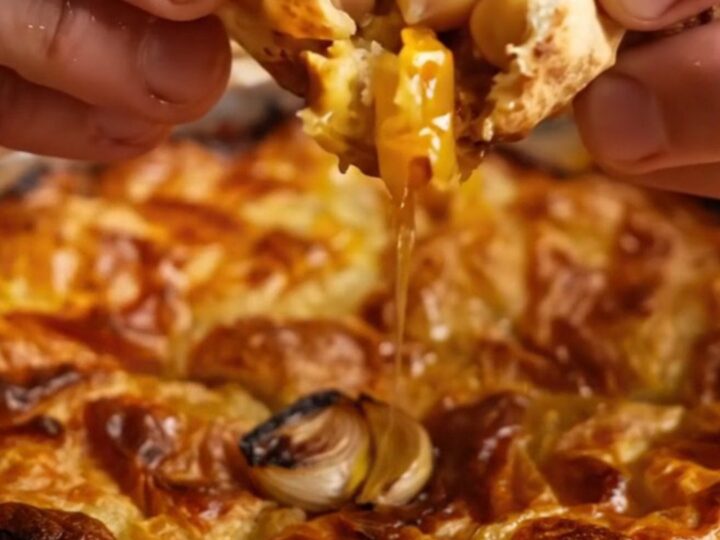
This Urfa baked chickpea tava turns a handful of pantry staples into a golden, bubbling dish that begs to be pinched with warm flatbread. Tender chickpeas soak up a rich tomato sauce spiced with smoky Urfa isot, roasted garlic, and sweet caramelized peppers, all baked in a round glass dish until the edges turn sticky and dark. It's the kind of meal that feels both rustic and special, perfect for a weeknight dinner or a casual gathering.
Baked chickpea tava is a beloved Turkish home-cooking classic, and this version brings all its smoky, savory depth to your table in about an hour. The dish starts with chickpeas and fresh vegetables layered in a glass baking dish, then gets a generous pour of olive oil and a blanket of wet parchment that steams everything until tender.
A final uncovered bake caramelizes the top, creating a slightly sticky, intensely flavorful crust. Serve it straight from the dish with warm flatbread for a meal that's comforting, satisfying, and surprisingly simple to pull together.
Ingredients
- 3 cups cooked chickpeas
- 2 medium onions, sliced
- 3 medium ripe tomatoes, chopped
- 2 medium green bell peppers, chopped
- 4 cloves garlic, sliced
- 1 tbsp pepper paste (biber salçası)
- 1 tsp Urfa isot chili flakes
- 1 tsp ground cumin
- 1 tsp paprika (sweet or smoked)
- Salt, to taste
- Black pepper, to taste
- 1/2 cup extra virgin olive oil
- Warm Turkish flatbread, for serving
Why this recipe works
The wet parchment method is the secret to this dish's perfect texture. As the dish bakes covered, the trapped steam gently softens the onions, peppers, and tomatoes, releasing their juices and creating a rich, saucy base.
The chickpeas absorb all that flavor without drying out, staying creamy and tender. Then, removing the parchment for the last few minutes lets the top caramelize, concentrating the sugars and adding a deep, roasted complexity that you just don't get from a stovetop simmer.
Baking in a glass dish isn't just for looks—it allows the heat to distribute evenly and lets you watch the sauce bubble and thicken. The high oven temperature, combined with the olive oil, helps the spices bloom and meld into a cohesive, luxurious sauce.
The result is a dish that's greater than the sum of its parts: simple ingredients transformed into something deeply savory, with layers of smoky, sweet, and slightly spicy flavors that cling to every chickpea.
Notes and substitutions
The heart of this recipe is Urfa isot, a Turkish chili flake that's dark, smoky, and mildly spicy with a hint of raisin-like sweetness. If you can't find it, a combination of regular red pepper flakes and smoked paprika will get you close.
Pepper paste (biber salçası) adds a concentrated, slightly sweet pepper flavor; tomato paste mixed with a pinch of paprika is a fine substitute. Use good-quality extra virgin olive oil here—it's a major flavor component, not just a cooking fat.
You'll need a round glass baking dish, about 9 to 10 inches in diameter, to get the right proportions and even cooking. If you don't have one, a ceramic or enameled cast-iron dish of similar size will work. The parchment paper must be crumpled and wet before covering the dish; this keeps it flexible and helps create the steam that's essential for the first phase of baking. Don't skip it—it's what makes the chickpeas so luscious.
- Urfa isot chili flakes: Use 1/2 tsp regular red pepper flakes plus 1/2 tsp smoked paprika for a similar smoky warmth.
- Pepper paste (biber salçası): Mix 1 tbsp tomato paste with 1/2 tsp sweet paprika and a pinch of cayenne.
- Green bell peppers: Use 2 Cubanelle peppers or 1 large poblano for a milder, slightly sweet flavor.
- Cooked chickpeas: Two 15-ounce cans, drained and rinsed, work perfectly; no need to boil from dried.
Equipment
- Round glass baking dish (9-10 inch)
- Parchment paper
- Mixing spoons
- Measuring cups and spoons
- Chef's knife and cutting board
- Oven
Up next · Part 2 of 3
5 steps · 40 min of cooking · what to look for at each stage
Step-by-step instructions (Part 2)