Desserts · Part 2 of 3: Instructions
Rich Peanut Butter Cup Dump Cake Step-by-step instructions
- Prep
- Cook
- Total
- Serves
- 8
Before you start
Before beginning the assembly, ensure all ingredients are at room temperature to facilitate even melting and integration during the baking process. Preheat the oven to the specified temperature and position the oven rack in the center to encourage uniform heat circulation.
Prepare your 9x13 inch glass baking dish by lightly greasing it with butter or non-stick spray to ensure easy serving. Chop the peanut butter cups into uniform pieces to ensure they distribute evenly across the dish, which prevents large gaps and ensures a consistent chocolate-to-peanut butter ratio in every single serving.
Ingredients at a glance (4)
- 1 box chocolate cake mix
- 2 cups chopped peanut butter cups
- 1 cup unsalted butter, melted
- 1/2 cup creamy peanut butter, melted
Instructions
Base Preparation
- Prepare the BasePreheat the oven to 350°F (175°C). Grease a 9x13 inch glass baking dish thoroughly to prevent sticking. Evenly spread the dry chocolate cake mix across the bottom of the dish to create an even foundation for the subsequent layers.Look for The oven is preheated and the dish is prepared.Tip Ensure the cake mix is spread evenly to avoid dry pockets.
At this phase, the cake mix is evenly distributed, creating a smooth and level foundation. Ensure the bottom of the dish is fully covered and that there are no large clumps of dry mix. The oven should be fully preheated to the required temperature, and the dish should be placed centrally to ensure that the heat reaches the cake mix layer effectively from all sides, setting the stage for the rest of the assembly.
Layering and Buttering
- Layer and AssembleDistribute the chopped peanut butter cups over the layer of dry cake mix. Drizzle the melted creamy peanut butter over the peanut butter cups, ensuring an even coverage. Finally, pour the melted butter uniformly over the entire surface of the cake mix and toppings.Look for All ingredients are layered in the baking dish.Tip Use a spoon to drizzle the peanut butter to maintain control.
The peanut butter cups should be spread in an even, single layer across the cake mix. When drizzling the melted peanut butter, aim for a consistent pattern to ensure every section has a portion of the flavor.
The final layer of melted butter must cover the entire surface, including the edges, as this provides the necessary fat to hydrate the dry mix and create the decadent, moist texture that defines a perfect dump cake.
Baking and Settling
- Bake and ServePlace the dish into the preheated oven and bake for approximately 45 minutes, or until the edges are set and the center appears cooked through. Remove from the oven and let it rest for 10 minutes to allow the layers to settle before slicing and serving warm.Look for The edges are firm and the center is set.Tip Serve while warm for the best texture and flavor experience.
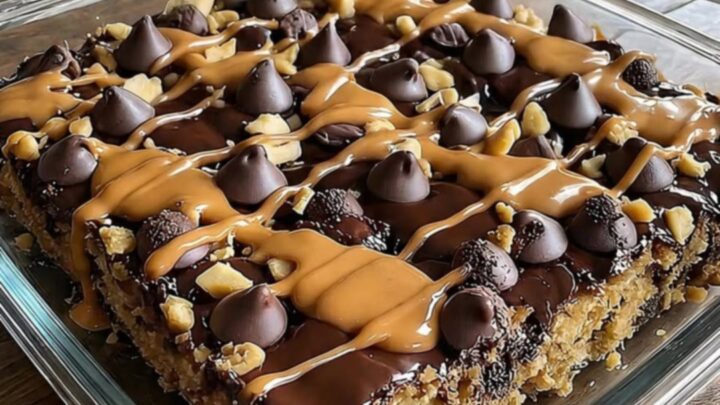
The cake is finished when the edges are deep brown and the top has a slight, set crust while the interior remains soft. You will smell the rich aroma of toasted chocolate and peanut butter filling the kitchen. After removing the dish from the oven, the 10-minute resting period is essential. During this time, the internal moisture stabilizes, ensuring that the cake holds its shape when you slice into it for serving.
Common mistakes
A common mistake is failing to fully preheat the oven, which results in uneven baking and a bottom layer that remains powdery or dry. Another error is neglecting to grease the baking dish, which causes the gooey chocolate base to stick, making it difficult to lift clean slices.
Additionally, avoid stirring the ingredients after they have been layered, as this disrupts the intended structure and prevents the desired texture from forming. Finally, do not rush the cooling period, as slicing the cake immediately while it is piping hot will cause the layers to collapse into a messy heap.
How to tell it’s done
The dump cake is done when the edges appear firm and slightly golden, and the center is set and no longer liquid. You will notice the chocolate layer bubbling around the edges, indicating the butter has fully incorporated into the cake mix.
Allow the cake to rest for 10 minutes after removing it from the oven, as this cooling time is crucial for the structure to firm up slightly, making it much easier to slice and serve while maintaining that signature gooey, molten center that makes this dish so delicious.
Up next · Part 3 of 3
2 variations · storage & make-ahead · 3 answers · printable card
Tips, FAQ & printable recipe (Part 3)← Back to the ingredients (Part 1)