Desserts · Part 2 of 3: Instructions
Refreshing Mango Pomelo Sago in 20 Minutes Step-by-step instructions
- Prep
- Cook
- Total
- Serves
- 4
Before you start
Before starting, measure all ingredients and have them ready. Peel and dice the mangoes, separating the flesh for the puree and the dice for topping. If using fresh pomelo, peel it and separate the pulp into small sacs, removing any white pith.
Fill a large pot with water for boiling the sago. Have a fine-mesh strainer and a bowl of ice water ready for rinsing. The mango puree can be blended ahead and stored in the refrigerator for up to a day.
Ingredients at a glance (7)
- 400 g ripe Carabao mango flesh (about 2 large mangoes)
- 150 ml coconut milk
- 80 ml evaporated milk
- 100 g small sago tapioca pearls
- 6 cups water
- 1 cup fresh mango dice (from 1 mango)
- 1/2 cup pomelo pulp (peeled and separated into sacs)
Instructions
Blend the Mango Base and Boil the Sago
- Blend the Mango BaseIn a blender, combine 400 g ripe Carabao mango flesh, 150 ml coconut milk, and 80 ml evaporated milk. Blend on high until completely smooth and velvety, about 30 to 45 seconds. Scrape down the sides as needed to ensure no chunks remain. The mixture should be thick, pourable, and a vibrant golden yellow. Set aside in the refrigerator while cooking the sago.Look for The puree is silky and pourable, with a bright golden color and no visible mango bits.Tip Chilling the base while the sago cooks keeps the final dessert cold and refreshing.
- Boil the Sago PearlsBring 6 cups of water to a rolling boil in a medium saucepan. Add 100 g small sago tapioca pearls, stirring immediately to prevent sticking. Boil uncovered for 12 minutes, stirring occasionally. The pearls will become translucent with tiny white centers. After 12 minutes, remove the pan from heat, cover, and let rest for 10 minutes. The residual heat will finish cooking the pearls until they are fully clear.Look for After resting, the pearls are completely translucent with no white dot in the center.Tip Use a large pot to give the pearls room to expand and cook evenly.
By the end of this phase, the mango puree is smooth, vibrant yellow, and chilled. The sago pearls are boiling and then resting, gradually turning translucent.
The kitchen smells faintly of coconut and mango. The sago should be almost fully clear before moving to the next phase.
Rinse and Assemble the Dessert
- Rinse and Drain the SagoPour the cooked sago into a fine-mesh strainer and rinse under cold running water, shaking gently, until the pearls are cool and no longer sticky. This removes excess starch and stops the cooking process. Let drain thoroughly for a few minutes. The pearls should be separate, chewy, and translucent.Look for The pearls are cool, separate, and have a glossy, clear appearance.Tip Rinsing well prevents the sago from clumping together in the dessert.
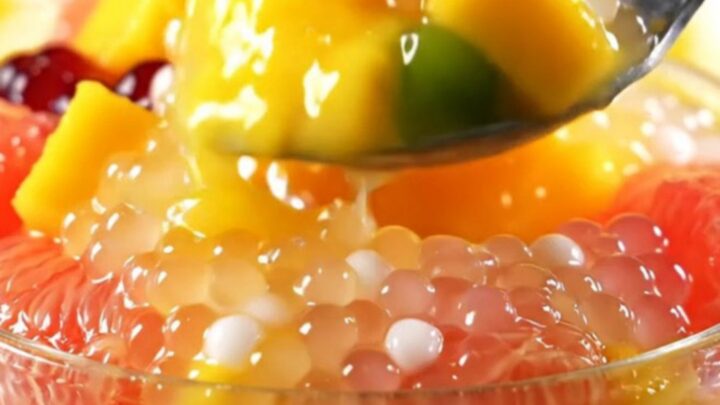
- Assemble the Dessert BowlsDivide the drained sago among four serving bowls or glasses. Spoon the chilled mango puree over the sago, filling each bowl about three-quarters full. Top with fresh mango dice and pomelo pulp, distributing evenly. The layers should be visible: sago at the bottom, creamy mango puree in the middle, and bright mango and pomelo on top.Look for Each bowl shows distinct layers of sago, mango puree, and fruit toppings.Tip For a prettier presentation, spoon the puree gently over the back of a spoon to avoid disturbing the sago layer.
The sago pearls are rinsed, cool, and separate. The dessert bowls are layered with sago, mango puree, and fresh fruit. The presentation is neat with distinct layers. The puree should be thick enough to hold the fruit on top without sinking immediately.
Chill and Serve
- Chill and ServeRefrigerate the assembled bowls for at least 15 minutes to let the flavors meld and the dessert become thoroughly chilled. Serve cold, with a spoon, so each bite includes sago, creamy mango base, and juicy pomelo sacs. The dessert is best enjoyed within a few hours of assembly.Look for The dessert is cold to the touch and the puree has thickened slightly.Tip Chilling also allows the sago to absorb some of the mango flavor.
The assembled bowls are chilled until cold. The puree has thickened slightly, and the flavors have melded. The dessert is ready to serve, with a creamy texture and a bright, tropical taste. The sago pearls remain chewy and separate.
Common mistakes
One common issue is undercooked sago with a white core. This happens if the pearls are not boiled long enough or if the water is not at a rolling boil when added. Ensure the water is vigorously boiling and stir immediately to prevent sticking.
Another mistake is overcooking the sago, which makes it mushy and sticky. Follow the timing closely and rinse under cold water right after cooking. If the mango puree is too thick, add a splash of coconut milk to thin it.
How to tell it’s done
The mango puree is done when it is completely smooth and has a thick, pourable consistency. The sago is done when the pearls are fully translucent with no white center after boiling and resting.
To test, remove a pearl and press it between your fingers; it should be soft and chewy, not hard or chalky. The assembled dessert should be thoroughly chilled before serving. Since this recipe contains no raw proteins, there is no minimum internal temperature to check.
Up next · Part 3 of 3
4 variations · storage & make-ahead · 5 answers · printable card
Tips, FAQ & printable recipe (Part 3)← Back to the ingredients (Part 1)