Desserts · Part 2 of 3: Instructions
Reese’s Peanut Butter Earthquake Cake Step-by-step instructions
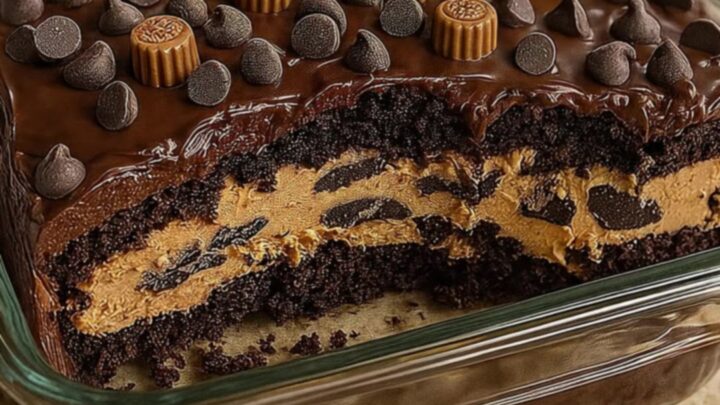
- Prep
- Cook
- Total
- Serves
- 12
Before you start
Before beginning, ensure all ingredients are at room temperature, especially the cream cheese and the egg, as this allows them to combine into a perfectly smooth mixture without effort.
Preheat the oven well in advance and prepare the baking dish with parchment paper or non-stick cooking spray.
Have all measurement tools ready and ensure the mini peanut butter cups are kept in a cool place so they do not melt before being added to the top of the batter.
Ingredients at a glance (2)
- 1 box chocolate cake mix, prepared according to package directions
- 1 cup mini peanut butter cups
Instructions
Batter Preparation
- Prepare the cake basePreheat the oven to 350°F (175°C). Prepare the chocolate cake mix in a large bowl according to the package instructions until smooth. Pour the batter into a greased 9x13-inch glass baking dish and spread it evenly to the edges.Look for The batter should be smooth and free of large lumps before pouring.Tip Ensure the baking dish is well-greased to prevent sticking.
The cake batter should be completely smooth, with no pockets of dry flour remaining. It should be spread evenly into the prepared baking dish, creating a flat, level surface ready for the peanut butter layer.
Swirling the Filling
- Add the peanut butter fillingDollop the peanut butter cheesecake mixture over the raw chocolate cake batter in the baking dish. Use a knife or spatula to gently swirl the mixture into the chocolate batter to create a marble effect.Look for The lines of peanut butter should be visible against the dark chocolate batter without being fully incorporated into a single color.Tip Do not over-mix the swirls; keep them distinct for the best appearance.
The peanut butter cheesecake mixture should be light and airy. When swirled, the lines of peanut butter should be visible against the dark chocolate batter without being fully incorporated into a single color.
Baking and Cooling
- Bake and finishSprinkle the mini peanut butter cups over the top of the cake. Place the dish in the oven and bake for 45 minutes. Remove from the oven and allow the cake to rest on a wire rack for 20 minutes before slicing to ensure clean servings.Look for The edges should be firm and the center should no longer jiggle when the pan is moved.Tip A toothpick inserted into the chocolate part should come out mostly clean.
The cake should be golden and firm at the edges, with the peanut butter cups melted slightly into the top. It must cool sufficiently to allow the cheesecake layers to set before serving.
Common mistakes
Avoid over-mixing the peanut butter swirl into the chocolate batter, as this will result in a muddy, uniform color rather than the desired marbled effect.
Another common mistake is slicing the cake too soon; it needs to rest for at least 20 minutes to allow the layers to stabilize, which prevents the cake from falling apart when removed from the dish and ensures clean, beautiful servings.
How to tell it’s done
The cake is done when the edges are firm and slightly pulled away from the sides of the baking dish. The center should be set, meaning it does not jiggle when the pan is gently shaken.
Because of the peanut butter cheesecake swirl, the center will remain soft and fudgy, which is the intended texture for this dessert.
Up next · Part 3 of 3
2 variations · storage & make-ahead · 3 answers · printable card
Tips, FAQ & printable recipe (Part 3)← Back to the ingredients (Part 1)