Desserts · Part 1 of 3: Ingredients
Reese’s Peanut Butter Earthquake Cake
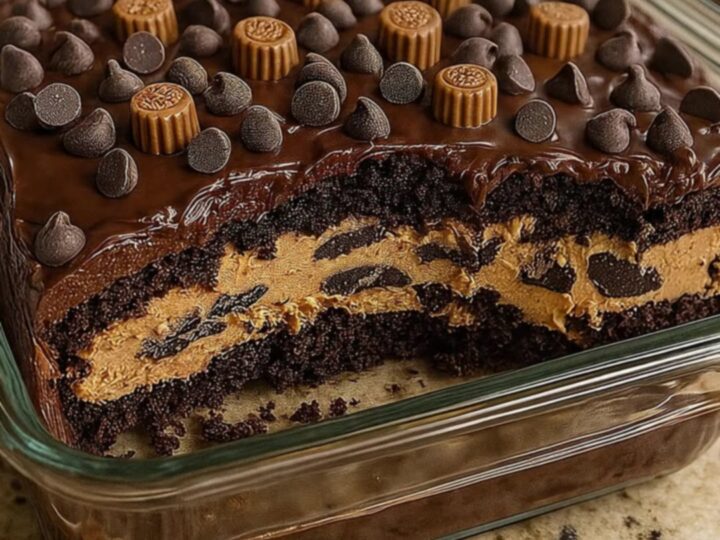
- Prep
- Cook
- Total
- Serves
- 12
Discover the ultimate dessert that combines two favorites into one decadent treat. This earthquake cake is famous for its signature gooey texture and rich flavor profile, making it a reliable crowd-pleaser for any gathering.
By combining a moist chocolate base with a velvety peanut butter cheesecake swirl, this recipe delivers a complex taste and soft, fudgy mouthfeel that is hard to resist.
The earthquake cake gets its name from the craggy, sunken appearance it takes on after baking, which creates pockets of rich, creamy flavor. This version elevates the concept by incorporating a peanut butter cheesecake layer and topping it with mini peanut butter cups.
It is a straightforward dessert that relies on the contrast between the deep cocoa notes of the chocolate cake and the sweet, nutty profile of the peanut butter, resulting in a balanced and indulgent experience.
Ingredients
- 1 box chocolate cake mix, prepared according to package directions
- 1 cup mini peanut butter cups
Why this recipe works
The method of dropping dollops of the cheesecake mixture into the cake batter creates distinct layers rather than a fully blended cake. As the cake rises in the oven, the heavy cheesecake mixture sinks, creating the classic earthquake effect. This ensures that every slice contains a generous portion of both the light chocolate sponge and the dense, creamy peanut butter filling.
Using an electric mixer to beat the cream cheese and peanut butter ensures a smooth, lump-free consistency that blends perfectly with the egg and sugar.
This emulsification is crucial for the texture, as it allows the filling to hold its shape during the baking process while remaining soft and gooey once cooled, providing the perfect contrast to the baked chocolate cake structure.
Notes and substitutions
When selecting a chocolate cake mix, choose a high-quality brand that produces a moist crumb, as the cake needs to support the weight of the peanut butter filling.
For the peanut butter, a standard creamy variety is recommended over natural, oil-separated versions, as the emulsifiers in standard peanut butter help maintain the stability of the swirl during the high-heat baking process.
A standard 9x13-inch glass baking dish is ideal for this recipe because it allows for even heat distribution and enables the cook to monitor the doneness of the cake through the sides. If using a metal pan, be aware that heat transfer happens faster, so it may be necessary to reduce the baking time by a few minutes to prevent the edges from becoming too dry before the center sets.
- Mini peanut butter cups: Chopped standard-sized peanut butter cups or peanut butter chips.
Equipment
- 9x13-inch glass baking dish
- spatula
- wire cooling rack
Up next · Part 2 of 3
3 steps · 45 min of cooking · what to look for at each stage
Step-by-step instructions (Part 2)