Desserts · Part 2 of 3: Instructions
Pistachio Tahini Halva Dark Chocolate Bars Step-by-step instructions
- Prep
- Cook
- Total
- Serves
- 12
Before you start
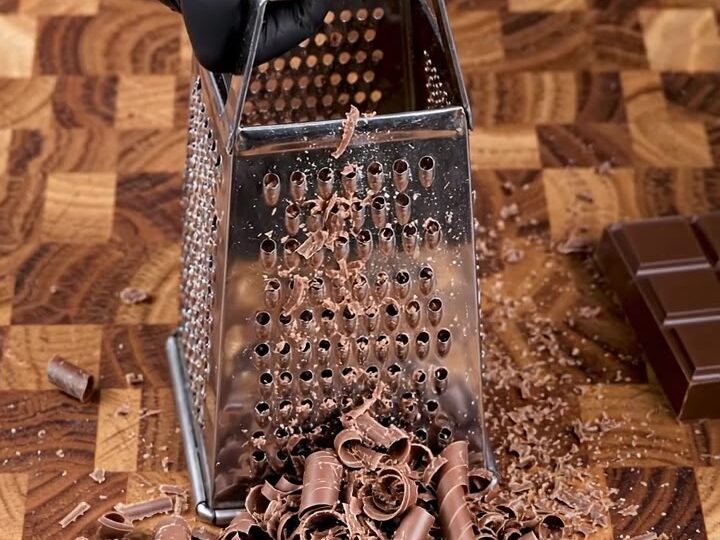
Before starting, gather all ingredients and equipment. Chop the pistachios and crumble the halva; set aside. Grate the chocolate on a box grater—this is easier when the chocolate is cool. Line a metal tray (about 9x9 inches) with parchment paper, leaving some overhang for easy removal.
Prepare a small saucepan with barely simmering water for melting the chocolate. Have a rubber spatula and a small bowl for the tahini honey mixture ready. The entire process takes about 20 minutes of active prep, plus 1 hour of chilling time.
Ingredients at a glance (5)
- 12 oz 70% dark chocolate, finely grated
- 1/2 cup tahini
- 1/4 cup honey
- 1 cup roasted pistachios, chopped
- 8 oz sesame tahini halva, crumbled
Instructions
Prep and Melt
- Prep the IngredientsUsing a sharp chef's knife, chop the roasted pistachios into coarse pieces. Crumble the sesame tahini halva into small chunks with your fingers or a fork. Grate the dark chocolate on a box grater into a pile of fine curls; reserve about one-third of the chocolate for the topping.Look for Pistachios are in coarse pieces, halva is crumbled, and chocolate is finely grated.Tip Keep the chocolate cool while grating so it doesn't melt into clumps.
- Melt the ChocolatePlace the remaining two-thirds of the grated chocolate in a heatproof bowl set over a saucepan of barely simmering water. Stir gently until completely melted and smooth. Remove from heat and let cool slightly, about 2 minutes.Look for Chocolate is glossy and fluid.Tip Avoid any water touching the chocolate—it can cause it to seize.
At the end of this phase, you should have a bowl of glossy melted chocolate, a small bowl of smooth tahini honey mixture, and a tray lined with parchment.
The pistachios and halva are chopped and crumbled, ready to sprinkle. The chocolate should be fluid but not hot—if it's too warm, let it cool for a minute or two before assembling.
Assemble and Swirl
- Make the Tahini Honey SwirlIn a small bowl, stir together the tahini and honey until smooth and well combined. The mixture should be pourable but not too thin.Look for Tahini and honey form a smooth, golden ribbon.Tip If the tahini is very thick, warm it slightly to make it easier to stir.
- Assemble the Base LayerLine a metal tray with parchment paper. Pour the melted chocolate into the tray and spread it into an even layer about 1/2 inch thick. Tilt the tray to help the chocolate reach the edges evenly.Look for Chocolate layer is smooth and even.Tip Use a spatula to push chocolate into corners for a neat edge.
- Swirl the Tahini HoneyDrizzle the tahini honey mixture in ribbons across the surface of the chocolate. Use a knife or skewer to gently swirl the ribbons into the chocolate, creating a marbled pattern.Look for Golden ribbons swirl through the dark chocolate.Tip Do not over-swirl—keep distinct ribbons for a pretty cross-section.
- Add the ToppingSprinkle the crumbled halva and chopped pistachios evenly over the top. Gently press them into the chocolate so they adhere. Scatter the reserved grated chocolate over the top for extra texture.Look for Topping covers the entire surface evenly.Tip Press lightly so the topping stays in place without sinking.
The chocolate layer is even, and the tahini honey ribbons are swirled through the surface in a marbled pattern. The topping of halva and pistachios is evenly distributed and gently pressed in. The reserved grated chocolate adds extra texture. At this point, the slab looks rustic and inviting, with contrasting colors and textures.
Chill and Slice
- Chill and SetPlace the tray in the refrigerator and chill until the chocolate is completely set and firm, about 1 hour. The slab should be solid and easy to lift from the parchment.Look for Chocolate is firm and no longer soft to the touch.Tip Chilling longer ensures clean slicing.
- Slice and ServeRemove the chilled slab from the tray and peel off the parchment. Use a sharp knife to slice the slab into thick bars, about 2 inches wide. Cut through cleanly in one motion to avoid crumbling.Look for Bars are neat with a visible layered cross-section.Tip Warm the knife slightly for cleaner cuts.
After chilling, the slab is firm and releases cleanly from the parchment. Slicing produces neat bars with a visible cross-section: dark chocolate base, golden swirl, and crunchy topping. The bars snap cleanly in half, revealing the layers. They are ready to serve immediately or store in the refrigerator.
Common mistakes
One common mistake is overheating the chocolate, which can cause it to seize or become grainy. Always melt gently over barely simmering water and stir often. Another is over-swirling the tahini honey, which can muddy the layers; keep the ribbons distinct for a prettier cross-section.
Pressing the topping too hard can cause it to sink into the chocolate, so use a light touch. Finally, cutting the bars too early can result in crumbly edges; wait until the slab is fully chilled and firm.
How to tell it’s done
The bars are done when the chocolate is completely set and firm to the touch. The surface should be solid, and the slab should lift easily from the parchment.
When you slice into it, the knife should glide through with a clean cut, revealing the layered cross-section: a dark chocolate base, a golden tahini swirl, and a crunchy topping. If the chocolate is still soft or bends when you lift it, return it to the refrigerator for another 15-20 minutes.
Up next · Part 3 of 3
4 variations · storage & make-ahead · 5 answers · printable card
Tips, FAQ & printable recipe (Part 3)← Back to the ingredients (Part 1)