Desserts · Part 2 of 3: Instructions
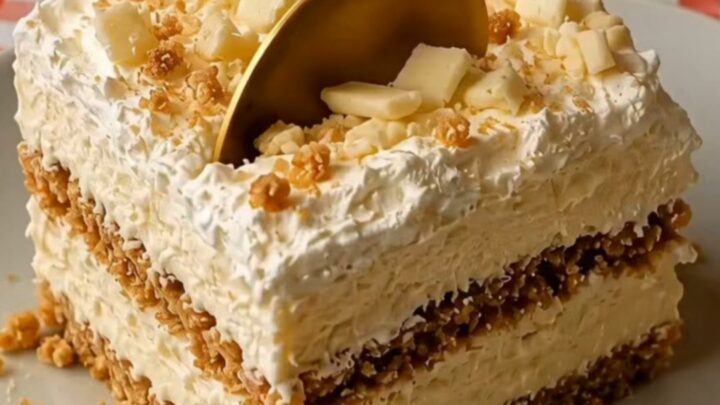
No-Bake White Chocolate Biscuit Cream Cake Step-by-step instructions
- Prep
- Cook
- Total
- Serves
- 8
Before you start
Before beginning, ensure that the heavy cream is thoroughly chilled in the refrigerator, as cold cream whips much faster and maintains a more stable structure. Prepare the glass dish by ensuring it is clean and dry.
Have all ingredients measured and ready to use, and clear enough space in the refrigerator to hold the dish flat during the chilling process to prevent the layers from shifting.
It is also helpful to have your workspace organized and free of clutter, as the whipping and assembly process moves quickly once the cream begins to thicken, and you want to maintain a steady workflow throughout.
Ingredients at a glance (3)
- 2 cups crushed biscuits
- 10 oz white chocolate, chopped
- 2 cups heavy cream
Instructions
Base Preparation
- Prepare the basePlace the crushed biscuits into the bottom of an 8-inch square glass dish. Use the back of a spoon to press the crumbs down firmly, creating an even and compact base layer for the cake.Look for The crumbs should cover the entire bottom of the dish in an even, flat layer.Tip Ensure the layer is pressed tightly so the cake holds its shape when sliced later.
The biscuit crumbs should form a solid, uniform foundation across the bottom of the dish. Pressing them down ensures they do not separate when the cream is added. Check that the edges of the dish are clean of stray crumbs before moving to the next step, as this ensures a neat and tidy presentation for the final dessert.
Cream Whipping
- Whip the creamIn a large mixing bowl, whip the heavy cream using an electric mixer until it reaches stiff peaks. Gradually fold in half of the chopped white chocolate to incorporate it into the airy mixture.Look for The cream should be thick, glossy, and hold its shape perfectly when lifted with a spatula.Tip Keep the bowl chilled if the room is warm to ensure the cream whips effectively.
The whipped cream should be thick and hold stiff peaks. When the spatula is lifted, the cream should stand upright without drooping. Once the white chocolate is incorporated, the mixture should look smooth and uniform. Ensure no large lumps of chocolate remain, as these can affect the texture of the finished cake.
Chilling and Setting
- Assemble and chillSpread the white chocolate cream over the biscuit base in an even layer. Sprinkle the remaining white chocolate chunks over the top. Refrigerate the dish for at least two hours to allow the cream to set before serving.Look for The top layer of cream should feel firm to the touch after the chilling time.Tip For clean slices, dip your knife in hot water and wipe it dry between each cut.
After spreading the cream, the top should be smooth and even. The dish must remain undisturbed in the refrigerator to set properly. Once chilled, the cream should feel firm. This phase is crucial for achieving the perfect texture, so avoid the temptation to slice into the cake before the full chilling time has elapsed.
Common mistakes
A common mistake is failing to whip the cream to the correct consistency; if the cream is too soft, the cake will not hold its shape when sliced. Another issue is using warm ingredients, which can cause the cream to deflate.
Always use cold cream, and avoid over-folding the white chocolate, as this can cause the mixture to lose its aeration and become dense. Additionally, ensure the biscuit base is pressed down firmly; if it is loose, the base will crumble when you try to lift a slice from the dish, ruining the presentation of the cake.
How to tell it’s done
The dessert is ready when the cream layer is firm and set, which typically takes at least two hours in the refrigerator. A gentle touch on the surface should reveal a stable, non-sticky texture. The white chocolate chunks should remain distinct, providing a pleasant contrast to the smooth, whipped cream, and the biscuit base should be securely bonded to the cream layer.
If the cake feels soft or wobbly when the dish is gently shaken, it needs more time to chill. Always err on the side of caution and allow for extra setting time to ensure the cleanest possible slices when serving.
Up next · Part 3 of 3
2 variations · storage & make-ahead · 3 answers · printable card
Tips, FAQ & printable recipe (Part 3)← Back to the ingredients (Part 1)