Dinner · Part 2 of 3: Instructions
Honey Gochujang Charred Octopus and Shrimp Skillet in One Pan Step-by-step instructions
- Prep
- Cook
- Total
- Serves
- 4
Before you start
Gather everything before you turn on the stove, because the seafood cooks fast and the glaze comes together in about two minutes once the honey goes into the pan. Set a wooden cutting board on a stable counter and place your large chef's knife next to it. Rinse and pat the octopus tentacles and the shrimp completely dry with paper towels, then keep them chilled until the skillet is hot; raw seafood should stay in the refrigerator and sit out for no more than 30 minutes before cooking.
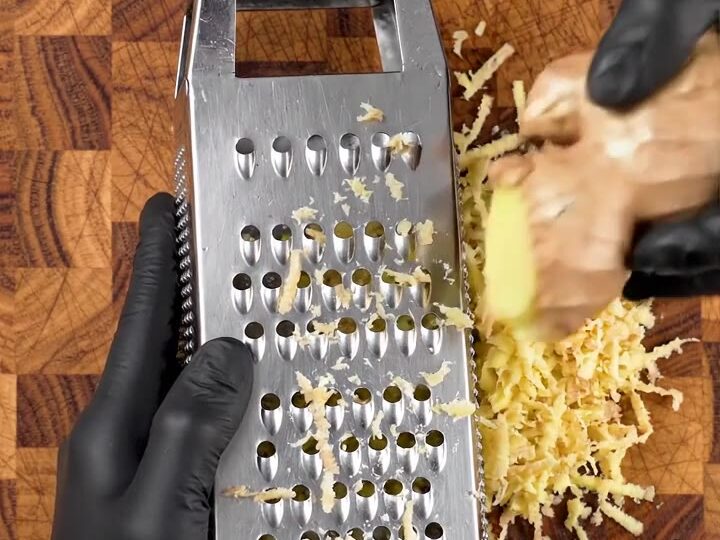
Trim the green onions and slice them, keeping the whites and greens in separate piles so you can add the white parts with the aromatics and the green parts at the end. Mince the garlic and grate the fresh ginger on the box grater; a fine grater releases the most flavor.
Ingredients at a glance (9)
- 1 lb raw octopus tentacles, cleaned
- 1/2 lb large shrimp, peeled and deveined
- 2 tbsp neutral cooking oil, such as canola or vegetable oil
- 3 tbsp gochujang (Korean red chili paste)
- 2 tbsp honey
- 1 tbsp fresh ginger, finely grated
- 4 cloves garlic, minced
- 4 green onions, trimmed and sliced, divided
- 1 lime, cut into wedges for squeezing
Instructions
Char the seafood first
- Prep the seafood and aromaticsPat the octopus tentacles and shrimp dry with paper towels. Slice the green onions, keeping the whites and greens separate. Mince the garlic and grate the fresh ginger on a box grater. Keep the seafood refrigerated until the pan is hot.Look for Octopus and shrimp look dry and the aromatics are ready in small piles on the board.Tip Dry seafood sears and chars rather than steaming, so take the time to pat it thoroughly.
After the first phase, the octopus tentacles should be curled and browned at the edges, with a few darker charred spots, and the oil should still be shimmering rather than smoking. Look for a crisp, golden-brown exterior on each piece and a tender, slightly springy texture when you press one with the spatula.
Check the skillet for even browning and make sure the pieces are not stuck to the bottom. If the octopus is pale or steaming in its own liquid, the pan is either too crowded or not hot enough; remove the pieces, let the skillet reheat for another minute, and cook in smaller batches. Only then add the shrimp, because the octopus needs its full sear before the seafood share the pan.
Build the glaze
- Char the octopus firstHeat the oil in the cast-iron skillet over medium-high heat until it shimmers. Add the octopus tentacles in a single layer and sear them for 4 to 5 minutes, turning once, until curled and browned at the edges.Look for Oil shimmers and the octopus tentacles curl with dark browned edges.Tip Avoid crowding the pan; work in two batches if needed so the octopus chars instead of steaming.
- Add the shrimpAdd the shrimp to the skillet beside the octopus. Cook for 2 to 3 minutes, turning once, until the shrimp turn pink and opaque all the way through and are cooked to 145°F (63°C).Look for Shrimp turn pink and opaque, with no gray translucent centers.Safe temperature 145°F (63°C) internal temperature (shellfish)Tip Shrimp cook quickly, so pull them out of the pan if they start to overcook while the octopus finishes.
- Build the glaze in the panSpoon the gochujang and honey into the skillet and stir. Add the grated ginger and minced garlic and stir for about 1 minute, until fragrant. Reduce the heat to medium and let the sauce bubble until thick.Look for Sauce bubbles thick, dark red and glossy, and smells sweet and toasty.Tip Stir constantly once the honey goes in, since sugar can scorch quickly over high heat.
At the end of the second phase, the shrimp should be pink and opaque all the way through, reaching 145°F (63°C), and the glaze should be bubbling in a thick, dark red layer that coats the back of the spatula. The sauce should smell sweet and toasty with a clear garlic and ginger aroma, and it should look glossy rather than dull or grainy. If the glaze is thin and watery, let it bubble for another minute over medium heat until it reduces and tightens. If it begins to smoke or turns very dark too fast, lower the heat, since sugar in honey can burn quickly. Confirm that the seafood is evenly coated before you move on to the final phase.
Lacquer and finish
- Lacquer the seafoodSpoon the glaze over the octopus and shrimp, turning the pieces until every surface is coated. Continue cooking for 1 to 2 minutes, basting often, until the glaze caramelizes and clings to the seafood.Look for The seafood is coated in a glossy, sticky glaze that no longer runs off the pieces.Tip Baste repeatedly so the glaze tightens into a lacquer rather than burning in spots.
- Finish and serveScatter the green onion greens over the skillet and take the pan off the heat. Squeeze a lime over the top and serve immediately while the skillet is still sizzling.Look for Green onions are bright green on top and the skillet is still hot and sizzling.Tip Add the lime only at the table so the citrus stays bright and fresh.
By the end of the last phase, every piece of octopus and shrimp should be coated in a sticky, glossy glaze that clings instead of running off, and the edges should look caramelized. The green onion greens should be bright and fresh-smelling, scattered over the top without wilting, and the skillet should still be sizzling when you bring it to the table. Check that the glaze has not burned at the bottom of the pan; a light scrape with the spatula should reveal a dark, fragrant sauce rather than blackened bits. Squeeze the lime over the top just before serving, then taste a piece and adjust with a little more honey or lime if needed.
Common mistakes
The most common mistake is crowding the skillet. If the octopus and shrimp fill the pan too tightly, the seafood releases its moisture and steams instead of searing, so the octopus stays pale and rubbery rather than charred. Work in batches if your pan is small, and let the oil heat until it shimmers before adding the first piece.
Another frequent problem is adding the honey and gochujang to a pan that is still very hot, which can scorch the sugars before the aromatics have bloomed. Lower the heat to medium before you add the glaze, and stir constantly. Finally, do not add the lime or the green onion greens too early; the lime loses its brightness when it cooks, and the green onions turn limp and dull.
How to tell it’s done
The octopus is ready when the tentacles have curled into tight spirals, with browned, slightly crisp edges and a tender, springy bite when you cut into the thickest part. A piece that is still rubbery or pale needs another minute in the hot skillet. Shrimp are done when they turn pink and opaque all the way through, with no gray translucent center, and the thickest part reaches 145°F (63°C) on an instant-read thermometer.
The glaze is ready when it is thick, dark red and glossy, coats the back of a spoon, and clings to the seafood instead of running off. Taste a shrimp before serving to check that the balance of sweet, spicy and savory is right, and make sure the seafood has reached 145°F (63°C) before you plate the dish for guests.
- Shellfish: 145°F (63°C) in the thickest part
Up next · Part 3 of 3
4 variations · storage & make-ahead · 5 answers · printable card
Tips, FAQ & printable recipe (Part 3)← Back to the ingredients (Part 1)