Dinner · Part 2 of 3: Instructions
Fresh Homemade Crusty Rolls with Shattering Crust Step-by-step instructions
- Prep
- Cook
- Total
- Serves
- 8
Before you start
Before starting, measure all ingredients and have them at room temperature. The water should be warm, about 110°F (43°C), to activate the yeast. Line a baking sheet with parchment paper and set aside.
Prepare a shallow metal pan or cast-iron skillet to place on the bottom oven rack for steam. Have a spray bottle filled with water if you prefer to mist the oven instead. Clear a work surface and generously dust it with flour for shaping the rolls.
Ingredients at a glance (7)
- 2 cups warm water (450 ml)
- 1 packet active dry yeast (10 g / 1 tbsp)
- 1 tbsp granulated sugar
- 4 1/2 cups bread flour (550 g)
- 1 1/2 tsp fine sea salt
- 1 tbsp olive oil
- all-purpose flour, for dusting, to taste
Instructions
Mixing and Proofing
- Activate the YeastIn a large glass bowl, combine the warm water, active dry yeast, and granulated sugar. Whisk gently until the yeast and sugar dissolve. Let the mixture sit for 5 to 10 minutes until it becomes frothy and bubbly on top, indicating the yeast is active.Look for The surface should be covered with small bubbles and smell pleasantly yeasty.Tip If the water is too hot, it will kill the yeast; aim for about 110°F (43°C).
- Mix the DoughAdd the bread flour, fine sea salt, and olive oil to the yeast mixture. Stir with a wooden spatula until a shaggy, wet, sticky dough forms. Continue stirring for 1 to 2 minutes to ensure all the flour is hydrated and no dry patches remain.Look for The dough will be sticky and shaggy, not smooth or elastic.Tip Do not overmix at this stage; a rough dough is fine.
- First ProofCover the bowl tightly with plastic wrap. Let the dough proof at room temperature for 45 minutes, or until it has doubled in size and is puffy and airy.Look for The dough should have doubled and look bubbly and soft.Tip A warm spot, like near a sunny window, speeds up the proof.
After mixing, the dough should be shaggy, sticky, and wet. After 45 minutes of proofing, it should have doubled in size, be puffy, and have a bubbly surface. The yeast should smell fragrant and active. If the dough has not risen, the yeast may be old or the water too hot.
Shaping and Baking
- Shape the RollsTurn the dough out onto a heavily floured board. Dust the top with more flour. Divide the dough into 8 equal portions. Gently shape each portion into a plump round roll by folding the edges toward the center and pinching the bottom to seal.Look for The rolls should be round and smooth on top, with a taut surface.Tip Keep the work surface well-floured to prevent sticking.
- Second ProofPlace the shaped rolls onto a baking sheet lined with parchment paper, leaving space between them. Dust the tops lightly with flour. Cover loosely with plastic wrap and let them proof for another 20 to 30 minutes, until slightly puffy.Look for The rolls should look slightly puffed but not doubled.Tip No need for a long second proof; a short rest helps them hold shape.
- Preheat the OvenPreheat the oven to 425°F (220°C). Place a shallow metal pan or a cast-iron skillet on the bottom rack of the oven to preheat as well; this will be used to create steam.Look for The oven should be fully preheated before baking.Tip The steam helps create a shattering crust.
- Score the RollsUsing a baker's razor or a sharp knife, slash a deep cut across the center of each roll. The cut should be about 1/2 inch deep, allowing the dough to expand during baking.Look for The cuts should be clean and distinct.Tip Slash at a slight angle for a classic ear.
- Bake with SteamPlace the baking sheet in the preheated oven. Immediately pour about 1 cup of hot water into the preheated pan on the bottom rack to create steam. Close the oven door quickly. Bake for 22 minutes, until the rolls are deep golden brown and the crust is hard and crackly.Look for The rolls should be deeply browned and sound hollow when tapped on the bottom.Tip Be careful when adding water to the hot pan; use oven mitts.
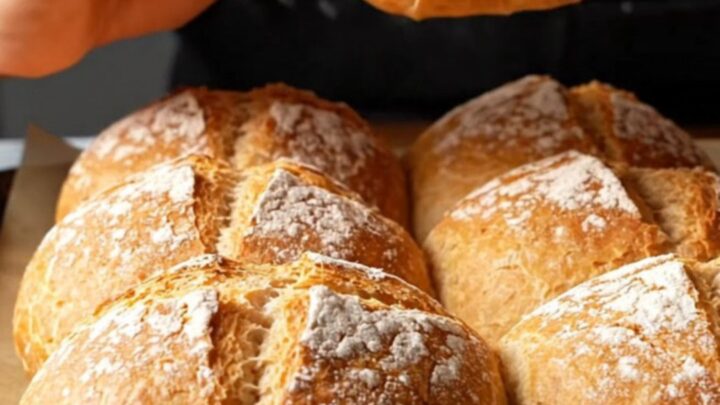
The shaped rolls should be plump and round, with a dusting of flour on top. After scoring, the cuts should be clean and deep.
During baking, the rolls should puff up and turn a deep golden brown. The crust should be hard and crackly, and tapping the bottom should produce a hollow sound.
Cooling and Crisping
- Cool and CrispRemove the baking sheet from the oven. Transfer the rolls to a wire rack to cool for at least 10 minutes. The crust will continue to crisp as they cool.Look for The rolls should be firm and the crust crackly to the touch.Tip Do not cover them while warm, or the steam will soften the crust.
After cooling on a wire rack for at least 10 minutes, the rolls should have a crisp, brittle crust that crackles when squeezed. The interior should be soft and airy with a honeycomb crumb. The rolls should be cool enough to handle but still warm in the center.
Common mistakes
A common mistake is using water that is too hot, which kills the yeast and prevents the dough from rising. Another is over-flouring the dough during shaping, which can make the rolls dense. Skipping the steam step will result in a softer, less crackly crust.
Also, avoid opening the oven door during the first 15 minutes of baking, as this releases steam and can affect crust formation. Finally, do not underbake—pale rolls will have a doughy interior.
How to tell it’s done
The rolls are done when they are deep golden brown and the crust feels hard and crackly to the touch. To test, tap the bottom of a roll—it should sound hollow.
The internal temperature of the rolls should reach about 200°F (93°C) for a fully baked crumb. Let them cool on a wire rack for at least 10 minutes before serving; the crust will continue to crisp as they cool.
Up next · Part 3 of 3
4 variations · storage & make-ahead · 5 answers · printable card
Tips, FAQ & printable recipe (Part 3)← Back to the ingredients (Part 1)