Dinner · Part 2 of 3: Instructions
Easy Artisan Sourdough Bread with Crackling Crust Step-by-step instructions
- Prep
- Cook
- Total
- Serves
- 1
Before you start
Before starting, feed your sourdough starter and let it sit at room temperature until it is bubbly and active. This can take 4 to 6 hours, depending on the strength of the starter. Have all ingredients measured and ready. You’ll also need a large mixing bowl, a banneton or proofing basket, and a Dutch oven.
If using a proofing basket, dust it generously with flour so the dough doesn’t stick. Clear space in the refrigerator for the overnight proof. The dough will be sticky, so keep a bowl of water nearby for wetting your hands during the stretch-and-folds.
Ingredients at a glance (5)
- 100 g active sourdough starter
- 350 g warm water
- 500 g bread flour
- 10 g sea salt
- salted butter, for serving
Instructions
Mix, Fold, and Proof
- Mix the DoughIn a large bowl, stir together the active sourdough starter and warm water until the starter is mostly dispersed. Add the bread flour and sea salt, then mix with a spatula or your hand until no dry flour remains and a shaggy dough forms. Cover the bowl with plastic wrap or a damp towel and let it rest for 30 minutes.Look for The dough will be sticky and rough, with no dry patches.Tip Warm water should feel like bath water, not hot, to keep the starter active.
- Stretch and FoldPerform four sets of stretch-and-folds at 30-minute intervals. To do one set, wet your hand, reach under one side of the dough, stretch it up and over to the opposite side, then repeat for the other three sides. After each set, re-cover the bowl and let it rest.Look for The dough becomes smoother and more elastic with each fold.Tip Keep the dough in the same bowl; the folds build strength without kneading.
- Shape the BouleAfter the final fold, let the dough rest for 30 minutes. Turn it out onto a lightly floured surface. Gently shape it into a tight round boule by pulling the edges toward the center and pinching the seams. Place the boule seam-side up in a floured banneton basket.Look for The dough holds a round shape and feels pillowy.Tip Use rice flour in the banneton if you have it; it prevents sticking better than wheat flour.
- Overnight ProofCover the banneton with plastic wrap or a towel and refrigerate for at least 8 hours, or up to 12. The cold proof slows fermentation and develops flavor while making the dough easier to handle.Look for The dough should feel puffy and have increased slightly in volume.Tip If the kitchen is warm, a shorter room-temperature proof of 3-4 hours also works, but the overnight cold proof gives the best flavor.
After mixing, the dough is shaggy and sticky. After the four sets of stretch-and-folds, it should be smoother and hold its shape better. The dough will have increased in volume and feel airy and elastic.
After the overnight proof, it should be puffy and slightly domed, with a pleasant sour aroma. It should not be flat or overly sticky. If it looks too loose, give it a gentle shape before placing it in the banneton.
Bake in a Dutch Oven
- Preheat the Dutch OvenPlace a Dutch oven with its lid on the center rack of the oven. Preheat the oven to 450°F (230°C) for at least 30 minutes before baking. The Dutch oven must be screaming hot to create steam and a crackling crust.Look for The Dutch oven is fully heated and a drop of water sizzles instantly.Tip If the Dutch oven is not preheated long enough, the bread won’t get the same oven spring.
- Transfer and ScoreCarefully remove the hot Dutch oven from the oven. Turn the proofed dough out onto a piece of parchment paper. Use a razor blade or lame to score the top with a single deep slash or a cross pattern. The score should be about 1/2 inch deep.Look for The dough holds its shape and the score opens slightly.Tip Score confidently in one swift motion; hesitation can drag the blade and deflate the dough.
- Bake CoveredLift the parchment paper with the dough into the hot Dutch oven. Put the lid on and bake for 20 minutes. The covered environment traps steam, which keeps the crust soft while the bread rises.Look for The bread will be pale and soft after this stage.Tip Use oven mitts; the Dutch oven is extremely hot.
- Bake UncoveredRemove the lid and continue baking for 20 to 25 minutes, until the crust is deep golden brown and blistered. The internal temperature of the bread should reach at least 200°F (93°C) for a fully baked loaf.Look for The crust is dark, crackly, and sounds hollow when tapped on the bottom.Tip If the crust browns too quickly, lower the oven to 425°F (220°C) for the last 10 minutes.
When you score the dough, the cut should open slightly and reveal a moist interior. During the covered bake, the dough will rise and the crust will remain pale. After removing the lid, the crust will darken and blister, and the kitchen will fill with the smell of fresh bread. The loaf should be deeply browned and sound hollow when tapped. The internal temperature should be at least 200°F (93°C).
Cool and Serve
- Cool the LoafTransfer the bread to a wire rack and let it cool for at least 1 hour before slicing. This allows the crumb to set; cutting too early can result in a gummy interior.Look for The loaf cools to room temperature and the crust makes crackling sounds as it contracts.Tip Resist the urge to slice immediately; the wait is worth it for the texture.
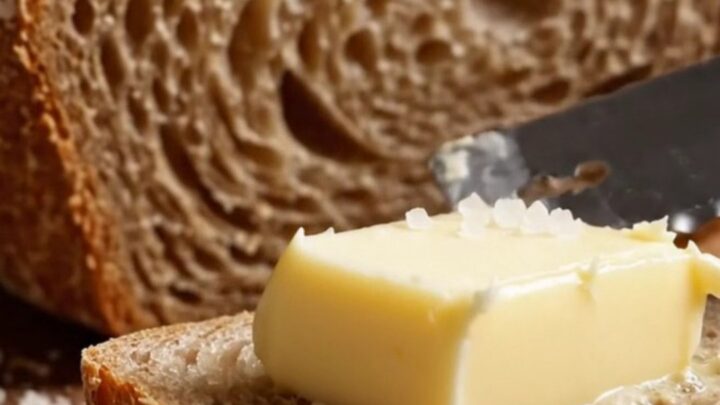
- Slice and ServeUse a serrated bread knife to slice the loaf into thick pieces. Spread each warm slice with salted butter, allowing it to melt into the open crumb. Serve immediately.Look for The crust crackles as the knife cuts through, and the crumb is airy and steamy.Tip For the best experience, serve the bread warm but not hot, so the butter melts without making the crumb soggy.
The bread should cool on a wire rack for at least an hour. As it cools, the crust will crackle and sing—this is a good sign. When you slice into it, the crust should shatter with a satisfying crunch, and the crumb should be open and airy with irregular holes. The texture should be chewy and moist, not gummy. Spread with butter and enjoy the contrast of crisp crust and tender interior.
Common mistakes
One common mistake is using a starter that isn’t active enough. If the starter doesn’t double in volume after feeding, the bread will be dense. Another pitfall is over-proofing the dough in the fridge—if it sits for more than 12 hours, it can become overly sour and collapse. On the other hand, under-proofing leads to a tight crumb.
Make sure the dough has visibly increased in size before baking. When scoring, use a sharp blade and make confident cuts; a dull blade will drag and deflate the dough. Finally, don’t skip preheating the Dutch oven—it must be screaming hot to create the steam that gives a crackling crust.
How to tell it’s done
The bread is done when the crust is deep golden brown and sounds hollow when tapped on the bottom. The internal temperature should register at least 200°F (93°C) on an instant-read thermometer.
If the crust is browning too quickly but the interior isn’t done, lower the oven to 425°F (220°C) for the last 10 minutes. The crumb should be fully set and not gummy when sliced. Let the loaf cool completely on a wire rack before cutting; this allows the steam to escape and the crumb to firm up.
Up next · Part 3 of 3
4 variations · storage & make-ahead · 5 answers · printable card
Tips, FAQ & printable recipe (Part 3)← Back to the ingredients (Part 1)