Desserts · Part 2 of 3: Instructions
Mirror Glaze Dark Chocolate Raspberry Pistachio Cake Step-by-step instructions
- Prep
- Cook
- Total
- Serves
- 10
Before you start
Before starting, make sure you have a ring mold or springform pan, an instant-read thermometer, and a freezer with space to accommodate the mold.
Prepare all ingredients: chop the chocolate, measure the cream, and have the gelatin blooming. The cake needs to freeze overnight, so plan accordingly. Set up a clean workspace and have a baking sheet ready to catch any glaze drips.
Ingredients at a glance (18)
- 8 oz dark chocolate (70% cacao), chopped
- 2 cups heavy cream, cold
- 4 large egg yolks
- 1/4 cup granulated sugar
- 2 tbsp water
- 2 cups raspberries (fresh or frozen)
- 1/2 cup granulated sugar
- 2 tsp powdered gelatin (about 1 packet)
- 3 tbsp cold water
- 1 cup feuilletine (or crushed crepes dentelles)
- 1/2 cup pistachio paste
- 3 tbsp unsalted butter, melted
- 1 cup granulated sugar
- 3/4 cup unsweetened cocoa powder
- 1/2 cup water
- 1/2 cup sweetened condensed milk
- 2 tsp powdered gelatin
- 3 tbsp cold water
Instructions
Build the Layers
- Make the Raspberry GeleeIn a small bowl, sprinkle gelatin over cold water and let bloom for 5 minutes. In a saucepan, combine raspberries and sugar; cook over medium heat, stirring, until the berries break down and the mixture is bubbling, about 5 minutes. Remove from heat, stir in the bloomed gelatin until fully dissolved. Strain through a fine-mesh sieve to remove seeds. Let cool slightly, then pour into the ring mold to form a thin layer (about 1/4 inch). Freeze until set, about 30 minutes.Look for The gelee is set and firm to the touch.Tip For a smoother gelee, press the mixture through the sieve with a spatula.
- Make the Pistachio FeuilletineIn a bowl, combine feuilletine, pistachio paste, and melted butter. Mix until the feuilletine is evenly coated. Press the mixture evenly over the frozen raspberry gelee layer in the ring mold. Freeze while preparing the mousse.Look for The feuilletine layer is compact and holds together.Tip Press firmly to create an even, solid base.
- Make the Dark Chocolate MousseMelt the dark chocolate in a heatproof bowl set over simmering water, stirring until smooth. Set aside to cool slightly. In a small saucepan, combine egg yolks, sugar, and water; whisk constantly over medium heat until the mixture reaches 160°F (71°C) and thickens slightly. Remove from heat and whisk in the melted chocolate until glossy. In a separate bowl, whip the cold heavy cream to soft peaks. Gently fold the whipped cream into the chocolate mixture in three additions until no streaks remain.Look for The mousse is smooth, airy, and holds a ribbon when lifted.Safe temperature 160°F (71°C) internal temperature (egg dishes)Tip Fold gently to keep the mousse light and airy.
- Assemble and Freeze the CakePour the chocolate mousse over the frozen feuilletine layer in the ring mold, filling to the top. Smooth the surface with an offset spatula. Tap the mold gently on the counter to release air bubbles. Freeze the assembled cake overnight, or at least 6 hours, until completely solid.Look for The cake is completely frozen and firm to the touch.Tip Freezing overnight ensures clean slicing and a flawless glaze application.
At the end of this phase, you have a ring mold with a set raspberry gelee, a crunchy pistachio feuilletine layer, and a smooth chocolate mousse on top, all frozen solid.
The layers should be distinct and firm, with no air bubbles in the mousse. The cake should be completely frozen, which is crucial for the next phase.
Glaze the Cake
- Make the Mirror GlazeIn a small bowl, sprinkle gelatin over cold water and let bloom for 5 minutes. In a saucepan, combine sugar, cocoa powder, water, and condensed milk. Whisk over medium heat until the sugar dissolves and the mixture comes to a gentle boil. Remove from heat and whisk in the bloomed gelatin until fully dissolved. Let the glaze cool to exactly 92°F (33°C) before using.Look for The glaze is smooth, glossy, and coats the back of a spoon.Tip Use an instant-read thermometer to hit the exact temperature for the best shine.
- Glaze the Frozen CakeRemove the frozen cake from the ring mold and place on a wire rack set over a baking sheet. Pour the mirror glaze at 92°F (33°C) in one continuous stream over the top and sides of the cake, starting from the center and moving outward. Let the excess glaze drip off. Allow the glaze to set for a few minutes before transferring the cake to a serving plate.Look for The glaze forms a smooth, shiny, even coating with a glass-like finish.Tip Work quickly; the glaze sets fast on the cold cake.
The mirror glaze is at 92°F (33°C) and you have poured it over the frozen cake in one continuous stream. The glaze should coat the cake evenly, dripping down the sides and pooling at the base. The surface should be smooth and shiny, with no bare spots. The glaze sets quickly, so work efficiently.
Slice and Serve
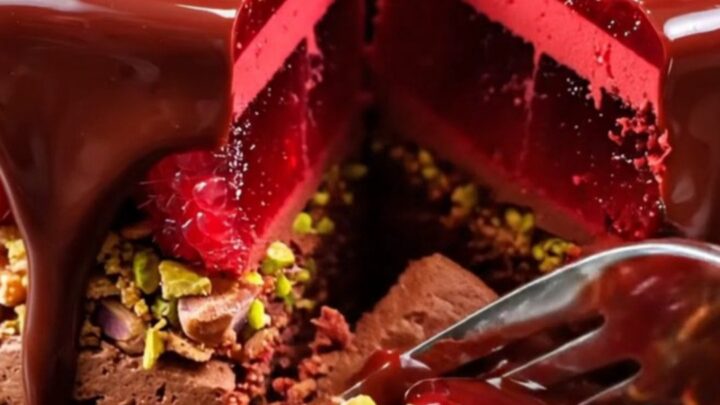
- Slice and ServeDip a sharp knife in hot water, wipe dry, and slice the cake with a clean, smooth motion. Wipe the blade between cuts for clean slices. Serve immediately, or keep refrigerated until ready to serve.Look for The interior layers are distinct: dark mousse, red gelee, and golden feuilletine.Tip Warm the knife for each cut to prevent the glaze from cracking.
The cake is glazed and set, and you are ready to slice. The knife is warm and clean, and each cut reveals the beautiful layers: dark mousse, red gelee, and golden feuilletine. The slice holds its shape and the glaze cracks cleanly. Serve immediately or keep chilled until ready.
Common mistakes
Common pitfalls include over-whipping the cream, which can make the mousse grainy; not freezing the cake long enough, causing the layers to shift when glazing; and overheating the glaze, which can make it dull or cause it to run off.
Always use a thermometer for the glaze and ensure the cake is thoroughly frozen before pouring. If the glaze is too thick, gently reheat it; if too thin, let it cool slightly.
How to tell it’s done
The cake is done when the layers are completely frozen solid, the glaze is smooth and glossy, and the interior shows distinct layers when sliced. The mousse should be firm but not icy, and the gelee should be set.
When you slice, the knife should glide through without resistance. The glaze should be shiny and crack slightly when cut, revealing the layers beneath.
- Egg dishes: 160°F (71°C) in the thickest part
Up next · Part 3 of 3
4 variations · storage & make-ahead · 5 answers · printable card
Tips, FAQ & printable recipe (Part 3)← Back to the ingredients (Part 1)