Desserts · Part 1 of 3: Ingredients
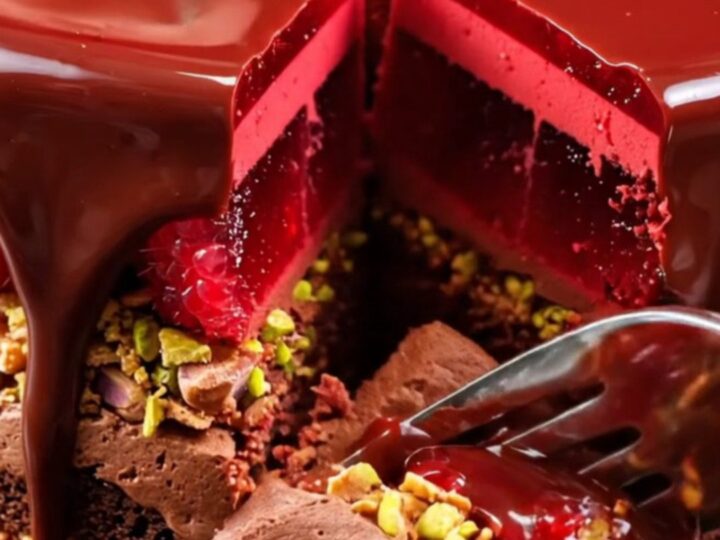
Mirror Glaze Dark Chocolate Raspberry Pistachio Cake
- Prep
- Cook
- Total
- Serves
- 10
This mirror-glazed entremet is a showstopper: a frozen cake with layers of dark chocolate mousse, tart raspberry gelee, and crunchy pistachio feuilletine, all enrobed in a glossy, glass-like chocolate mirror glaze.
The technique is surprisingly approachable, and the result looks like it came from a high-end patisserie. Perfect for celebrations or when you want to impress without spending hours on complex decorations.
Mirror glazes are a hallmark of professional pastry, but they are achievable at home with the right technique. This recipe breaks down the process into manageable steps: build the layers, freeze them solid, then pour a perfectly tempered glaze over the top.
The contrast of textures—silky mousse, bright berry gelee, and buttery crunch—makes every bite exciting. The glaze sets to a mirror-like shine that is both beautiful and satisfying to crack into.
Ingredients
Dark Chocolate Mousse
- 8 oz dark chocolate (70% cacao), chopped
- 2 cups heavy cream, cold
- 4 large egg yolks
- 1/4 cup granulated sugar
- 2 tbsp water
Raspberry Gelee
- 2 cups raspberries (fresh or frozen)
- 1/2 cup granulated sugar
- 2 tsp powdered gelatin (about 1 packet)
- 3 tbsp cold water
Pistachio Feuilletine
- 1 cup feuilletine (or crushed crepes dentelles)
- 1/2 cup pistachio paste
- 3 tbsp unsalted butter, melted
Mirror Glaze
- 1 cup granulated sugar
- 3/4 cup unsweetened cocoa powder
- 1/2 cup water
- 1/2 cup sweetened condensed milk
- 2 tsp powdered gelatin
- 3 tbsp cold water
Why this recipe works
Freezing the assembled cake is essential: it allows the layers to set firmly and provides a cold surface that makes the mirror glaze set quickly and smoothly. A well-chilled cake ensures the glaze adheres evenly and doesn't run off, creating that flawless, polished finish.
Heating the glaze to exactly 92°F (33°C) is the secret to a shiny, non-dull surface. At this temperature, the glaze is fluid enough to flow over the cake but sets quickly on contact with the cold surface, trapping the glossy shine.
This precise temperature control is what separates a professional-looking mirror glaze from a matte one.
Notes and substitutions
Use high-quality dark chocolate with at least 70% cacao for the mousse—it provides a deep, intense flavor that balances the sweet glaze and tart raspberries.
Feuilletine, also known as crepes dentelles, adds a delicate crunch; if unavailable, crushed wafer cookies or even finely chopped toasted nuts can work as a substitute.
The ring mold should be placed on a baking sheet for easy transfer to the freezer. Make sure the mold is completely sealed to prevent leaks. If using a springform pan, line the bottom with plastic wrap for easy removal. The glaze can be made ahead and reheated gently to the correct temperature before pouring.
- feuilletine: Crushed plain crepes dentelles or finely crushed wafer cookies can stand in for feuilletine.
- pistachio paste: Use almond paste or a thick nut butter like cashew or macadamia for a similar texture.
- raspberries: Frozen raspberries work well; thaw and drain excess juice before using.
- dark chocolate: Use semisweet or bittersweet chocolate (60-70% cacao) for the mousse.
Equipment
- 8-inch ring mold
- stand mixer or hand mixer
- saucepan
- whisk
- spatula
- immersion blender (optional)
- wire rack
- baking sheet
Up next · Part 2 of 3
7 steps · 20 min of cooking · what to look for at each stage
Step-by-step instructions (Part 2)