Dinner · Part 3 of 3: Tips & recipe card
Crusty Mini Sourdough Loaves with an Airy Crumb Tips, FAQ & printable recipe
- Prep
- Cook
- Total
- Serves
- 4
Tips for success
For the best crust, create steam in the first 20 minutes of baking. If using a Dutch oven, keep the lid on for the first half of baking. If using a baking stone, pour hot water into a preheated steam pan.
The steam keeps the crust soft, allowing the loaf to expand. After removing the steam source, the crust crisps up and develops a deep golden color.
Scoring is both functional and decorative. A single deep slash down the center is classic and allows the dough to expand in a controlled way.
Use a sharp razor blade or lame and make a confident, swift cut at a slight angle. The slash should be about 1/2 inch deep. If the dough sticks to the blade, dip it in water or flour between scores.
Variations
- Seeded Crust: Before baking, brush the scored loaves with a little water and sprinkle with sesame seeds, poppy seeds, or rolled oats. The seeds add texture and flavor to the crust.
- Whole Wheat Blend: Replace 1 cup of the bread flour with whole wheat flour. Increase the water by 2 tablespoons and expect a denser crumb with a nuttier flavor.
- Rosemary and Sea Salt: Add 1 tablespoon of chopped fresh rosemary to the dough during the final fold. Sprinkle flaky sea salt on top before baking for a savory twist.
- Olive Oil and Herbs: Replace 2 tablespoons of the water with olive oil and add 1 teaspoon of dried Italian herbs. The oil tenderizes the crumb and adds richness.
Storage and make-ahead
- Fridge
- Store cooled loaves in a paper bag at room temperature for up to 2 days. For longer storage, slice and freeze in an airtight bag for up to 3 months.
- Freezer
- Slice the cooled loaves and freeze in a zip-top bag for up to 3 months. Reheat slices in a toaster or oven at 350°F (175°C) for 5 minutes.
- Reheat
- To reheat whole loaves, place in a 350°F (175°C) oven for 10 minutes. Slices can be toasted directly from frozen.
Store the cooled loaves in a paper bag at room temperature for up to 2 days. The crust will soften slightly, but the crumb stays moist. For longer storage, slice the loaves and freeze them in a zip-top bag. Toast slices directly from the freezer for a crisp exterior. Avoid storing bread in the refrigerator, as it accelerates staling.
The dough can be prepared through the final shaping and then refrigerated for up to 12 hours. Cold proofing slows fermentation and deepens the flavor.
Remove the loaves from the refrigerator, score, and bake directly from cold. You may need to add a few minutes to the baking time. Alternatively, bake the loaves fully, cool, and freeze for up to 3 months.
Serving ideas
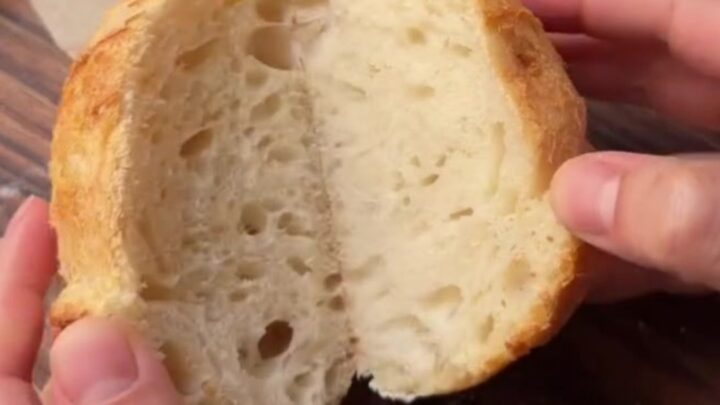
These mini loaves are perfect for serving alongside soups, salads, or cheese boards. The crusty exterior and airy crumb are ideal for dipping in olive oil or spreading with butter. Slice them thick and toast for breakfast, or use them for sandwiches. The tangy flavor pairs beautifully with both sweet and savory toppings.
For a simple appetizer, slice the loaves and serve with a bowl of olive oil and balsamic vinegar. Or top with fresh tomatoes, basil, and a drizzle of olive oil for bruschetta.
The loaves also make great dinner rolls—serve them warm with butter and sea salt. However you serve them, the crackling crust and custardy crumb will be the star.
Frequently asked questions
Why is the dough so sticky?
Can this recipe be made without a Dutch oven?
How do you know when the dough is properly proofed?
Can the dough be refrigerated overnight?
Why is your bread gummy in the center?
Crusty Mini Sourdough Loaves with an Airy Crumb
Ingredients
- 3 1/2 cups bread flour
- 1 1/2 cups water, room temperature
- 1/2 cup active sourdough starter
- 12 g salt
- 2 tbsp water
Instructions
- In a large bowl, combine the bread flour and water. Add the active sourdough starter and mix with a spatula until no dry flour remains. Cover and let rest for 30 minutes.
- Dissolve the 12 g salt in the 2 tablespoons of water. Pour over the dough and fold with a spatula until fully incorporated. Cover and let rest 30 minutes.
- Perform a series of stretch and folds: wet your hands, grab one side of the dough, stretch it up and over to the opposite side. Repeat for all four sides. Cover and rest 30 minutes. Repeat this fold series 3 more times at 30-minute intervals.
- After the final fold, cover the bowl and let the dough ferment at room temperature until it has increased in volume by about 50% and shows bubbles on the surface. This takes about 2 to 3 hours.
- Turn the dough onto a lightly floured surface. Divide into 4 equal pieces. Gently pre-shape each into a round by folding the edges into the center. Let rest 20 minutes. Then shape each piece into a tight boule or oval, creating surface tension.
- Place the shaped loaves seam-side up in floured proofing baskets or on a parchment-lined baking sheet. Cover and let proof at room temperature for 1 to 2 hours, until the dough is puffy and springs back slowly when poked.
- Place a Dutch oven or a baking stone with a steam pan in the oven. Preheat the oven to 500°F (260°C) for at least 30 minutes before baking.
- Carefully transfer a proofed loaf onto a piece of parchment. Using a razor blade or lame, score down the center with a single, confident slash about 1/2 inch deep.
- Place the scored loaf into the preheated Dutch oven or onto the baking stone. Cover with the lid or add 1 cup of hot water to the steam pan. Bake at 450°F (230°C) for 20 minutes with steam, then remove the lid or steam pan and bake for 10 to 15 minutes more, until deep golden brown.
- Transfer the baked loaves to a wire rack. Let them cool completely before slicing, at least 1 hour. This allows the crumb to set and prevents a gummy texture.
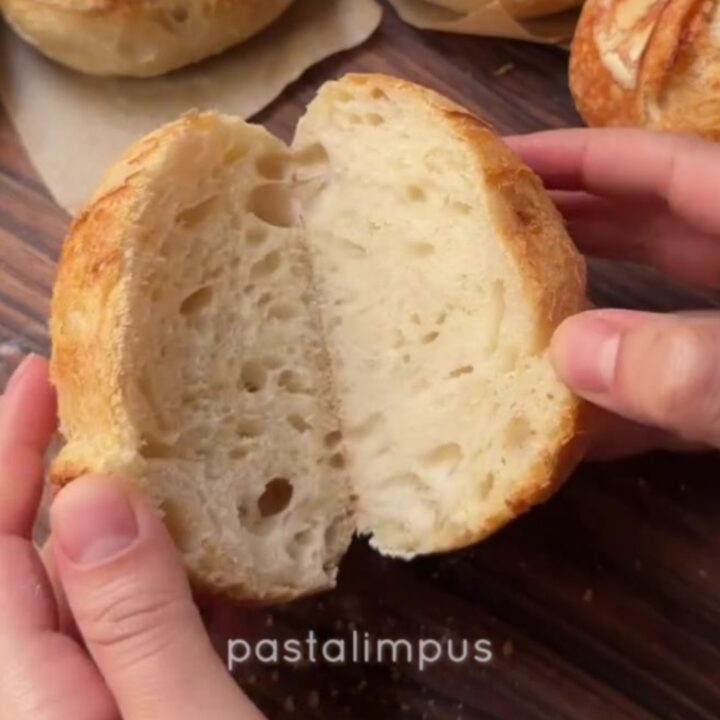
- Using a serrated knife, slice the loaves with a gentle sawing motion. Enjoy the crusty crackle and the custardy, open crumb.
Estimated nutrition per serving
- Calories
- 380
- Protein
- 11 g
- Carbohydrates
- 76 g
- Fat
- 2 g
Next recipe

Crispy Twisted Spinach Feta Börek
See the recipe → →This recipe is based on a short cooking video and is published under the pen name Clara Weller. It was checked before publication, but errors can slip through. Nutrition, when shown, is an estimate. Read more in our editorial policy and on our food safety page.
More recipes to try

Crispy Cheesy Chicken Taquitos with Creamy Green Crema
Total time: 35 min
Caramelized Onion Pasta with Silky Fettuccine
Total time: 40 min
Greek Chicken Wraps with Tzatziki
Total time: 32 min
Creamy Sun-Dried Tomato Rigatoni with Dijon Chicken
Total time: 30 min
Crispy Fried Chicken Nuggets with Creamy Pepper Sauce
Total time: 35 min