Dinner · Part 1 of 3: Ingredients
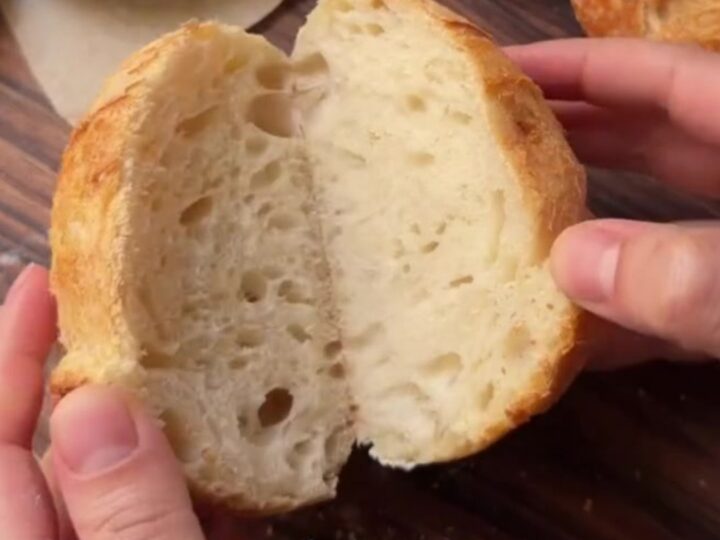
Crusty Mini Sourdough Loaves with an Airy Crumb
- Prep
- Cook
- Total
- Serves
- 4
These mini sourdough loaves deliver everything you love about artisan bread: a shattering crust, a custardy crumb with open pockets, and that unmistakable tang. The small size means they bake faster and are perfect for sharing.
The dough comes together quickly, then a few folds build strength and airiness. You don't need a fancy setup—just a bowl, a bench scraper, and a hot oven. Score them boldly, let the steam do its work, and listen to the crackle as they cool.
There's something deeply satisfying about pulling a crusty, blistered loaf from your own oven. These mini sourdough loaves are scaled for weeknight baking—small enough to bake quickly, yet full of the open, custardy crumb that makes sourdough so special.
The dough is a simple mix of flour, water, salt, and a lively starter. A few stretch-and-fold sessions build the gluten and airy structure, then a hot, steamy oven transforms it into golden, crackling loaves. Whether you're new to sourdough or a seasoned baker, this recipe is straightforward and rewarding.
Ingredients
- 3 1/2 cups bread flour
- 1 1/2 cups water, room temperature
- 1/2 cup active sourdough starter
- 12 g salt
- 2 tbsp water
Why this recipe works
The method relies on a high-hydration dough and a series of gentle stretch-and-folds. This technique develops gluten without vigorous kneading, which would deflate the air bubbles that create an open crumb.
The folds also align the gluten strands, giving the loaves structure and strength to rise in the oven. The result is a light, airy interior with a satisfying chew.
Baking in a preheated Dutch oven or with a steam pan creates a burst of steam in the first minutes. That steam keeps the crust soft, allowing the loaf to expand fully—this is what creates the dramatic oven spring and the blistered, crackly crust.
As the steam dissipates, the crust dries and crisps, giving you that perfect contrast of crackly outside and custardy inside.
Notes and substitutions
Use a 100% hydration active sourdough starter—equal parts flour and water by weight. If your starter is thicker, adjust the water slightly. Bread flour gives the best structure, but all-purpose flour works in a pinch. The salt is dissolved in a little water before adding; this ensures even distribution without overworking the dough.
The dough is sticky and wet, so resist the urge to add too much flour. Wet hands and a bench scraper are your best tools. The stretch-and-fold series is essential—don't skip it. The dough should feel silky and aerated after the folds. If your kitchen is cool, fermentation will take longer; if warm, shorter. Watch the dough, not the clock.
- bread flour: All-purpose flour works, but the crumb will be slightly less open. Use the same weight.
- active sourdough starter: A 100% hydration starter is best. If using a stiffer starter, increase water slightly.
- salt: Fine sea salt or table salt can be used, but reduce to 10 g if using table salt.
Equipment
- Large mixing bowl
- Spatula
- Bench scraper
- Kitchen towel
- Razor blade or lame
- Dutch oven or baking stone with steam pan
- Cooling rack
Up next · Part 2 of 3
11 steps · 30 min of cooking · what to look for at each stage
Step-by-step instructions (Part 2)