Dinner · Part 2 of 3: Instructions
Crusty Mini Sourdough Loaves with an Airy Crumb Step-by-step instructions
- Prep
- Cook
- Total
- Serves
- 4
Before you start
Before starting, make sure your sourdough starter is active and bubbly—it should double in volume within 4 to 6 hours of feeding. Measure all ingredients. Have a large bowl, a spatula, a bench scraper, and a clean kitchen towel ready.
If using a Dutch oven, place it in the oven while it preheats. If using a baking stone, set up a steam pan on a lower rack. Clear a space on your counter for folding and shaping. The dough is sticky, so keep a bowl of water nearby to wet your hands.
Ingredients at a glance (5)
- 3 1/2 cups bread flour
- 1 1/2 cups water, room temperature
- 1/2 cup active sourdough starter
- 12 g salt
- 2 tbsp water
Instructions
Mix and Fold
- Mix the DoughIn a large bowl, combine the bread flour and water. Add the active sourdough starter and mix with a spatula until no dry flour remains. Cover and let rest for 30 minutes.Look for The dough is shaggy and slightly sticky.Tip Use room-temperature water for a consistent dough temperature.
- Add Salt and FoldDissolve the 12 g salt in the 2 tablespoons of water. Pour over the dough and fold with a spatula until fully incorporated. Cover and let rest 30 minutes.Look for The dough becomes smoother and more elastic.Tip The salt water helps even distribution without overmixing.
- Stretch and Fold SeriesPerform a series of stretch and folds: wet your hands, grab one side of the dough, stretch it up and over to the opposite side. Repeat for all four sides. Cover and rest 30 minutes. Repeat this fold series 3 more times at 30-minute intervals.Look for The dough becomes silky, smooth, and aerated.Tip Wet hands prevent sticking and help handle the dough gently.
- Bulk FermentationAfter the final fold, cover the bowl and let the dough ferment at room temperature until it has increased in volume by about 50% and shows bubbles on the surface. This takes about 2 to 3 hours.Look for The dough is puffy, with a slightly domed top and visible bubbles.Tip The dough should feel airy and alive, not dense.
- Divide and ShapeTurn the dough onto a lightly floured surface. Divide into 4 equal pieces. Gently pre-shape each into a round by folding the edges into the center. Let rest 20 minutes. Then shape each piece into a tight boule or oval, creating surface tension.Look for The dough holds its shape without spreading much.Tip Use minimal flour to avoid dry spots in the crumb.
- Final ProofPlace the shaped loaves seam-side up in floured proofing baskets or on a parchment-lined baking sheet. Cover and let proof at room temperature for 1 to 2 hours, until the dough is puffy and springs back slowly when poked.Look for The loaves have increased slightly in size and feel airy.Tip If the dough springs back quickly, it needs more proofing time.
After the stretch-and-fold series, the dough should be smooth, silky, and aerated. It will have increased in volume and show small bubbles on the surface. The dough should feel elastic and slightly tacky.
When you gently pull a piece, it should stretch without tearing. If the dough is still shaggy, continue folding at 30-minute intervals until it becomes smooth.
Shape and Score
- Preheat the OvenPlace a Dutch oven or a baking stone with a steam pan in the oven. Preheat the oven to 500°F (260°C) for at least 30 minutes before baking.Look for The oven is fully preheated and the baking vessel is scorching hot.Tip A hot baking surface helps loaves spring immediately.
- Score the LoavesCarefully transfer a proofed loaf onto a piece of parchment. Using a razor blade or lame, score down the center with a single, confident slash about 1/2 inch deep.Look for The score opens slightly and reveals the moist, aerated dough beneath.Tip Score at a slight angle to create a beautiful 'ear'.
- Bake with SteamPlace the scored loaf into the preheated Dutch oven or onto the baking stone. Cover with the lid or add 1 cup of hot water to the steam pan. Bake at 450°F (230°C) for 20 minutes with steam, then remove the lid or steam pan and bake for 10 to 15 minutes more, until deep golden brown.Look for The crust is deeply browned and blistered, and the loaf sounds hollow when tapped.Tip Steam in the first minutes creates a blistered, crackly crust.
The shaped loaves should hold their shape without spreading. When you poke the dough, it should spring back slowly, leaving a slight indentation. The surface should be smooth and taut. After scoring, the slash should open slightly, revealing the moist, aerated dough beneath. The loaves are ready to bake when they look puffy and feel light.
Bake and Cool
- Cool CompletelyTransfer the baked loaves to a wire rack. Let them cool completely before slicing, at least 1 hour. This allows the crumb to set and prevents a gummy texture.Look for The loaves are cool to the touch and the crust crackles when pressed.Tip Do not slice warm bread—it will compress the crumb.
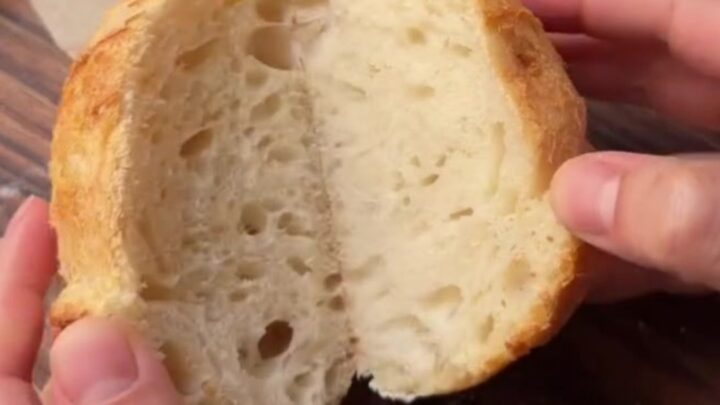
- Slice and ServeUsing a serrated knife, slice the loaves with a gentle sawing motion. Enjoy the crusty crackle and the custardy, open crumb.Look for The crumb is open and glossy with a tender, moist texture.Tip A serrated knife is essential for clean slices without crushing.
The loaves are done when they are deeply browned and the crust is blistered. They should sound hollow when tapped on the bottom. The internal temperature should be at least 200°F (93°C). After cooling, the crust should crackle when pressed, and the crumb should be open and glossy with a tender, moist texture.
Common mistakes
One common mistake is under-proofing the dough. If the loaves don't spring in the oven, they are likely under-proofed. The dough should be puffy and have visible bubbles. Over-proofing causes the loaves to spread flat and lose structure.
Another mistake is skipping the stretch-and-fold series—this develops the gluten needed for a tall rise. Also, don't use too much flour when shaping; it creates dry pockets in the crumb. Finally, always preheat your baking vessel thoroughly.
How to tell it’s done
The loaves are done when they are deeply browned, with blistered and crackly crust. An instant-read thermometer inserted into the center should register at least 200°F (93°C).
The loaves will sound hollow when tapped on the bottom. Let them cool completely before slicing—this allows the crumb to set and prevents a gummy texture. The crust should crackle audibly when you press it.
Up next · Part 3 of 3
4 variations · storage & make-ahead · 5 answers · printable card
Tips, FAQ & printable recipe (Part 3)← Back to the ingredients (Part 1)