Desserts · Part 2 of 3: Instructions
Crispy Turkish Walnut Baklava with Lemon Syrup Step-by-step instructions
- Prep
- Cook
- Total
- Serves
- 12
Before you start
Before you begin, ensure you have all the ingredients measured and ready. The phyllo dough must be thawed if frozen, following the package instructions. Clarified butter should be melted and kept warm but not hot. The walnuts should be roasted and finely chopped.
Prepare the syrup in advance and let it cool completely. Have your baking pan, pastry brush, and sharp knife within reach. Cover the phyllo with a damp towel to keep it from drying out as you work. Preheat the oven to 340°F (170°C) so it is ready when you are.
Ingredients at a glance (6)
- 30 sheets paper-thin phyllo dough
- 1 1/2 cups clarified butter (sade yağ)
- 2 1/2 cups finely chopped roasted walnuts
- 2 cups granulated sugar
- 1 cup water
- 2 tbsp fresh lemon juice
Instructions
Building the Layers
- Prepare Syrup and OvenIn a small saucepan, combine the granulated sugar, water, and fresh lemon juice. Bring to a boil over medium heat, stirring until the sugar dissolves. Reduce the heat and simmer gently for 8–10 minutes until slightly thickened. Remove from heat and let cool completely to room temperature. Meanwhile, heat the oven to 340°F (170°C).Look for The syrup should be clear and slightly syrupy, not caramelized.Tip Cooling the syrup completely is crucial—hot syrup on hot baklava makes it soggy.
- Butter the Pan and PhylloBrush the bottom and sides of a 12-inch round baking pan with some of the clarified butter. Lay one sheet of phyllo in the pan, letting the edges come up the sides. Brush the entire sheet with more clarified butter. Repeat with 14 more sheets, brushing each one generously, for a total of 15 buttered phyllo layers.Look for Each sheet should be evenly coated but not dripping; the stack should look uniform.Tip Keep unused phyllo covered with a damp towel to prevent drying out.
- Add Walnut LayerSprinkle the finely chopped roasted walnuts evenly over the buttered phyllo, spreading them in an even, thick layer that covers the entire surface. Press gently so the nuts adhere to the butter.Look for The walnuts should form a continuous, even layer without bare spots.Tip Chop the walnuts finely but not to a powder—small pieces give the best texture.
- Top with Remaining PhylloPlace another sheet of phyllo over the walnuts and brush with clarified butter. Repeat with the remaining 14 sheets, brushing each one with butter, to create a total of 15 top layers. Brush the top sheet generously with butter.Look for The top should look smooth and evenly buttered, with no dry spots.Tip Don't press down too hard—you want the layers to stay separate for flakiness.
At the end of this phase, you should have a neat stack of 15 buttered phyllo sheets, a thick layer of walnuts, and 15 more buttered phyllo sheets on top. The top should look smooth and evenly buttered, with no dry spots.
The walnuts should be evenly distributed, and the edges of the phyllo should be tucked in. The butter should be absorbed into the layers, but the top sheet should still feel slightly glossy. This is the foundation for the flaky texture to come.
Cutting and Baking
- Cut Diamond ShapesUsing a sharp chef's knife, cut the baklava into traditional diamond shapes: make diagonal cuts one way, then diagonal cuts the other way, creating a grid. Cut all the way through to the bottom of the pan. Pour any remaining clarified butter evenly over the cuts, making sure it seeps into the lines.Look for The cuts should be clean and go all the way to the bottom; the butter pools in the crevices.Tip Wipe the knife between cuts for cleaner edges.
- Bake the BaklavaPlace the pan on a baking sheet to catch any butter overflow. Bake at 340°F (170°C) for 50 minutes, until the top is deep golden amber and the layers are visibly crisp and flaky. The butter should be bubbling around the edges.Look for The baklava should be uniformly golden brown, with the edges slightly darker.Tip Rotate the pan halfway through baking for even browning.
After cutting, the diamond shapes should be clearly defined, and the butter should pool in the cut lines. As it bakes, the aroma of butter and nuts will fill the kitchen. The top will gradually turn golden, and the edges will become crisp. By the end of the 50 minutes, the entire surface should be a deep amber, and the layers should look visibly separated and flaky. The butter should be bubbling around the edges, and the pan will feel hot to the touch.
Syrup Soak and Rest
- Pour Cooled Syrup over Hot BaklavaRemove the baklava from the oven and immediately pour the cooled lemon syrup evenly over the entire surface, focusing on the cut lines. Listen for the sizzle as the syrup hits the hot pastry. Let the baklava absorb the syrup completely.Look for The syrup should bubble and sizzle, and the baklava should look glossy.Tip Pour slowly and evenly, letting the syrup soak in before adding more.
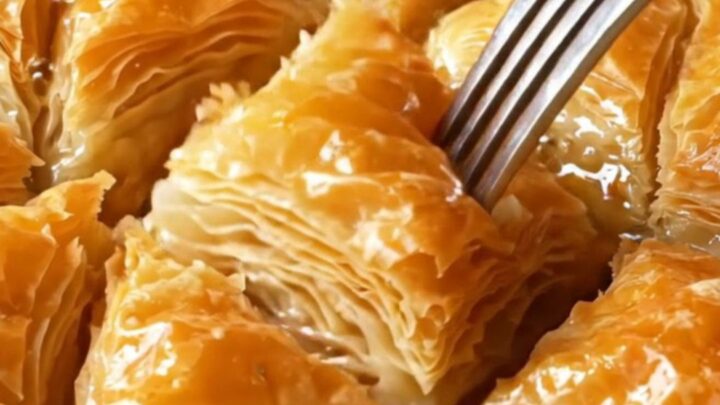
- Rest and ServeLet the baklava rest at room temperature for at least 2 hours, allowing the layers to absorb the syrup and set. Use a fork to lift a piece—it should shatter with a crisp crunch. Serve at room temperature.Look for The top should be crisp, the interior moist but not soggy, and the syrup fully absorbed.Tip For the best texture, wait at least 4 hours before serving.
The moment you pour the syrup, you should hear a satisfying sizzle and see the syrup bubble as it hits the hot pastry. The baklava will look glossy and wet, but as it rests, the syrup will be absorbed. After 2 hours, the top should be crisp, and when you lift a piece, it should shatter. The interior should be moist but not soggy, and the layers should separate cleanly. The lemon aroma should be present but not overpowering.
Common mistakes
One common mistake is using hot syrup on hot baklava, which makes the pastry soggy. Always cool the syrup completely. Another pitfall is not brushing enough butter between layers, leading to dry, tough phyllo. Be generous with the butter.
Cutting the baklava before baking is essential, but if the knife is dull, it can tear the layers. Use a very sharp knife and wipe it clean between cuts. Finally, do not skip the resting time—this allows the syrup to distribute evenly and the layers to set, ensuring the perfect texture.
How to tell it’s done
The baklava is done when the top is a deep golden amber color and the layers look visibly crisp and flaky. The edges may be slightly darker, and the butter should be bubbling around the sides. When you gently press the top, it should feel firm and crisp, not soft or doughy.
After pouring the syrup, let it rest for at least 2 hours. When you lift a piece with a fork, it should shatter with a crisp crunch, revealing distinct layers that are moist but not soggy. The syrup should be fully absorbed, and the piece should hold its shape.
Up next · Part 3 of 3
4 variations · storage & make-ahead · 5 answers · printable card
Tips, FAQ & printable recipe (Part 3)← Back to the ingredients (Part 1)