Desserts · Part 1 of 3: Ingredients
Crispy Turkish Walnut Baklava with Lemon Syrup
- Prep
- Cook
- Total
- Serves
- 12
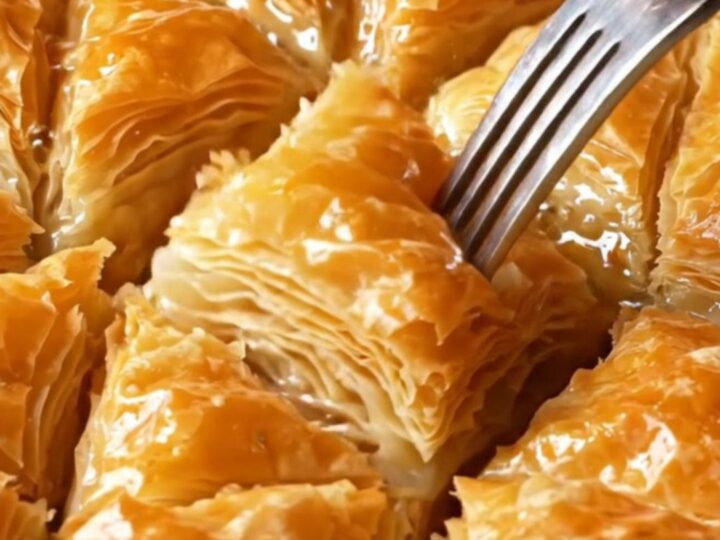
There is nothing quite like the shattering crunch of homemade Turkish baklava, with its paper-thin layers of phyllo, toasted walnuts, and clarified butter, all soaked in a lemon-scented syrup. This recipe captures that authentic experience, guiding you through each step with precision.
The result is a dessert that is both elegant and deeply satisfying, perfect for special occasions or a weekend baking project. Every bite offers a symphony of textures—crisp, flaky, and tender—with a sweetness that is balanced by the bright citrus note.
Baklava is a beloved pastry across the Middle East and the Mediterranean, and this Turkish version, known as Cevizli Ev Baklavası, highlights the rich flavor of walnuts and the purity of clarified butter. The key to its irresistible texture lies in the contrast between hot, crisp pastry and cool, fragrant syrup.
This recipe walks you through the traditional method, from layering the delicate phyllo to cutting the signature diamond shapes. With careful attention to detail, you can create a dessert that is not only beautiful but also deeply flavorful. The process is rewarding, and the aroma that fills your kitchen is simply intoxicating.
Ingredients
- 30 sheets paper-thin phyllo dough
- 1 1/2 cups clarified butter (sade yağ)
- 2 1/2 cups finely chopped roasted walnuts
- 2 cups granulated sugar
- 1 cup water
- 2 tbsp fresh lemon juice
Why this recipe works
The method of pouring cooled syrup over hot baklava is the cornerstone of this recipe. This temperature contrast ensures that the pastry remains crisp and shatters when you bite into it, while the syrup is absorbed just enough to sweeten and moisten the layers without making them soggy.
The clarified butter, or sade yağ, is essential because it has a higher smoke point than regular butter, allowing the phyllo to bake to a deep golden brown without burning. Its pure, nutty flavor also complements the walnuts beautifully, creating a rich and aromatic base.
Layering the phyllo with butter between each sheet is what creates those forty distinct, flaky layers. The butter not only adds flavor but also separates the sheets, allowing steam to escape during baking and producing that characteristic airy crispness.
Roasting the walnuts before chopping enhances their natural oils and deepens their flavor, adding a toasty note that pairs perfectly with the sweet syrup. The lemon juice in the syrup brightens the overall taste, cutting through the richness and preventing the dessert from becoming cloying.
Notes and substitutions
When selecting phyllo dough, look for sheets that are labeled 'paper-thin' or 'extra-thin' for the most authentic texture. If you cannot find it, regular phyllo will work, but the layers will be slightly thicker. Clarified butter can be purchased or made at home by melting unsalted butter and skimming off the milk solids. Ghee is a good substitute, though it has a slightly nuttier flavor. The walnuts should be roasted and finely chopped—not ground—to provide a pleasant crunch in every bite.
The syrup is a simple combination of sugar, water, and lemon juice. The lemon juice is not just for flavor; it also helps prevent the sugar from crystallizing. Be sure to cool the syrup completely before using it, as this is crucial for achieving the desired crispness. If you prefer a more floral note, you can add a small piece of lemon peel to the syrup while it simmers, but remove it before pouring. The baking pan should be round and deep enough to hold the phyllo layers without overflowing.
- clarified butter: unsalted butter, melted and skimmed (or ghee) for a similar rich flavor
- roasted walnuts: raw walnuts, toasted in a dry skillet for 3-4 minutes until fragrant
- granulated sugar: honey (use 1 1/2 cups honey and reduce water to 1/2 cup) for a floral sweetness
Equipment
- Round baking pan (12-inch)
- Pastry brush
- Sharp chef's knife
- Small saucepan
- Measuring cups and spoons
- Wire rack
- Clean kitchen towel
Up next · Part 2 of 3
8 steps · 50 min of cooking · what to look for at each stage
Step-by-step instructions (Part 2)