Desserts · Part 2 of 3: Instructions
Crispy Pistachio Katmer: Quick Turkish Filo Pastry Step-by-step instructions
- Prep
- Cook
- Total
- Serves
- 4
Before you start
Before starting, make sure the filo dough is fully thawed if using frozen phyllo. Place it in the refrigerator overnight, then let it sit at room temperature for 30 minutes before use.
Preheat the oven to 425°F (220°C) and line a baking sheet with parchment paper. Measure out all ingredients, and have the melted clarified butter ready in a small bowl. Set up a clean work surface with enough space to lay out the filo sheets without crowding.
Ingredients at a glance (6)
- 4 sheets paper-thin Turkish baklava yufka (or phyllo dough)
- 150 g clotted cream (kaymak or mascarpone)
- 100 g finely ground vibrant green Antep pistachios
- 50 g granulated sugar
- 40 g clarified butter, melted
- Crushed pistachios for garnish, to taste
Instructions
Assembly and Filling
- Prepare the Filling and OvenPreheat the oven to 425°F (220°C). Line a baking sheet with parchment paper. In a small bowl, mix the finely ground pistachios with the granulated sugar until evenly combined. Set aside. Gently unfold the filo sheets on a clean work surface and cover with a slightly damp towel to prevent drying.Look for The pistachio-sugar mixture looks uniform and vibrant green.Tip Keep the filo covered while working to avoid brittle edges.
- Layer and Brush the FiloPlace one sheet of filo on the prepared baking sheet. Brush the entire surface with melted clarified butter. Repeat with the remaining three sheets, brushing each layer generously. Make sure the edges are well coated so they crisp up evenly.Look for The filo looks translucent and evenly buttered.Tip Use a light hand to avoid tearing the delicate sheets.
- Add the Clotted CreamSpoon the clotted cream (kaymak or mascarpone) into the center of the buttered filo, forming a rough square about 4 inches wide. Leave a border of at least 2 inches on all sides so the pastry can be folded over the filling.Look for The cream is thick and holds its shape in the center.Tip If using mascarpone, let it soften slightly for easier spreading.
- Sprinkle the Pistachio MixtureEvenly shower the pistachio-sugar mixture over the clotted cream, covering it completely. Press lightly so the nuts adhere to the cream. Reserve a small amount of the mixture for garnishing the finished pastry.Look for The cream is fully covered with a thick layer of green pistachios.Tip Reserve about 2 tablespoons for the final garnish.
At the end of this phase, you should have a neat square envelope of filo, generously buttered on all sides, with the filling completely enclosed. The pastry should look translucent and pliable, and the edges should be well sealed. If any filling is exposed, fold the edges over to cover it. The baking sheet should be ready to go into the oven.
Baking to Golden Perfection
- Fold into a Square EnvelopeFold the four edges of the filo over the filling, one at a time, to form a neat square envelope. Tuck in the corners gently to seal. Brush the top and sides of the folded pastry with more melted clarified butter.Look for The pastry forms a tidy square with no filling exposed.Tip Work quickly to keep the filo pliable; if it cracks, press it back together.
- Bake Until Golden and CrispPlace the baking sheet in the preheated oven and bake for 8 minutes, until the pastry is puffed, deeply golden, and blistering in spots. Rotate the sheet halfway through for even browning. The filling should be hot and the pastry shatteringly crisp.Look for The katmer is golden brown and visibly crisp around the edges.Tip Watch closely during the last 2 minutes to prevent over-browning.
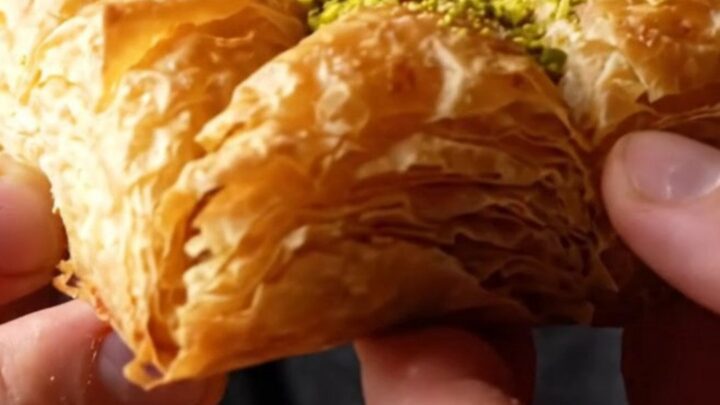
After 8 minutes, the katmer should be puffed, deeply golden, and blistering in spots. The kitchen will smell of toasted butter and nuts. The pastry should feel crisp to the touch, and the filling should be hot and bubbling gently. If the top is browning too quickly, tent loosely with foil and continue baking until the pastry is fully crisp.
Garnish and Serving
- Garnish and SliceRemove the katmer from the oven and immediately dust the top heavily with the reserved crushed pistachios. Allow it to cool for 2 minutes, then slice into four triangles using a pizza wheel or a sharp knife. The filling will be molten and the pastry will crackle as you cut.Look for The top is covered with bright green pistachios and the pastry crackles when sliced.Tip Use a pizza wheel for clean, crisp cuts without crushing the layers.
- Serve WarmServe the katmer warm, while the clotted cream is still melting and the pastry is at its crispiest. Enjoy the contrast of hot, creamy filling and crunchy, buttery layers with the fragrant pistachios in every bite.Look for The filling is warm and creamy, the pastry crisp and golden.Tip Pair with Turkish tea or coffee for an authentic experience.
Once garnished and sliced, the katmer should crackle as you cut, revealing the molten cream and bright green pistachios. The filling should be warm and creamy, not runny, and the pastry should hold its shape.
Serve immediately for the best texture contrast. The slices should be neat triangles with visible layers of filo and a generous pistachio topping.
Common mistakes
One common mistake is overloading the filling, which can cause the pastry to tear or become soggy. Stick to the recommended amount of clotted cream and pistachios. Another pitfall is skipping the butter between layers—this is essential for the crisp, flaky texture.
Also, avoid opening the oven door too often during baking, as this can cause the pastry to deflate. Finally, let the katmer cool briefly before slicing; cutting too soon may cause the filling to spill out.
How to tell it’s done
The katmer is done when the pastry is deeply golden brown, puffed, and visibly crisp around the edges. The top should have a few darker blister spots, indicating even browning.
The filling will be hot and molten, so let the pastry rest for 2 minutes before slicing to allow it to set slightly. If the pastry is not yet golden after 8 minutes, continue baking in 1-minute increments, watching closely to avoid over-browning.
Up next · Part 3 of 3
4 variations · storage & make-ahead · 5 answers · printable card
Tips, FAQ & printable recipe (Part 3)← Back to the ingredients (Part 1)