Desserts · Part 2 of 3: Instructions
Crispy Gianduja and Kataifi Chocolate Bars Step-by-step instructions
- Prep
- Cook
- Total
- Serves
- 6
Before you start
Before beginning, ensure that your workspace is cool and free from humidity, as moisture is the enemy of tempered chocolate. Gather all ingredients and measure them precisely. Have your chocolate molds ready on a level surface.
It is helpful to have a clean, dry offset spatula available for smoothing the backs of the bars. If the kataifi is not already toasted, toast it in a dry pan over low heat until it reaches a deep golden color and allow it to cool completely before mixing, as warm ingredients will melt the chocolate prematurely.
Ingredients at a glance (5)
- 2 cups golden toasted kataifi shards
- 1 cup roasted hazelnut praline paste
- 1/2 cup hazelnut chocolate spread
- 1/4 cup crushed toasted Piedmont hazelnuts
- 16 oz 38% milk chocolate, tempered
Instructions
Preparing the Filling
- Prepare the Gianduja FillingIn a large mixing bowl, combine the golden toasted kataifi shards, roasted hazelnut praline paste, hazelnut chocolate spread, and crushed toasted Piedmont hazelnuts. Fold the ingredients together gently using a spatula until the mixture is uniform and the kataifi is well coated in the nut pastes. Ensure the kataifi maintains some of its structural integrity for the best final texture.Look for The mixture should look thick, glossy, and evenly combined.Tip Use a light hand when mixing to avoid breaking the delicate kataifi strands too much.
The filling is ready when the kataifi is thoroughly coated in the hazelnut praline and chocolate spread. The mixture should be thick and heavy, with a uniform, glossy appearance that holds its shape when spooned into the mold. Ensure the hazelnuts are evenly distributed throughout the mixture for consistent texture in every bite.
Molding the Chocolate
- Temper and Mold the ChocolateGently melt the milk chocolate over a double boiler until it reaches 86 degrees Fahrenheit (30 degrees Celsius). Pour a thin layer of the tempered chocolate into the cavities of the chocolate bar molds, tilting the molds to coat the sides completely. Spoon the thick Gianduja kataifi mixture into the center of each cavity, leaving a small gap at the top to seal with the remaining chocolate.Look for The chocolate should be smooth and pourable at the specified temperature.Tip Tap the molds firmly against the counter to remove any air bubbles trapped in the chocolate.
The chocolate is properly molded when it forms a thin, even shell along the bottom and sides of the cavity. It should be smooth and free of large air bubbles. The Gianduja mixture should be packed neatly into the center, leaving enough room for the final layer of chocolate to seal the bar completely.
Setting and Unmolding
- Seal and RefrigeratePour the remaining tempered chocolate over the filling to cap the bars, smoothing the surface with an offset spatula. Transfer the molds to the refrigerator and allow the bars to set for exactly twenty-five minutes. Once fully set, carefully unmold the bars and serve at room temperature to enjoy the contrast between the crisp shell and the creamy hazelnut interior.Look for The bars should be firm to the touch and release easily from the molds.Tip Ensure the bars are completely set before attempting to remove them to maintain a clean finish.
The bars are ready when they have spent twenty-five minutes in the refrigerator and feel completely solid. They should release effortlessly from the mold when inverted.
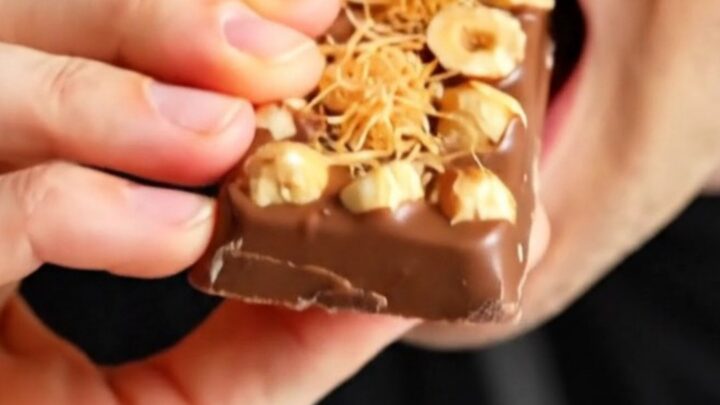
The finished bars should have a glossy sheen and a clean, sharp edge, indicating the chocolate was tempered correctly and handled with care during the setting process.
Common mistakes
A common mistake is overheating the chocolate during the tempering process, which can cause it to lose its temper and become difficult to work with. If the chocolate becomes too thick or develops streaks, it may be out of temper.
Another frequent error is failing to tap the molds after filling, which leaves air pockets that compromise the appearance and texture. Finally, rushing the refrigeration time can lead to bars that are soft and difficult to unmold cleanly, resulting in broken edges or uneven surfaces.
How to tell it’s done
The bars are done when the chocolate is fully set, firm to the touch, and has contracted slightly from the edges of the mold. The surface should be uniform, glossy, and free of white streaks or dull spots.
When unmolded, the bars should feel solid and break with a clear, audible snap. There is no protein to cook, so no internal temperature is required for safety; simply rely on the visual and tactile cues of the chocolate's set and the crispness of the filling.
Up next · Part 3 of 3
2 variations · storage & make-ahead · 3 answers · printable card
Tips, FAQ & printable recipe (Part 3)← Back to the ingredients (Part 1)