Desserts · Part 1 of 3: Ingredients
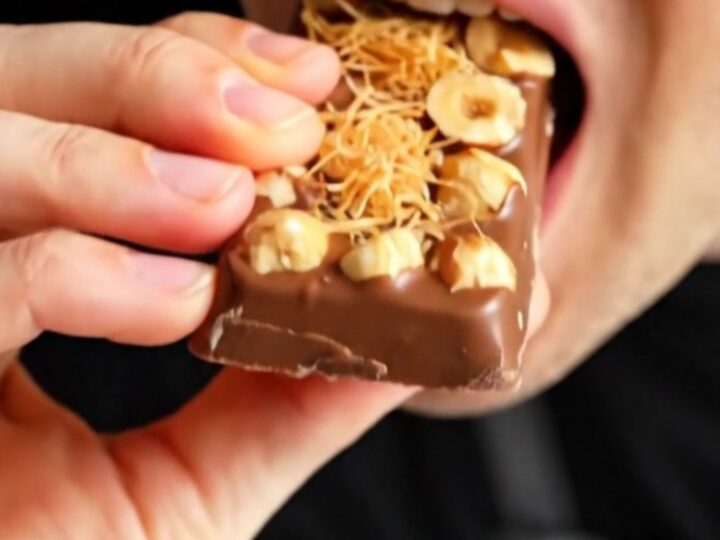
Crispy Gianduja and Kataifi Chocolate Bars
- Prep
- Cook
- Total
- Serves
- 6
Elevate your home confectionery game with these decadent chocolate bars. By combining the rich, nutty profile of traditional Gianduja with the surprising crunch of golden kataifi, this recipe delivers a sophisticated sensory experience that rivals the finest artisanal chocolates. Prepare to impress with a treat that perfectly balances smooth, creamy textures with an explosive, satisfying snap in every single bite.
These homemade chocolate bars are a masterclass in texture and flavor balance. The foundation of the recipe is a high-quality milk chocolate shell, tempered to a perfect, glossy finish. Inside, a dense and luxurious mixture of roasted hazelnut praline and hazelnut chocolate spread provides a rich, buttery base.
The inclusion of toasted kataifi—a shredded phyllo dough pastry—introduces a unique, airy crunch that cuts through the richness of the nuts and chocolate. This combination creates a complex profile that is both comforting and exciting, making it an ideal project for those looking to explore the art of chocolate molding at home.
Ingredients
Filling
- 2 cups golden toasted kataifi shards
- 1 cup roasted hazelnut praline paste
- 1/2 cup hazelnut chocolate spread
- 1/4 cup crushed toasted Piedmont hazelnuts
Shell
- 16 oz 38% milk chocolate, tempered
Why this recipe works
The method of tempering the chocolate is essential for achieving that professional, snappy finish and glossy appearance. By bringing the milk chocolate to exactly 86 degrees Fahrenheit (30 degrees Celsius), the cocoa butter crystals are stabilized, ensuring the final bar remains firm at room temperature and possesses the characteristic 'snap' when broken.
This technique prevents the chocolate from becoming dull or grainy, providing a smooth mouthfeel that enhances the flavor of the cocoa.
Incorporating the kataifi into the hazelnut paste creates a structural contrast that elevates the eating experience. Because kataifi is inherently crisp, it provides a long-lasting crunch that does not soften quickly when combined with the nut butter. This layering technique allows the creamy praline to coat the palate while the kataifi provides a distinct textural break, ensuring that each bite remains interesting and balanced from start to finish without becoming overly dense or cloying.
Notes and substitutions
Choosing the right quality of chocolate is paramount for this recipe. Since the chocolate shell makes up a significant portion of the bar, select a milk chocolate with at least 38% cocoa solids to ensure a deep, balanced flavor that is not overly sweet.
If using store-bought praline paste, look for a product that contains only roasted hazelnuts and sugar for the most authentic flavor profile. High-quality ingredients ensure that the final result remains smooth and luxurious rather than waxy.
When it comes to equipment, using professional-grade polycarbonate chocolate molds will provide the best results, as they offer the necessary rigidity for a clean release. However, silicone molds can be used if handled with care.
Always ensure the molds are completely clean and free of moisture before beginning, as even a small amount of water can cause the chocolate to seize. If tempering seems daunting, take your time and use a reliable digital thermometer to monitor the temperature continuously throughout the process.
- 38% milk chocolate: Dark chocolate with at least 50% cocoa solids
- Piedmont hazelnuts: Any high-quality roasted hazelnuts
Equipment
- Chocolate bar molds
- Mixing bowl
- Spatula
- Double boiler
- Thermometer
Up next · Part 2 of 3
3 steps · 10 min of cooking · what to look for at each stage
Step-by-step instructions (Part 2)