Dinner · Part 2 of 3: Instructions
Crispy Chicken Alfredo Wrap with Garlic Parmesan Cream Step-by-step instructions
- Prep
- Cook
- Total
- Serves
- 4
Before you start
Before starting, gather all ingredients and measure them out. Slice the chicken breast into thin, even strips. Mince the garlic cloves. Grate the parmesan cheese if using a block. Set the seasonings and avocado oil nearby.
Have a large skillet and a medium saucepan ready. The prep takes about 10 minutes, and the cooking process moves quickly, so having everything within reach makes the process smoother.
Ingredients at a glance (13)
- 2 lb boneless, skinless chicken breast, sliced
- 1 tsp garlic powder
- 1 tsp onion powder
- 1 tsp smoked paprika
- 1 tsp salt
- 2 tbsp avocado oil, divided
- 2 tbsp butter
- 1 cup heavy whipping cream
- 3 cloves garlic, minced
- 1/2 cup grated parmesan cheese
- 4 large flour tortillas
- 1 cup shredded mozzarella cheese
- 2 tbsp butter, for toasting
Instructions
Sear and Simmer
- Season and Sear the ChickenIn a small bowl, mix the garlic powder, onion powder, smoked paprika, and salt. Sprinkle the seasoning over the sliced chicken breast and toss to coat evenly. Heat 1 tablespoon of the avocado oil in a large skillet over medium-high heat. Add the chicken in a single layer and cook without stirring for 2-3 minutes until browned, then flip and cook the other side until the chicken is cooked through and reaches 165°F (74°C). Transfer the chicken to a plate and set aside.Look for The chicken is golden brown on the outside and no longer pink in the center.Safe temperature 165°F (74°C) internal temperature (poultry)Tip Don't overcrowd the pan; cook in batches if needed for better browning.
- Make the Garlic Parmesan CreamIn the same skillet, reduce the heat to medium. Add the butter and let it melt. Add the minced garlic and cook for about 30 seconds until fragrant. Pour in the heavy whipping cream and bring to a gentle simmer. Stir in the grated parmesan cheese and continue to whisk until the sauce thickens and becomes velvety, about 2-3 minutes. Season with a pinch of salt if needed. Remove from heat and set aside.Look for The sauce coats the back of a spoon and has a smooth, glossy texture.Tip Keep the heat moderate to avoid curdling the cream.
At the end of this phase, the chicken is golden brown and cooked through, and the garlic parmesan cream is thick and velvety. The kitchen smells of butter, garlic, and parmesan.
The sauce should coat the back of a spoon and have a glossy sheen. The chicken pieces are evenly coated with the sauce and look juicy.
Assemble and Roll
- Combine Chicken and SauceAdd the cooked chicken back to the skillet with the garlic parmesan cream. Stir to coat every piece of chicken with the sauce. Let it warm through for a minute. The mixture should be thick and creamy, not runny. If it seems too thin, let it simmer for another minute to reduce slightly. Turn off the heat and allow the mixture to cool for a couple of minutes so it's easier to handle when filling the tortillas.Look for The chicken is fully coated and the sauce is thick enough to hold its shape.Tip Letting the filling cool slightly prevents the tortillas from becoming soggy.
- Assemble the WrapsLay a flour tortilla on a clean work surface. Spoon about one-quarter of the chicken Alfredo mixture onto the center of the tortilla. Sprinkle with a generous amount of shredded mozzarella cheese. Fold the sides of the tortilla over the filling, then roll it up tightly from the bottom to form a secure wrap. Repeat with the remaining tortillas and filling.Look for Each wrap is snug and the filling is completely enclosed.Tip Use a light hand when filling to avoid overstuffing.
The tortillas are soft and pliable, filled with the creamy chicken mixture and topped with mozzarella. Each wrap is snugly rolled, with the ends tucked in to prevent leaking. The filling is evenly distributed, and the wraps feel sturdy. The edges are sealed and ready for toasting.
Toast to Crisp
- Toast the Wraps Until GoldenHeat a large skillet over medium heat and add the remaining 1 tablespoon of avocado oil. Place the wraps seam-side down in the skillet. Cook for 2 minutes per side, or until golden brown and crispy. If your skillet is small, work in batches. Add the butter for toasting to the skillet as needed, letting it melt and coat the wraps as they cook.Look for The tortillas are golden brown with a crispy, crackly texture.Tip Press gently with a spatula to ensure even browning.
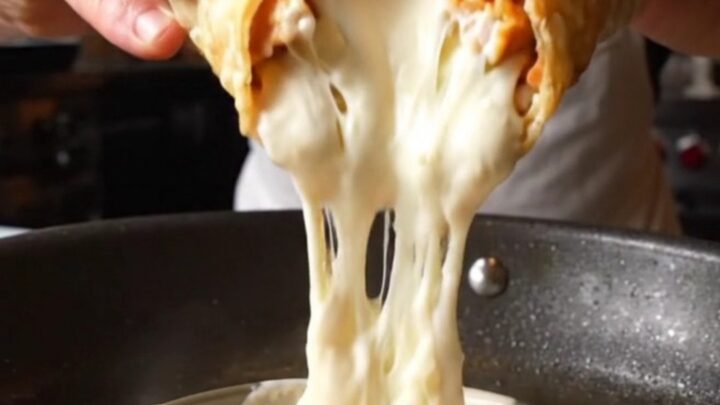
- Serve with Extra SauceSlice the crispy wraps in half if desired. Serve immediately with extra garlic parmesan cream on the side for dipping. The wraps are best enjoyed right away while the exterior is crunchy and the inside is molten and cheesy.Look for The cheese is melted and the wrap is crisp on the outside.Tip Let the wraps rest for a minute before cutting to keep the filling intact.
The wraps are golden brown and crispy on both sides, with a shatteringly crisp exterior. When cut, the cheese is melted and stretchy, and the filling is hot and creamy. The sound of the crunch is audible, and the aroma of toasted tortillas and garlic fills the kitchen.
Common mistakes
One common mistake is overcrowding the skillet when cooking the chicken, which causes it to steam instead of brown. Cook in batches if needed. Another issue is making the sauce too thin; let it simmer longer to reduce and thicken.
Overfilling the tortillas can cause them to burst or become soggy. Use a moderate amount of filling and roll tightly. Finally, do not skip toasting the wraps—this step creates the essential crispy texture.
How to tell it’s done
The chicken is fully cooked when it reaches an internal temperature of 165°F (74°C) and is no longer pink in the center. The sauce is done when it has thickened and coats the back of a spoon.
The wraps are ready when the tortillas are golden brown and crispy on both sides, and the cheese is melted and gooey. To test for doneness, cut into a wrap and check that the filling is hot and the chicken is juicy.
- Poultry: 165°F (74°C) in the thickest part
Up next · Part 3 of 3
4 variations · storage & make-ahead · 5 answers · printable card
Tips, FAQ & printable recipe (Part 3)← Back to the ingredients (Part 1)