Desserts · Part 2 of 3: Instructions
Creamy Coconut Pudding — One Saucepan, Twenty Minutes Step-by-step instructions
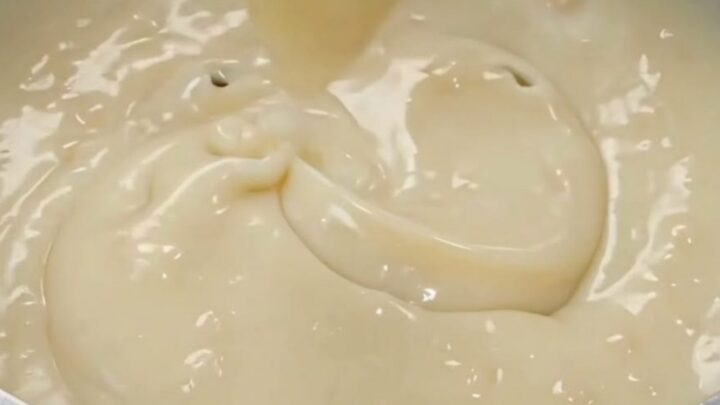
- Prep
- Cook
- Total
- Serves
- 4
Before you start
Set everything out before the pan goes on the heat, because this pudding rewards uninterrupted whisking. Shake both cans of coconut milk and coconut cream thoroughly, then open them and check that the contents pour as one smooth liquid — a stubbornly separated can can be warmed gently and whisked back together.
Measure the sugar, cornstarch and salt into a small bowl and blend them with a fork or small whisk, breaking up any cornstarch clumps now while they are still easy to crush. Measure the vanilla and keep it beside the stove with a teaspoon ready. Set out four small serving bowls and a ladle, and clear a spot on the counter where the hot pan can rest. A trivet and a clean cloth for wiping drips finish the setup.
Ingredients at a glance (6)
- 2 cups full-fat coconut milk, shaken well (dairy-free)
- 1 cup coconut cream, shaken well (dairy-free)
- 1/3 cup granulated sugar
- 1/4 cup cornstarch
- 1/4 tsp fine salt
- 1 tsp vanilla extract
Instructions
Build the cold base
- Blend the dry baseWhisk the cornstarch, granulated sugar and fine salt together in a small bowl until evenly blended. Mixing the dry ingredients first means the starch disperses without lumps later, and the sugar granules keep the cornstarch from clumping when it meets the cold coconut milk in the pan.Look for The blend should look uniform, with no visible white streaks of cornstarch.Tip A small bowl and a fork work fine if the whisk is already in use.
- Combine the coconut milksPour the coconut milk and coconut cream into a medium, heavy-bottomed saucepan. Shake both cans well before opening so the thick cream at the top blends back into the liquid below. Set the pan over medium heat and add the blended dry mix.Look for The surface should look pale ivory and completely smooth before the heat goes on.Tip A heavy bottom keeps the coconut fat from scorching over direct heat.
At the end of the first phase the dry blend should look completely uniform — one pale, even powder with no white streaks of pure cornstarch and no sugar crystals visible at the bowl's edge. The saucepan holds both coconut products, blended into a smooth, pale ivory liquid with no floating chunks of separated cream; if the surface shows small, firm lumps, keep whisking over low heat until they dissolve.
Nothing should be warm yet beyond a faint chill leaving the pan. Check three things before moving on: the dry mix was added to the pan, the whisk reaches every corner without scraping metal, and the heat sits at a true medium, not the high setting that scorches coconut fat in minutes. If all three hold, the hard part is already done.
Thicken to a glossy ribbon
- Whisk as it warmsWhisk the mixture continuously as it warms, scraping the corners and bottom of the pan where starch settles first. Keep the heat at a steady medium — coconut fat separates if the pan gets too hot, and a scorched base flavors the whole batch.Look for Small steam wisps and gentle bubbles at the edges mean the temperature is right.Tip A silicone spatula reaches the corners better than a balloon whisk alone.
- Cook to the ribbon stageKeep whisking until the pudding thickens enough that a lifted whisk leaves a thick ribbon holding its shape for a second before melting back in. This takes about six to eight minutes from the first steam, depending on the pan and the stove.Look for Draw a finger across the back of a coated spoon — the line should hold.Tip If nothing changes after ten minutes, raise the heat slightly and keep whisking.
- Hold the two-minute simmerOnce the ribbon stage is reached, set a timer and simmer gently for two full minutes, whisking the whole time. Cornstarch needs this time past thickening to reach its full set and to lose the raw, chalky taste it carries when undercooked.Look for The pudding should look glossy and pull away from the pan bottom briefly with each pass.Tip Lower the heat a notch if big bubbles start popping on the surface.
- Finish with vanillaRemove the pan from the heat and whisk in the vanilla extract. Off the heat is the right moment — vanilla's aroma fades quickly at a simmer, and adding it here keeps the flavor bright and clean through the last whisk strokes.Look for The pudding should smell sweet and fragrant, with no chalky note at all.Tip Whisk another thirty seconds off the heat so the vanilla spreads evenly.
This is the phase that decides everything, and the checkpoint is the ribbon. Lift the whisk and watch what falls: a finished pudding drops in a thick, slow ribbon that holds its shape on the surface for a beat before melting back in, and a finger drawn across the back of a coated spoon leaves a clean line. The texture should look glossy, not matte, and smell sweetly of coconut with no chalky edge. Steam rises steadily and the surface breaks in slow, fat bubbles rather than a rolling boil — a boil means the heat is too high. After the ribbon appears, the two-minute timed simmer still has to pass; cutting it short leaves a starchy taste that no amount of vanilla can hide. Only then does the pan come off the heat.
Bowl and serve warm
- Ladle into bowlsLadle the warm pudding straight from the pan into small serving bowls, filling them three-quarters full. Work while it is hot — coconut pudding sets quickly as it cools, and a ladle glides through the thick, glossy cream far more easily now than later.Look for Each ladleful should fall in a slow, thick ribbon and mound gently in the bowl.Tip Wipe any drips from the rims with a clean cloth before carrying the bowls.
- Serve warmServe the pudding warm, while steam still rises from each bowl, handing out spoons right away. The texture is at its most velvety in the first ten minutes; any bowls not eaten right away can cool and go into the refrigerator for later.Look for The surface should look shiny and tremble only slightly when the bowl is set down.Tip Warm the bowls briefly in hot water so the pudding stays velvety longer at the table.
The final phase is fast, so the checkpoint is about the bowls, not the pan. Each ladleful should fall in a heavy ribbon and mound softly in the center of the bowl before settling — if it spreads thin and level, the pudding has not finished its set and needs another minute of whisking over low heat. The surface should look shiny and smooth, with a faint steam curl rising as each bowl is filled. Fill the bowls about three-quarters full, wipe any drips from the rims, and get spoons out immediately: the pudding is at its most velvety in the first ten minutes, while it is still warm and pours easily off the spoon. Any bowls destined for the refrigerator should be cooling uncovered on a rack, never stacked.
Common mistakes
Three mistakes account for nearly every failed batch. First, heat that runs too high: coconut fat separates above a gentle simmer, leaving greasy pockets and a dull, broken-looking surface — keep the pan at medium and drop it a notch the moment big bubbles form. Second, stopping the whisk: cornstarch sinks and welds itself to the pan bottom within seconds, and those welded patches turn into lumps that later whisking cannot fully erase.
Third, pulling the pan at the first thickening: without the full two-minute simmer the starch never completes its set, the pudding relaxes as it cools and it carries a raw, chalky flavor. Using beverage-carton coconut milk is a fourth, quieter failure — the pudding simply never thickens, no matter how long it cooks.
How to tell it’s done
The pudding is done when it passes three tests at once. The ribbon test comes first: a whisk lifted from the pan leaves a thick, glossy ribbon that sits on the surface for a second before melting back. The spoon test confirms it — the back of a wooden spoon or spatula should be coated in a smooth, even layer that holds a finger-line.
The time test anchors both: two full minutes of gentle simmering after the ribbon stage, whisking without pause, so the cornstarch reaches its complete set and its clean, non-chalky flavor. Visually, the pudding should be off-white, glossy and thick enough to mound in the bowl; no thin liquid should pool at the edges when the pan is tilted. When all three agree, whisk in the vanilla and serve.
Up next · Part 3 of 3
4 variations · storage & make-ahead · 5 answers · printable card
Tips, FAQ & printable recipe (Part 3)← Back to the ingredients (Part 1)