Dinner · Part 2 of 3: Instructions
Creamy Cheesy Rotel Chicken Spaghetti Casserole Step-by-step instructions
- Prep
- Cook
- Total
- Serves
- 6
Before you start
Before beginning the cooking process, organize all ingredients and equipment to ensure a smooth, efficient workflow. Measure out the chicken broth and have the chicken breasts ready.
Soften the cream cheese at room temperature for about thirty minutes to help it melt quickly and evenly into the warm broth. Lightly grease a 9x13-inch ceramic baking dish with cooking spray and set it aside.
Ingredients at a glance (6)
- 12 oz spaghetti
- 1 1/2 lb boneless skinless chicken breasts
- 1 cup chicken broth
- 8 oz cream cheese, softened
- 10 oz canned diced tomatoes with green chilies
- 2 cups shredded mozzarella cheese
Instructions
Boiling Pasta and Cooking Chicken
- Boil the SpaghettiBring a large pot of water to a rolling boil. Add the spaghetti and cook for eight to nine minutes, or until just al dente. Drain the pasta thoroughly in a colander, but do not rinse it, then set it aside.Look for The pasta should be tender but still have a slight bite in the center.Tip Cooking the pasta to al dente ensures it does not get mushy when baked later.
- Cook the ChickenIn a medium pot, combine the raw chicken breasts and chicken broth. Bring to a simmer over medium heat and cook for fifteen to twenty minutes until the chicken reaches an internal temperature of 165°F (74°C).Look for The chicken must be completely opaque throughout with no pink remaining.Safe temperature 165°F (74°C) internal temperature (poultry)Tip Use an instant-read meat thermometer to ensure accuracy without overcooking and drying out the chicken.
- Shred the ChickenRemove the cooked chicken from the pot and place it on a clean cutting board, reserving the broth in the pot. Use two forks to shred the chicken into bite-sized pieces, then set the shredded meat aside.Look for The chicken should pull apart easily into tender, uniform shreds.Tip Let the chicken rest for five minutes before shredding to keep the juices locked inside.
By the end of this phase, the spaghetti should be cooked to a firm al dente texture and drained well. The chicken breasts should be completely cooked through, opaque, and tender enough to shred easily with two forks. The cooking liquid will smell highly aromatic and rich, serving as the flavorful liquid gold base for your upcoming cream sauce.
Creating the Cream Sauce
- Prepare the Creamy Rotel SauceTurn the heat to low under the pot with the reserved broth. Add the softened cream cheese and whisk continuously until completely melted and smooth. Stir in the canned diced tomatoes with green chilies, including their juices, until fully combined.Look for The sauce should be uniform, creamy, pale orange, and free of any cream cheese lumps.Tip Whisking vigorously helps emulsify the cream cheese into the hot broth quickly.
At this point, the cream cheese should be fully melted and whisked into the broth, creating a smooth, pale orange, and completely lump-free sauce. The diced tomatoes with green chilies should be fully incorporated, adding vibrant red flecks and a pleasant, mild tanginess to the aroma. The sauce should be thick enough to lightly coat the back of a spoon.
Assembling and Broiling the Casserole
- Combine Pasta, Chicken, and SauceAdd the cooked spaghetti and shredded chicken directly into the pot with the warm creamy Rotel sauce. Use tongs or a large spoon to gently toss the ingredients together until every strand of pasta is thoroughly coated.Look for The mixture should look highly moist, creamy, and evenly distributed.Tip Ensure the heat is off during this step to prevent the sauce from reducing too much.
- Assemble and BroilTransfer the pasta mixture into a lightly greased ceramic casserole dish. Spread it into an even layer, then sprinkle the shredded mozzarella cheese uniformly over the top. Place under the oven broiler for three to five minutes until the cheese is melted and bubbling.Look for The cheese top should be bubbling vigorously with gorgeous golden-brown spots.Tip Keep a close eye on the broiler, as cheese can transition from golden to burnt very quickly.
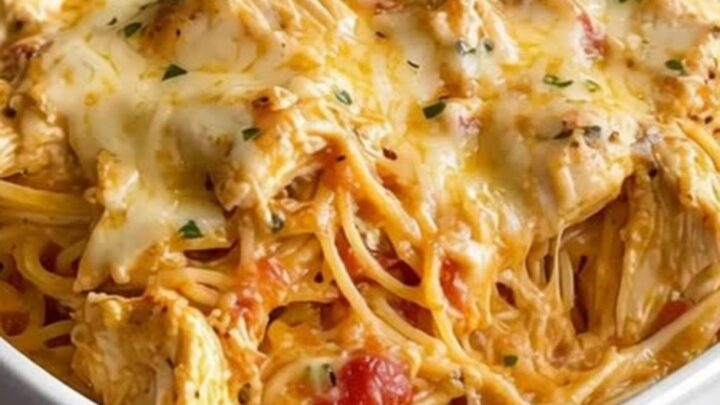
The final step results in a spectacular, bubbling masterpiece. The spaghetti and shredded chicken should be thoroughly coated in the creamy sauce, with no dry pockets of pasta remaining.
Under the broiler, the shredded mozzarella top will transform into a gorgeous, golden-brown blanket that sizzles gently, releasing a rich, savory aroma of toasted cheese that fills the entire kitchen.
Common mistakes
One common mistake is overcooking the spaghetti during the initial boiling phase, which leads to a soft, mushy casserole after baking. Always cook the pasta one to two minutes less than the package instructions suggest for al dente.
Another error is failing to let the cream cheese soften before adding it to the broth, which can result in stubborn white lumps in your sauce that are difficult to whisk out.
How to tell it’s done
The casserole is perfectly done when the mozzarella cheese on top is completely melted, bubbling vigorously around the edges, and develops beautiful golden-brown spots.
Additionally, because raw poultry is used, ensure the chicken is cooked through to a safe internal temperature of 165°F (74°C) using an instant-read thermometer inserted into the thickest part of the breast before shredding and combining it with the pasta.
- Poultry: 165°F (74°C) in the thickest part
Up next · Part 3 of 3
2 variations · storage & make-ahead · 3 answers · printable card
Tips, FAQ & printable recipe (Part 3)← Back to the ingredients (Part 1)