Desserts · Part 2 of 3: Instructions
Creamy Caramel Cheesecake with Graham Crust Step-by-step instructions
- Prep
- Cook
- Total
- Serves
- 12
Before you start
Before mixing anything, set up the kitchen so each phase flows without a scramble. Take the cream cheese, eggs and sour cream out of the refrigerator an hour ahead — softened dairy is the difference between a silky batter and a lumpy one. Position the oven rack in the lower third and heat a full kettle of water; it will be needed for the bath while the oven is already hot.
Ingredients at a glance (9)
- 1 1/2 cups graham cracker crumbs (about 12 full sheets, crushed fine)
- 5 tbsp unsalted butter, melted
- 1/4 cup granulated sugar
- 2 lb cream cheese, softened to room temperature
- 3/4 cup granulated sugar
- 3 large eggs, at room temperature
- 1 cup sour cream, at room temperature
- 1 tsp vanilla extract
- 3/4 cup caramel sauce, store-bought or made ahead
Instructions
Crust and setup
- Heat the oven and wrap the panHeat the oven to 325°F (163°C). Wrap the outside of the springform pan tightly in two layers of heavy-duty aluminum foil, pressing the foil up the sides so no water sneaks in. Set a kettle of water to heat for the bath later.Look for The foil should look smooth and snug, with no open seams at the bottom corner where water could pool.Tip Two crosswise sheets of foil beat one wrapped piece; the double layer is what keeps the crust dry in the water bath.
- Build the graham crustStir the graham cracker crumbs, melted butter and 1/4 cup of sugar together until every crumb looks damp. Press the mixture firmly into the bottom of the pan with the flat bottom of a measuring cup, working it into an even, compact layer.Look for Press until the crumbs no longer shift when the pan tilts; the surface should look like wet sand.Tip Firm pressing is what keeps the crust from crumbling when the scoop lifts a neat portion later.
- Toast the crustBake the crust for 10 minutes, then set it on a rack. Keep the oven at 325°F (163°C). Let the crust cool while the filling is mixed so the heat does not start setting the cream cheese before it goes in the pan.Look for The edges should smell toasty and take on a deeper golden color than the center.Tip A short bake dries the crust just enough to stay crisp under the moist filling.
Phase one ends with the kitchen fully staged and the crust baked. The graham layer should look evenly golden, smell toasty and feel solid when pressed — no sandy patches or loose crumbs at the edges. The foil-wrapped pan should show no gaps where water could enter, the kettle water should be hot and ready, and the oven should be holding steady at 325°F (163°C).
Batter and bake
- Beat the cream cheese baseBeat the softened cream cheese on medium speed for 2 minutes, scraping the bowl twice, until it looks completely smooth. Add the 3/4 cup of sugar and beat 1 minute more. Stop and scrape the beaters and the bottom of the bowl — hidden lumps now mean lumps in every slice.Look for No visible specks should remain when a small smear is rubbed between two fingers.Tip Room-temp cream cheese blends without overbeating, which keeps the batter from whipping in extra air.
- Add the eggs gentlyAdd the eggs one at a time, mixing on low just until the last streak of yolk disappears after each addition. Stir in the vanilla. Low speed and a light hand matter here: too much air baked into the batter rises in the oven and cracks as it cools.Look for The batter should look uniform and glossy, not foamy, with no yellow streaks left.Tip Crack each egg into a small bowl first so a stray shell never finds its way into the filling.
- Fold in the sour creamAdd the sour cream and fold it in on the lowest speed or by hand with the spatula, stopping as soon as the batter looks even. Pour the filling over the cooled crust and smooth the top. Tap the pan once on the counter to release any large air bubbles.Look for The surface should self-level within seconds and show no blobs of white sour cream.Tip Sour cream adds tenderness and that rich, tangy edge that keeps each bite balanced.
- Bake in a water bathSet the springform inside the roasting pan, place both in the oven, then pour the hot kettle water into the roasting pan to reach 1 inch up the sides. Bake 55 to 65 minutes, until the edges are set and the very center reads 160°F (71°C) on an instant-read thermometer.Look for The edges should look matte and set while the center still has a slight shine when the pan is nudged.Safe temperature 160°F (71°C) internal temperature (egg dishes)Tip The water bath tempers the oven heat so the custard cooks evenly and the top stays pale and smooth.
Phase two ends with the cheesecake baked in its water bath. The batter should have poured smoothly over the crust and leveled itself, and the baked cake should show set, matte edges with a center that reads 160°F (71°C) on an instant-read thermometer.
The top should be pale and uncracked, and the water in the roasting pan should still be steaming gently rather than boiling. When the pan is nudged, the filling should move as one unit, not slosh.
Chill, caramelize, serve
- Cool gradually, then chillTurn the oven off, crack the door open and leave the cheesecake inside for 30 minutes. Lift it from the water bath, remove the foil and cool to room temperature, about 1 hour. Then refrigerate at least 4 hours, overnight for the cleanest slices.Look for After chilling, the top should feel firm to a light touch and pull slightly away from the pan sides.Tip A slow cool-down and a full chill are the two moves that prevent a sunken, cracked surface.
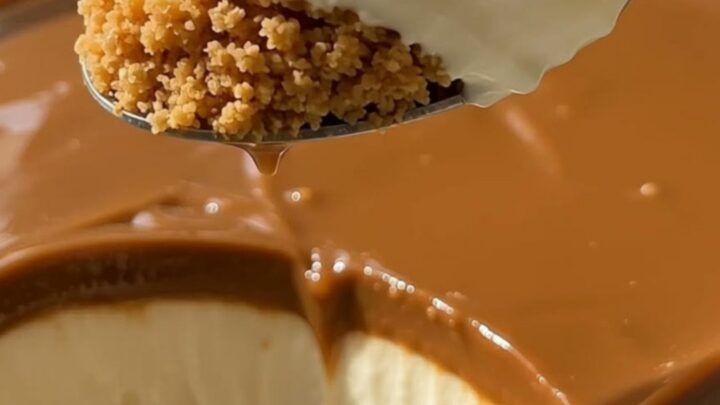
- Unmold and top with caramelRun a thin knife around the inside of the pan, then release the spring and lift off the ring. Warm the caramel sauce briefly until it pours like thick honey, and spread it over the top, letting it drift toward the edges without dripping down the sides.Look for The caramel should sit in a smooth, glossy layer that reflects light, exactly like the topping in the finished slice.Tip Warm caramel spreads in one pass; hot caramel turns thin and runs off the edges.
- Slice and serveWipe a sharp knife with a hot, damp cloth between cuts and slice straight down, lifting each piece out with the blade or a thin spatula. Serve the slices chilled, each one showing the crumbly crust, the creamy white filling and the glossy caramel layer.Look for Each slice should hold a clean edge, with three distinct layers visible from the side.Tip The hot-knife trick gives bakery-clean slices with no dragging through the crust.
Phase three ends with a fully chilled, caramel-topped cheesecake ready to slice. After the slow cool-down and at least four hours in the refrigerator, the top should feel firm to a gentle touch and the cake should have pulled slightly from the pan sides.
The released springform ring should come away without smearing, and the warm caramel should sit in a smooth, glossy layer that stops just short of the edges.
Common mistakes
The most common failures all trace back to heat and air. Overbeating the batter — especially after the eggs go in — whips in air that rises, cracks and sinks; mix on low and stop as soon as everything is combined.
A too-hot oven or a skipped water bath sets the edges fast, shrink-cracks the top and can curdle the outer inch of filling; keep the temperature at 325°F (163°C) and the water an inch deep. Cold cream cheese leaves lumps that never smooth out, so plan the softening time.
How to tell it’s done
A cheesecake is done by temperature and appearance together, not by the clock alone. The edges should look fully set and matte, and the surface should show no wet spots — but the surest sign is an instant-read thermometer in the center reading 160°F (71°C), which means the eggs in the filling are cooked through.
If the center still reads lower, continue baking in 5-minute checks. The top should stay pale cream colored with no browning; if it is taking on color, tent a piece of foil over the pan.
- Egg dishes: 160°F (71°C) in the thickest part
Up next · Part 3 of 3
4 variations · storage & make-ahead · 5 answers · printable card
Tips, FAQ & printable recipe (Part 3)← Back to the ingredients (Part 1)