Dinner · Part 3 of 3: Tips & recipe card
Cheesy Funeral Potatoes with Crispy Cornflake Topping Tips, FAQ & printable recipe

- Prep
- Cook
- Total
- Serves
- 10
Tips for success
Assemble the casserole completely, right up to the cornflake topping, and refrigerate it covered for several hours or overnight before baking. Cold dishes need a few extra minutes in the oven, so watch for the bubbling sauce rather than the 40-minute mark.
For the loudest crunch, add the buttered cornflakes just before baking even when the base is made ahead — flakes that sit on a moist base overnight soften slightly.
Grate the cheddar on the large holes of a box grater for shreds that melt into the sauce instead of disappearing, and save a small handful to sprinkle over the topping before baking for a few browned cheese edges among the cornflakes.
Salt carefully: the condensed soup and cheddar carry real salt already, so season the base lightly, taste a warmed spoonful, and adjust before the dish is assembled.
Variations
- Cracker crust: Replace the cornflakes with 1 1/2 cups of crushed buttery crackers tossed in the same amount of melted salted butter. The crust turns out richer and more savory, slightly less shattering, and browns a few minutes sooner — check the dish at 35 minutes.
- Ham and potato bake: Fold 1 1/2 cups of diced cooked ham into the potato base with the cheddar for a heartier main-dish version. The ham adds salt, so season the sauce lightly at first and taste before assembling. Bake as directed until bubbling.
- Hashbrown casserole with jalapeño: Add 2 tablespoons of finely diced fresh jalapeño and swap half the cheddar for pepper jack. The heat stays gentle and the melty, tangy base balances it. Keep the cornflake topping unchanged so the crunch still carries the dish.
- No-soup version: Replace the condensed soup with 1 cup of a quick homemade sauce: 2 tbsp butter, 2 tbsp flour, 1 cup chicken broth and 1/2 cup milk cooked until thick. Season well, cool slightly, and use it in place of the canned soup.
Storage and make-ahead
- Fridge
- Cover and refrigerate for up to 4 days; the crust softens but re-crisps in a hot oven.
- Freezer
- Freeze the assembled unbaked casserole wrapped in plastic and foil for up to 2 months; thaw overnight in the refrigerator before baking.
- Reheat
- Reheat covered portions in a 350°F (175°C) oven for 15–20 minutes; uncover for the last 5 to re-crisp the topping. Microwave works but softens the crust.
Cool leftovers on the counter for no more than 2 hours, then cover the dish tightly or transfer portions to an airtight container. Refrigerated, the casserole keeps well for 3 to 4 days.
The cornflake crust softens as it sits and absorbs moisture from the sauce underneath — that is unavoidable — but it regains much of its crispness when reheated in the oven or a toaster oven, where dry heat re-toasts the flakes instead of steaming them.
This is a make-ahead classic for good reason. Assemble the entire casserole — base and topping — up to 24 hours ahead, cover tightly, and refrigerate. Bake straight from the refrigerator, adding roughly 10 to 15 minutes to the bake time and relying on the bubbling sauce and golden crust as the real doneness signals.
For longer storage, freeze the fully assembled, unbaked dish wrapped well in plastic and foil for up to 2 months; thaw overnight in the refrigerator before baking as directed.
Serving ideas
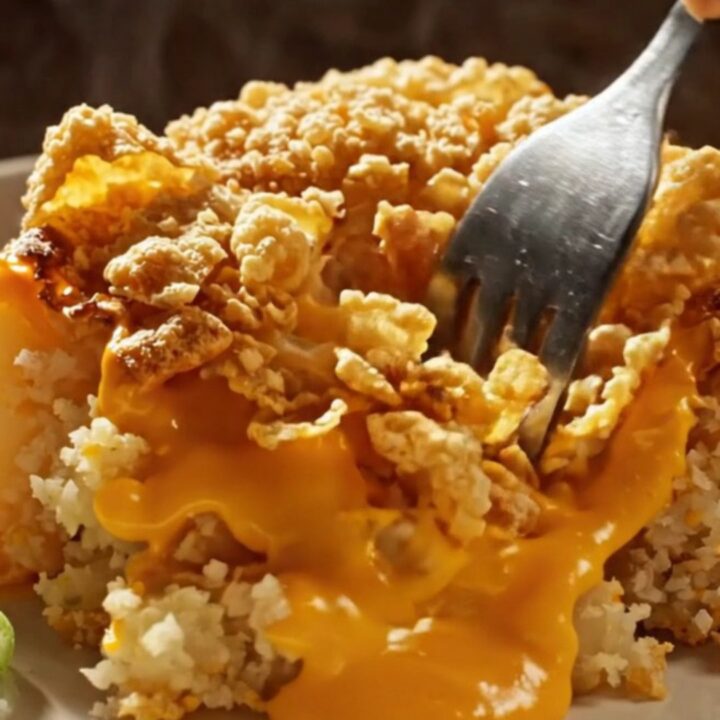
Serve the casserole straight from the baking dish, hot, with a serving spoon that breaks through the cornflake canopy at the table — the crunch is half the experience. A 9x13-inch dish generously serves 10 as a side, or 6 to 8 as a main with a green salad alongside. It is a natural partner for ham, roast chicken or Thanksgiving turkey, and it holds its heat well on a buffet.
For a potluck or holiday spread, pair it with bright, sharp counterpoints: glazed carrots, green beans, a crisp slaw or a tangy cucumber salad cut through the richness beautifully. Leftover portions reheat in a 350°F oven until hot and re-crisped, making the second-day servings nearly as good as the first.
Frequently asked questions
Can this casserole be made ahead of time?
Why are they called funeral potatoes?
Can frozen hashbrowns be used without thawing?
Can this be frozen after baking?
How do the leftovers stay crunchy on top?
Cheesy Funeral Potatoes with Crispy Cornflake Topping
Ingredients
- 2 lb frozen diced hashbrowns, thawed
- 1 cup sour cream
- 1 cup cream of chicken soup
- 4 tbsp unsalted butter, melted
- 2 1/2 cups sharp cheddar, grated
- 1/3 cup sliced green onions
- 3 cups cornflakes, lightly crushed
- 3 tbsp salted butter, melted
Instructions
- Set a rack in the center of the oven and heat it to 350°F (175°C). Butter a 9x13-inch baking dish lightly, or spray it with nonstick spray. Thawed hashbrowns hold a lot of moisture, so press them gently in a colander or with paper towels to wick away excess liquid — a drier base means a creamier, not watery, sauce.
- Put the cornflakes in a zip-top bag and crush them with a rolling pin or the bottom of a measuring cup until you have a mix of small flakes and coarse crumbs — not powder. Some texture is what makes the topping crackle. Tip them into a small bowl and keep them dry until assembly.
- In a large bowl, combine the sour cream, cream of chicken soup, and melted butter and stir until completely smooth. Add the grated sharp cheddar, sliced green onions, a good pinch of salt and a few grinds of black pepper, and stir again so the cheese is evenly distributed before the potatoes go in.
- Add the thawed, blotted hashbrowns to the bowl and fold with a rubber spatula until every piece is coated in the creamy cheddar sauce. Work gently so the potatoes keep their shape, but be thorough — a dry pocket of hashbrowns will bake up bland. Scrape the bottom of the bowl to catch any uncoated potatoes.
- Spoon the potato mixture into the prepared baking dish and spread it into an even layer with the spatula, reaching into the corners. Smooth the top so the cornflake crust sits level and toasts uniformly. An even layer also bakes at the same rate edge to center, so no corner stays cool.
- Pour the melted salted butter over the crushed cornflakes and toss with a fork until every piece glistens. The butter is what turns the flakes from merely toasted to deep golden and audibly crisp, so take a moment to coat them evenly rather than pooling the butter in one spot.
- Scatter the buttered cornflakes evenly over the potatoes, covering the surface edge to edge. Bake at 350°F (175°C) for about 40 minutes, until the cheese sauce bubbles vigorously up through the crust, the cornflakes are deep golden brown, and the center reaches 165°F (74°C) on an instant-read thermometer. If the topping colors too fast, lay a sheet of foil loosely over the dish for the last 10 minutes.
- Let the casserole rest on a wire rack for about 10 minutes before scooping. The sauce thickens slightly as it settles, so portions hold together and the crust stays crisp instead of steaming under a loose spoonful. Serve straight from the dish, hot, breaking through the cornflake canopy at the table.
Estimated nutrition per serving
- Calories
- 430
- Protein
- 12 g
- Carbohydrates
- 32 g
- Fat
- 28 g
Next recipe
Crockpot Pork Loin in Creamy Bacon Gravy — Dump-and-Go Dinner
See the recipe → →This recipe is based on a short cooking video and is published under the pen name Clara Weller. It was checked before publication, but errors can slip through. Nutrition, when shown, is an estimate. Read more in our editorial policy and on our food safety page.
More recipes to try
Pan-Seared Ribeye Steak with a Golden Crust in 20 Minutes
Total time: 32 min
Dump-and-Go Crockpot Thai Coconut Chicken Soup
Total time: 4 h 20 min
Bacon-Wrapped Sonoran Hot Dogs, Crispy in 30 Minutes
Total time: 30 min
New Mexico Stacked Green Chile Enchiladas Ready in 25 Minutes
Total time: 22 min
Red Chile Beef Enchiladas with a Fried Egg on Top
Total time: 45 min