Dinner · Part 2 of 3: Instructions
Butternut Squash Sage Lasagna Skillet in One Pan Step-by-step instructions
- Prep
- Cook
- Total
- Serves
- 4
Before you start
Gather everything before you turn on the stove, because the browned butter and crisp sage move quickly. Preheat the oven to 375°F (190°C) and set a rack in the middle position. Peel the butternut squash, cut off the ends, halve it and dice it into small, even cubes. Pick the sage leaves from their stems, leaving them whole, and pat them dry so they fry crisply.
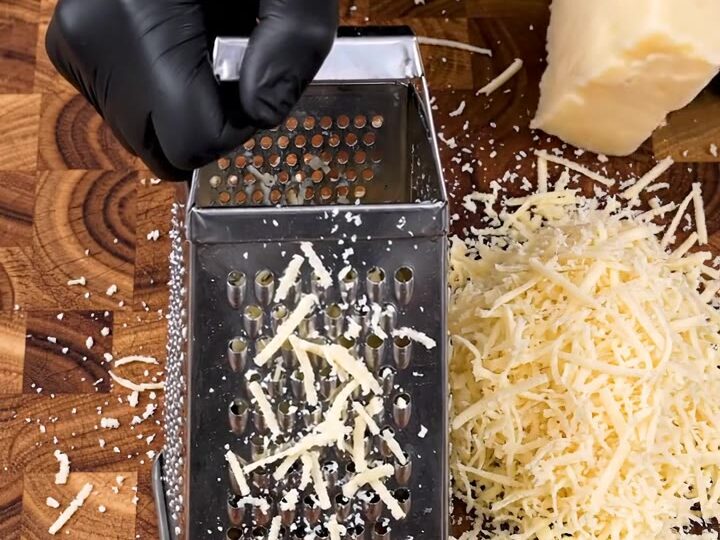
Peel the garlic cloves but keep them whole. Grate the hard cheese on a box grater to a fluffy mound, and cut the fresh pasta sheets to fit your skillet. Measure the heavy cream and flour, and set them beside the stove so you can whisk the sauce without stopping. Having each item ready makes the layering smooth and keeps the butter from over-browning while you search for an ingredient.
Ingredients at a glance (10)
- 1 whole butternut squash (about 2 lb), peeled and cut into small cubes
- 8 oz fresh pasta sheets, such as fresh pappardelle or lasagna sheets
- 4 tbsp unsalted butter
- 12 fresh sage leaves, plus a few extra for serving
- 2 cloves garlic, peeled and left whole
- 1 tbsp olive oil
- kosher salt and black pepper, to taste
- 2 cups heavy cream
- 2 tbsp all-purpose flour
- 1 1/2 cups finely grated hard cheese, such as Parmigiano-Reggiano or Pecorino Romano
Instructions
Browned Butter and Squash
- Cube the squash and crisp the sagePeel the butternut squash, cut off the ends, halve it and cut it into small cubes. Melt the butter in the cast iron skillet over medium heat, add the sage leaves and cook until crisp and fragrant, then lift them onto a plate and keep the butter in the pan.Look for Sage leaves turn crisp, darker green, and the butter turns nutty and golden brown.Tip Keep the leaves whole so they stay crisp and make a good garnish later.
- Soften the squash and garlicAdd the olive oil and the whole garlic cloves to the browned butter. Add the diced squash, season with salt and black pepper, and cook for 8 minutes, stirring now and then, until the cubes are tender at the edges.Look for Squash cubes are tender when a knife slides through with little resistance.Tip Use medium heat so the squash softens without burning in the butter.
- Make the creamy sauceRemove the garlic cloves. Sprinkle the flour over the squash and stir for one minute. Pour in the heavy cream slowly, whisking, and simmer for 5 minutes until the sauce thickens enough to coat a spoon.Look for The sauce coats the back of a spoon and no raw flour taste remains.Tip Whisk while you pour so the flour does not form lumps.
The butter has turned golden with a nutty aroma, the sage leaves are crisp and the squash cubes have softened at the edges. Each cube should give slightly under a knife tip while still holding its shape. Before you move on, make sure the garlic has been removed and the sauce base is ready.
The pan should look glossy, with no burnt bits in the butter. If the squash still feels firm in the center, cook it for another minute or two over medium heat, stirring gently so the cubes brown evenly without breaking apart. A pale, foamy butter means the heat needs a little more time to brown it.
Cream Sauce and Layering
- Layer the pasta and fillingCut the fresh pasta sheets to fit the skillet. Spread a thin layer of sauce and squash in the pan, add a layer of pasta, then repeat with the sauce, squash and crisp sage leaves, finishing with a layer of pasta and sauce.Look for Each layer of pasta is covered by sauce, and the top is evenly coated.Tip Press each layer gently so the sheets stay flat and the layers hold together.
- Top with cheese and bakeScatter the grated hard cheese over the top. Bake in the oven at 375°F (190°C) for 20 to 25 minutes, until the cheese bubbles and turns golden with lightly browned edges.Look for Cheese is bubbling across the whole surface and the edges are golden brown.Tip Place the skillet on the middle rack so the top browns evenly.
The sauce has thickened to a smooth, creamy consistency that coats the back of a spoon, with no raw flour taste and no visible lumps. Layer the pasta, sauce, squash and crisp sage in the skillet, pressing each sheet gently so it lies flat. The top layer should be fully covered with sauce so the pasta does not dry out in the oven. Look for even coverage across the whole pan. If any pasta edges stick up above the sauce, press them down before scattering the cheese, so the top browns evenly and the layers stay moist and tender through the bake.
Bake, Rest and Serve
- Rest, slice and plateLet the skillet rest for 10 minutes so the layers set. Slice into wedges, then plate each portion and top with extra crisp sage leaves and a little more grated cheese.Look for The sauce has thickened and the slices hold their shape when lifted.Tip Use a sharp knife and wipe it between cuts for clean slices.
The grated cheese has melted into a bubbling, golden crust across the whole surface, and the edges are lightly browned. The sauce should look thick and set around the edges rather than runny. Let the skillet rest for 10 minutes before slicing, so the layers firm up and the wedges hold together.
Before serving, check that the top is evenly golden and that the sage garnish is still crisp. If the top is pale, return the skillet to the oven for two or three minutes and watch it closely, since the cheese can darken quickly once it starts to brown.
Common mistakes
The most common problem is burning the butter. Once it turns dark brown and smells sharp, the flavor becomes bitter, so keep the heat at medium and watch it closely. Another frequent issue is adding the sauce too fast, which can clump the flour. Pour the cream slowly while whisking, and let it simmer until it thickens.
Do not skip the rest after baking; slicing too early makes the layers slide apart. Finally, avoid pre-shredded cheese, which often contains anti-caking agents that keep it from melting smoothly and turning golden on top. Grate a block of hard cheese instead, for a cleaner, more even crust.
How to tell it’s done
The lasagna is done when the cheese on top is bubbling across the whole surface and has turned golden with lightly browned edges, and when the sauce looks thick and set rather than runny when you lift a slice. The squash should be tender when pierced with a knife. There is no meat or egg in this recipe, so there is no protein temperature to reach; the cues to watch are color, bubbling and a sauce that has set enough to hold a clean edge when the wedge is lifted with a spatula.
Up next · Part 3 of 3
4 variations · storage & make-ahead · 5 answers · printable card
Tips, FAQ & printable recipe (Part 3)← Back to the ingredients (Part 1)