Desserts · Part 2 of 3: Instructions
Authentic Spanish Crema Catalana with Burnt Sugar Crust Step-by-step instructions
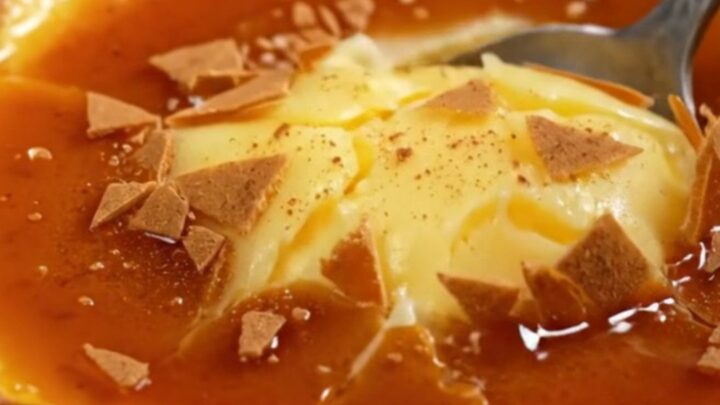
- Prep
- Cook
- Total
- Serves
- 6
Before you start
Before starting, gather all ingredients and equipment. Set out six shallow clay cazuelas or ramekins on a tray. Prepare the citrus peels by using a vegetable peeler to remove wide strips from a lemon and an orange, avoiding the bitter white pith.
Measure the milk, sugar, and cornstarch. Have a fine-mesh strainer ready for straining the custard. Ensure the refrigerator has space for the tray of custards to chill for at least 4 hours. If using an iron salamander, have it ready to heat just before serving.
Ingredients at a glance (8)
- 2 1/2 cups whole milk
- 1 strip lemon peel
- 1 strip orange peel
- 1 cinnamon stick
- 6 large egg yolks
- 1/2 cup granulated sugar
- 3 tbsp cornstarch
- 2 tbsp granulated sugar
Instructions
Infuse and Cook the Custard
- Infuse the MilkPour the whole milk into a medium saucepan. Add the strip of lemon peel, strip of orange peel, and the cinnamon stick. Place the saucepan over medium heat and bring the milk to a gentle simmer, stirring occasionally. Once small bubbles appear around the edges, remove the pan from the heat and let the milk steep for 10 minutes to infuse the citrus and cinnamon flavors.Look for The milk should be steaming with tiny bubbles at the edges, and the citrus and cinnamon aromas should be noticeable.Tip Do not let the milk boil rapidly; a gentle simmer is enough to extract the flavors without scalding.
- Whisk the Egg MixtureIn a medium bowl, whisk the egg yolks with the granulated sugar until the mixture is pale and thick, about 2 minutes. Add the cornstarch and whisk until completely smooth and no lumps remain. The mixture should fall from the whisk in a thick ribbon.Look for The yolk mixture should be a pale yellow, thick, and smooth when the whisk is lifted.Tip Whisk vigorously to ensure the cornstarch is fully dissolved, preventing lumps in the custard.
- Temper the YolksSlowly pour about 1 cup of the hot infused milk into the egg yolk mixture while whisking constantly. This raises the temperature of the yolks gradually, preventing them from scrambling. Continue whisking until the mixture is fully combined and smooth.Look for The mixture should be warm to the touch and completely smooth, with no cooked bits of egg.Tip Pour the milk in a thin stream while whisking to keep the yolks moving and avoid curdling.
- Cook the CustardPour the tempered yolk mixture back into the saucepan with the remaining infused milk. Place over medium heat and cook, stirring constantly with a whisk or rubber spatula, until the custard thickens to a pudding-like consistency. This should take 5 to 7 minutes. The custard is ready when it coats the back of a spoon and leaves a clear trail when you run a finger through it.Look for The custard should be thick, glossy, and smooth, with a noticeable resistance when stirred.Safe temperature 160°F (71°C) internal temperature (egg dishes)Tip Keep stirring constantly to prevent the bottom from scorching. The custard will thicken further as it cools.
At the end of this phase, the milk is infused with citrus and cinnamon, and the custard has thickened to a smooth, glossy pudding. It should coat the back of a spoon and have a pale yellow color.
The mixture should be free of lumps and have a fragrant aroma of lemon, orange, and cinnamon. The custard should reach 160°F (71°C) to ensure the eggs are fully cooked.
Chill and Set
- Strain and Fill the DishesRemove the saucepan from the heat. Strain the custard through a fine-mesh strainer into a large measuring cup or bowl to remove the citrus peels and cinnamon stick. Discard the solids. Divide the custard evenly among 6 shallow clay cazuelas or ramekins, filling each about three-quarters full. Tap each dish gently on the counter to release any air bubbles.Look for The custard should be smooth and silky, with no lumps or peels remaining.Tip Use a ladle or a spouted measuring cup for clean pouring. Wipe any drips from the rims.
- Chill the CustardsPlace the filled cazuelas on a tray and refrigerate uncovered for at least 4 hours, or until the custards are fully set and cold. They should be firm enough to hold a sugar crust without sinking. Do not cover them while chilling, as condensation can form on the surface and prevent the sugar from caramelizing properly.Look for The custards should be completely firm and cold to the touch, with a smooth, glossy surface.Tip Chill for at least 4 hours; overnight is even better. The colder the custard, the easier it is to sear the sugar without warming the custard.
After straining and filling the dishes, the custards should be chilled for at least 4 hours until they are completely firm and cold. The surface should be smooth and glossy, with no condensation. The custards should hold their shape when the dish is tilted. They are now ready for the sugar topping and searing.
Sear and Serve
- Sprinkle the Sugar ToppingJust before serving, sprinkle about 1 teaspoon of granulated sugar evenly over the surface of each chilled custard. Tilt and tap the dish to spread the sugar in an even, thin layer that covers the entire surface. Shake off any excess sugar that does not adhere.Look for The sugar should form a thin, even, dry layer over the custard, with no bare spots.Tip Use a fine-mesh sieve to dust the sugar evenly. Too much sugar can make the crust too thick and hard to crack.
- Sear the Sugar with a Hot IronHeat a small iron salamander or a metal disk over a gas flame or in a broiler until it is red-hot. Carefully place the hot iron directly onto the sugar layer of one custard and hold it there for 5 to 10 seconds, until the sugar melts and caramelizes into a deep amber crust. Repeat with the remaining custards, reheating the iron between each.Look for The sugar should bubble, smoke, and turn a deep amber color, forming a hard, glassy crust.Tip Work quickly and keep the iron moving slightly to avoid burning. The crust should be deeply caramelized but not black.
- Serve ImmediatelyLet the custards sit for 1 minute to allow the caramel to harden and set. Serve immediately, while the crust is still crisp and the custard is cold. To eat, crack the sugar crust with the back of a spoon and scoop up the custard with the caramel shards.Look for The sugar crust should be hard and crackle when tapped with a spoon, revealing the smooth custard underneath.Tip If the crust softens, it is still delicious but less dramatic. For the best texture, eat within 10 minutes of searing.
The sugar topping should be an even, thin layer that caramelizes to a deep amber color when seared. The crust should be hard and crackle when tapped with a spoon, revealing the smooth, cold custard underneath. The contrast between the warm, crisp sugar and the cool, silky custard is the defining characteristic of this dessert.
Common mistakes
One common mistake is overheating the milk, which can cause it to scald and develop an off-flavor. Keep the heat at medium and stir frequently. Another issue is adding the hot milk to the yolks too quickly, which can scramble them.
Always temper the yolks by adding a small amount of hot milk while whisking constantly. Finally, if the sugar crust is too thick or the iron is not hot enough, the sugar may not caramelize evenly, resulting in a soft, sticky crust instead of a crisp one. Use a thin, even layer of sugar and ensure the iron is red-hot.
How to tell it’s done
The custard is done when it has thickened to a pudding-like consistency and coats the back of a spoon, leaving a clear trail when a finger is drawn through it. The internal temperature of the custard should reach at least 160°F (71°C) to ensure the eggs are fully cooked and safe to eat.
After chilling, the custards should be completely firm and cold. The sugar crust is done when it turns a deep amber color and hardens into a crisp, glassy layer that cracks when tapped with a spoon.
- Egg dishes: 160°F (71°C) in the thickest part
Up next · Part 3 of 3
4 variations · storage & make-ahead · 5 answers · printable card
Tips, FAQ & printable recipe (Part 3)← Back to the ingredients (Part 1)