Dinner · Part 2 of 3: Instructions
Artisan Sourdough Bread with a Blistering Ear Step-by-step instructions
- Prep
- Cook
- Total
- Serves
- 12
Before you start
Before mixing the dough, ensure your sourdough starter is active and bubbly. Feed it 4–6 hours ahead, or overnight if it's been in the fridge, until it doubles in volume. Measure all ingredients by weight for accuracy. Have a large mixing bowl, a silicone spatula, and a damp towel ready.
For the proofing stage, prepare a banneton basket or a bowl lined with a floured kitchen towel. Also, clear space in your refrigerator for the overnight proof. Finally, set up your oven with a rack in the middle and place your Dutch oven inside, ready to preheat.
Ingredients at a glance (5)
- 100 g active sourdough starter
- 350 g warm water
- 500 g bread flour
- 10 g sea salt
- Salted butter, for serving
Instructions
Mix, Fold, and Shape
- Mix the DoughIn a large bowl, stir together the active sourdough starter and warm water until the starter disperses. Add the bread flour and sea salt, then mix with a spatula or your hand until a shaggy dough forms and no dry flour remains. Cover the bowl with a damp towel or plastic wrap and let it rest for 30 minutes to begin autolyse.Look for The dough will be shaggy and sticky, with no dry bits.Tip Warm water (about 90°F/32°C) helps the starter activate, but avoid hot water that could kill the yeast.
- Stretch and FoldPerform four sets of stretch-and-folds at 30-minute intervals. To do this, wet your hand, reach under one side of the dough, stretch it up and over the center, then rotate the bowl a quarter turn and repeat three more times. After each set, cover and rest the dough. The dough will become smoother and more elastic with each fold.Look for The dough tightens and gains structure, becoming less sticky and more cohesive.Tip Set a timer for the 30-minute rests so the folds happen consistently.
- Shape and ProofAfter the final stretch-and-fold, turn the dough out onto a lightly floured surface. Shape it into a tight round boule by pulling the edges toward the center and pinching them together. Place the boule seam-side up in a floured banneton basket. Cover and refrigerate overnight (8–12 hours) for a slow, flavorful proof.Look for The dough feels springy and holds its shape when shaped.Tip Use rice flour or all-purpose flour in the banneton to prevent sticking.
At the end of this phase, the dough should be smooth, elastic, and hold its shape when shaped into a ball. It will have increased in volume slightly and feel airy and alive.
The banneton will show a taut, round dome, and the dough will spring back slowly when poked. The mixture should smell pleasantly yeasty and slightly tangy, a sign that fermentation is underway.
Preheat, Score, and Bake
- Preheat the OvenAt least 45 minutes before baking, place a Dutch oven with its lid on the center rack of the oven. Preheat the oven to 450°F (232°C). The Dutch oven needs to be thoroughly hot to create steam and produce a crackling crust.Look for The Dutch oven is screaming hot after 45 minutes.Tip Keep the Dutch oven inside while the oven preheats; don't open the door too often.
- Score and BakeCarefully remove the hot Dutch oven from the oven. Invert the proofed dough onto a piece of parchment paper, seam-side down. Using a razor blade or lame, score the top of the dough with a single slash at a 45-degree angle, about 1/2 inch deep. Lift the parchment with the dough and lower it into the Dutch oven. Cover with the lid and bake for 20 minutes.Look for The dough is deeply scored and ready to bake; the crust will crackle as it hits the hot pot.Tip Score confidently—a shallow slash won't produce a dramatic ear.
- Finish BakingAfter 20 minutes, remove the lid and continue baking for 25–30 minutes, until the crust is deep golden brown and blistered. The internal temperature of the bread should read 200–210°F (93–99°C) on an instant-read thermometer. Transfer the bread to a wire rack and let it cool completely before slicing.Look for The crust is dark and crackly, and the loaf sounds hollow when tapped on the bottom.Tip Cooling is essential—slicing too early will make the crumb gummy.
The Dutch oven should be smoking hot, and the dough will have a distinct ear where it was scored. The crust will be deep golden brown and blistered, with a hard, crackling surface. The bread will release a rich, toasty aroma. When you tap the bottom, it should sound hollow. The internal temperature should be at least 200°F (93°C).
Cool and Serve
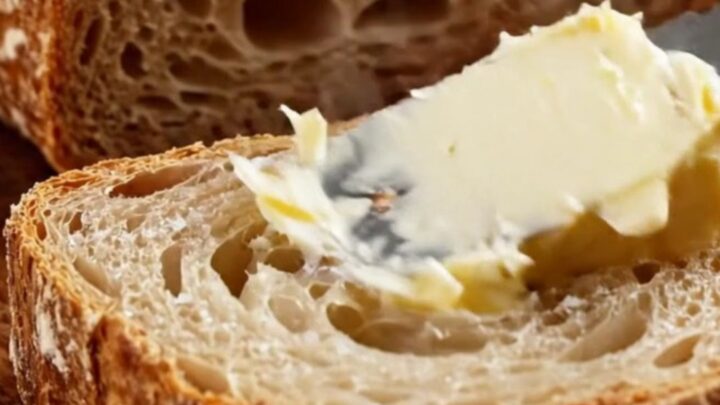
- Slice and ServeOnce the bread is completely cool, slice it with a serrated knife to reveal the open, honeycomb crumb. Spread salted butter on a warm slice and listen for the crackle. Serve immediately or store in a bread box.Look for The crust crackles as you slice, and the butter melts into the warm crumb.Tip For the best texture, slice only as much as you need—the cut crust will soften over time.
The bread is cool to the touch and the crust has a matte, crackled finish. When sliced, the crumb is open and airy with a glossy, tender texture. The butter melts into the warm bread, and the crust crackles with each bite. The loaf is ready to serve and enjoy.
Common mistakes
One common mistake is not preheating the Dutch oven long enough; it needs at least 45 minutes to become truly screaming hot. Another is scoring too shallowly—a slash that's less than 1/2 inch deep won't produce a dramatic ear.
Over-proofing can cause the dough to spread and lose its structure, so watch the dough during the cold proof; if it looks overly puffy and jiggly, it may be past its peak. Under-proofing results in a dense crumb, so give it the full 8–12 hours. Finally, resist the urge to slice the bread while it's still warm—patience yields a better texture.
How to tell it’s done
The bread is done when the crust is deeply browned and blistered, and the loaf sounds hollow when tapped on the bottom. For a more precise check, insert an instant-read thermometer into the center of the loaf; it should read 200–210°F (93–99°C).
If the crust is browning too quickly but the interior isn't done, lower the oven temperature to 425°F (218°C) for the last 10 minutes. Let the bread cool completely on a wire rack before slicing—this allows the crumb to set and prevents a gummy texture.
Up next · Part 3 of 3
4 variations · storage & make-ahead · 5 answers · printable card
Tips, FAQ & printable recipe (Part 3)← Back to the ingredients (Part 1)