Desserts · Part 2 of 3: Instructions
Witch’s Swamp Chocolate Bark Step-by-step instructions
- Prep
- Cook
- Total
- Serves
- 8
Before you start
Before beginning, ensure your workspace is clean, flat, and free of clutter. Prepare your baking sheet by fitting it with parchment paper, allowing a slight overhang for easy removal later.
Melt your dark chocolate and candy colors in separate microwave-safe bowls using short, thirty-second intervals, stirring thoroughly between each to prevent burning.
Have your sprinkles ready in a small bowl or ramekin so they are easy to scatter evenly. Keep the baking sheet on a level surface to prevent the chocolate from pooling unevenly.
Ingredients at a glance (4)
- 16 oz dark chocolate, melted
- 1/2 cup green candy melts, melted
- 1/2 cup purple candy melts, melted
- 2 tbsp orange, purple and black sprinkles
Instructions
Spreading the Base
- Prepare the BaseLine a baking sheet with parchment paper. Pour the melted dark chocolate onto the center of the parchment. Use a spatula to spread the chocolate evenly into a thin layer across the sheet, ensuring it reaches the edges for a uniform thickness.Look for Chocolate should be smooth and spread into a consistent rectangular shape.Tip Ensure the baking sheet is completely clean and dry before starting.
The chocolate should be spread into an even layer that covers most of the baking sheet. It should look smooth and glossy, with no dry spots or gaps. Check that the edges are relatively uniform to ensure even setting, and ensure the parchment is lying flat against the tray so the bottom of the bark remains smooth.
Adding Swirls and Decor
- Add Swirls and ToppingsSpoon small dollops of the melted green and purple candy over the dark chocolate layer. Using the tip of a spoon or a skewer, gently drag through the dollops to create a swirled, marbled effect. Immediately shower the surface with the orange, purple, and black sprinkles before the chocolate begins to set.Look for The colors should look swirled and marbled without over-mixing.Tip Work quickly so the chocolate does not harden before the sprinkles adhere.
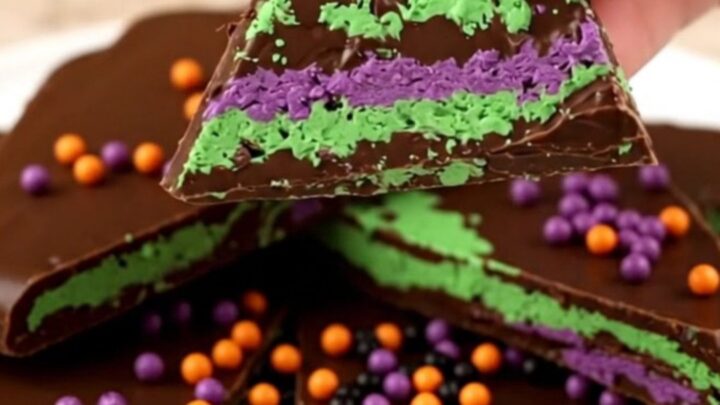
The swirls should appear as distinct, marbled patterns across the surface of the dark chocolate. The green and purple colors should be clearly visible and contrast sharply against the dark base. Ensure the sprinkles are distributed across the entire surface so that every section of the bark has a generous amount of decoration.
Setting and Breaking
- Set and ServePlace the baking sheet in a cool area or the refrigerator for at least one hour until the chocolate is firm. Once completely set, remove the parchment from the sheet and break the bark into irregular shards using your hands or a clean knife. Arrange the shards on a plate to serve.Look for The chocolate should be brittle and snap cleanly when broken.Tip For cleaner breaks, let the bark reach room temperature for five minutes before snapping.
The bark should be completely solid and cold to the touch. When you lift the parchment, the entire sheet should feel firm. When breaking the bark, it should snap with a sharp, clean sound. The shards should be irregular in size, providing a variety of shapes that look visually appealing when arranged on a serving platter.
Common mistakes
A common mistake is overheating the chocolate, which can cause it to seize or lose its glossy finish. Always melt it slowly and stir often. Another pitfall is waiting too long to add the sprinkles; if the chocolate base cools too much, the decorations will not adhere properly.
Finally, avoid over-swirling the colors, as this can lead to a uniform green-purple hue rather than distinct, swampy marbling. Keep the motion gentle and deliberate to maintain clear color separation throughout the bark.
How to tell it’s done
The bark is fully prepared when it is firm to the touch and no longer tacky. When lifted from the parchment, the edges should snap cleanly, and the chocolate should feel cool and rigid.
If you notice any soft spots, return the bark to the refrigerator for an additional fifteen minutes. The final shards should maintain their structure at room temperature, provided the environment is not excessively warm, ensuring a satisfying crunch with every bite.
Up next · Part 3 of 3
2 variations · storage & make-ahead · 3 answers · printable card
Tips, FAQ & printable recipe (Part 3)← Back to the ingredients (Part 1)