Desserts · Part 2 of 3: Instructions
Brown Butter Espresso Cookies with Flaky Sea Salt Step-by-step instructions
- Prep
- Cook
- Total
- Serves
- 24
Before you start
Before starting, measure all ingredients. Chop the chocolate and set aside. Have a large skillet ready for browning the butter. Line baking sheets with parchment paper.
Ensure the eggs are at room temperature for easier mixing. If using a stand mixer, fit it with the paddle attachment; otherwise, a large bowl and wooden spoon work well. Chill the dough as directed.
Ingredients at a glance (10)
- 1 1/2 cups packed brown sugar
- 1 cup unsalted butter
- 2 tbsp finely ground espresso
- 2 cups all-purpose flour
- 1 tsp baking soda
- 1/2 tsp kosher salt
- 2 large eggs
- 2 tsp vanilla extract
- 8 oz bittersweet chocolate, chopped
- flaky sea salt, for topping, to taste
Instructions
Brown Butter Dough
- Brown the butterMelt the butter in a large skillet over medium heat. Cook, swirling the pan occasionally, until the butter turns golden brown and smells nutty, about 5–7 minutes. Remove from heat and let cool slightly.Look for The butter will foam, then turn amber with brown specks at the bottom.Tip Watch closely to avoid burning; it goes from browned to burnt quickly.
- Mix the wet ingredientsIn a large bowl, combine the warm brown butter with the brown sugar. Stir until well combined. Add the eggs and vanilla, and mix until smooth.Look for The mixture will look glossy and thick.Tip If the butter is too hot, let it cool so the eggs don't scramble.
- Add the dry ingredientsSprinkle the espresso powder, flour, baking soda, and kosher salt over the wet mixture. Stir with a wooden spoon until just combined; do not overmix.Look for The dough will be thick and slightly sticky.Tip Scrape the bottom and sides of the bowl to ensure even mixing.
- Fold in the chocolateAdd the chopped chocolate and fold gently into the dough until evenly distributed.Look for Chocolate pieces are scattered throughout the dough.Tip Use a spatula to avoid crushing the chocolate.
The butter should be a deep amber color with a nutty aroma. The dough will be thick, glossy, and slightly sticky, with chocolate pieces evenly distributed.
It should hold together when pressed but not be dry. Taste the dough for seasoning—it should be sweet with a distinct coffee flavor.
Chilling and Scooping
- Chill the doughCover the bowl with plastic wrap and refrigerate for at least 30 minutes, or up to 24 hours. Chilling helps the flavors meld and prevents spreading.Look for Dough is firm and scoopable.Tip For a stronger espresso flavor, chill longer.
- Preheat the ovenPreheat the oven to 350°F (175°C). Line two baking sheets with parchment paper.Look for Oven is ready when it reaches temperature.Tip Use a thermometer to verify oven accuracy.
- Scoop the doughUsing a cookie scoop or tablespoon, scoop rounded balls of dough (about 1 1/2 tbsp each) onto the prepared baking sheets, spacing them 2 inches apart.Look for Dough balls are evenly sized and spaced.Tip For uniform cookies, use a spring-loaded scoop.
- Bake the cookiesBake one sheet at a time for 10–12 minutes, until the edges are golden and the centers are just set. The cookies will look slightly underdone in the middle.Look for Edges are golden, centers are puffy and soft.Safe temperature 160°F (71°C) internal temperature (egg dishes)Tip Rotate the sheet halfway through for even baking.
After chilling, the dough should be firm and scoopable. The balls should hold their shape on the baking sheet. The edges will be golden and the centers puffy when they go into the oven. The dough should not spread excessively; if it does, it needs more chilling.
Baking and Finishing
- Sprinkle with sea saltRemove the baking sheet from the oven and immediately sprinkle the hot cookies with flaky sea salt.Look for Salt crystals glisten on the warm surface.Tip Don't skip the salt; it balances the sweetness.
- Cool and serveLet the cookies cool on the baking sheet for 5 minutes, then transfer to a wire rack to cool completely. Serve warm or at room temperature.Look for Cookies are firm enough to lift without breaking.Tip For extra gooeyness, enjoy while still warm.
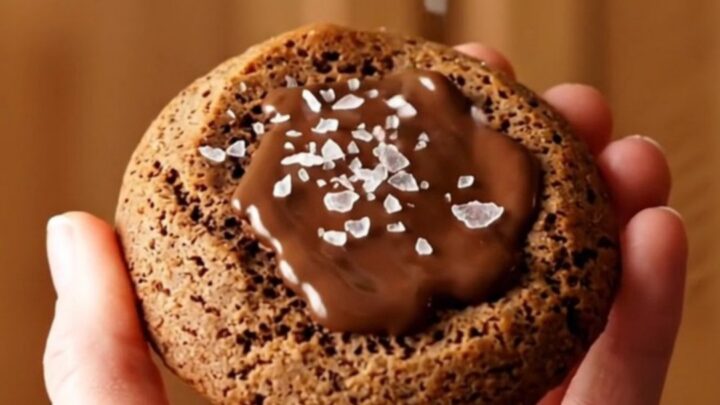
The cookies will spread slightly and crackle on top. The edges will be crisp and golden, while the centers remain soft. The flaky sea salt should be visible on the surface. The cookies will firm up as they cool but stay chewy in the middle.
Common mistakes
One common mistake is overmixing the dough after adding the flour, which develops gluten and leads to tough cookies. Mix until just combined. Another is skipping the chilling step, which causes the cookies to spread into flat discs.
Also, be careful not to burn the butter—it can go from browned to burnt in seconds. Keep an eye on it and remove from heat as soon as it turns amber and smells nutty.
How to tell it’s done
The cookies are done when the edges are golden brown and the centers look just set—they should be slightly soft and puffy. The internal temperature of the cookies should reach at least 160°F (71°C) to ensure the eggs are fully cooked.
The centers will continue to set as they cool on the baking sheet. Overbaking will result in dry, crisp cookies, so take them out when they look slightly underdone.
- Egg dishes: 160°F (71°C) in the thickest part
Up next · Part 3 of 3
4 variations · storage & make-ahead · 5 answers · printable card
Tips, FAQ & printable recipe (Part 3)← Back to the ingredients (Part 1)