Dinner · Part 1 of 3: Ingredients
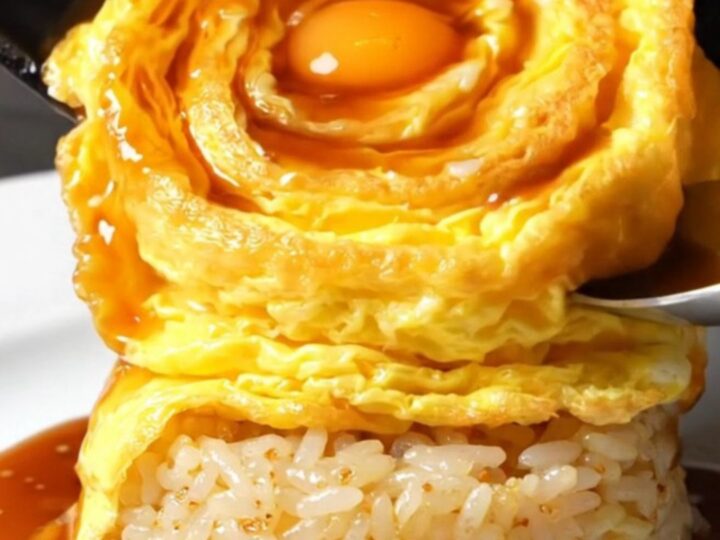
Viral Korean Tornado Omelette with Garlic Butter Rice
- Prep
- Cook
- Total
- Serves
- 1
Master the art of the viral Korean tornado omelette right in your own kitchen. This mesmerizing dish combines silky, perfectly folded eggs with a savory base of garlic butter rice and rich demi-glace.
It is a show-stopping meal that looks incredibly complex but relies on a simple, repeatable technique. Impress guests or elevate your everyday lunch with this beautiful, restaurant-style presentation that brings a touch of Seoul's vibrant street food culture to your dining table.
The secret to the tornado omelette lies in the combination of temperature control, consistent whisking, and the specific motion of the chopsticks during the cooking process. By straining the egg mixture, you ensure a uniform texture that allows the eggs to drape effortlessly when swirled.
This recipe focuses on mastering that precise movement, transforming basic ingredients into a sophisticated meal. Whether you are seeking a quick, elegant dinner or a fun culinary challenge, this method provides reliable results every time you step up to the stove.
Ingredients
Omelette
- 3 large eggs
- 15 ml whole milk
- 3 g kosher salt
- 5 ml mirin
- 1 tbsp neutral oil
Base
- 150 g garlic butter rice, prepared
- 2 tbsp demi-glace sauce
Why this recipe works
The method works by creating a controlled coagulation of the egg proteins. By pouring the mixture into a preheated pan and immediately manipulating the structure with chopsticks, you force the eggs to fold upon themselves in a tight spiral. This physical manipulation, combined with the silkiness achieved through straining, prevents the eggs from becoming a standard scramble and instead creates the signature draped tornado appearance.
The use of mirin and salt in the egg base serves two purposes: seasoning and texture. Mirin adds a subtle depth of flavor and a slight sweetness that balances the rich demi-glace, while the salt helps stabilize the egg structure during the quick cooking phase.
The garlic butter rice provides a robust, aromatic foundation that contrasts perfectly with the delicate, mild flavor of the egg, ensuring every bite is balanced and satisfying.
Notes and substitutions
The quality of the non-stick pan is paramount for this recipe. Use a pan with a high-grade non-stick coating to ensure the egg ribbons slide easily during the swirling process without tearing. If the pan is too large, the egg layer will be too thin; a smaller 8-inch skillet is ideal for one serving. Ensure the pan is properly seasoned or oiled to facilitate the smooth rotation required for the tornado effect.
For the ingredients, always use fresh, high-quality large eggs. While the recipe calls for whole milk, half-and-half can be substituted for a slightly richer result, though the standard milk works best for maintaining the delicate texture.
If mirin is unavailable, a tiny pinch of sugar with a splash of water is a suitable alternative. Always ensure the garlic butter rice is warm before assembly so the overall temperature of the dish remains consistent.
- mirin: A small pinch of sugar dissolved in a teaspoon of water or white wine can mimic the sweetness.
- demi-glace: A high-quality beef gravy or a reduced balsamic glaze works well for a similar rich flavor profile.
Equipment
- fine-mesh sieve
- whisk
- mixing bowl
- non-stick pan
- wooden chopsticks
- spatula
Up next · Part 2 of 3
3 steps · 2 min of cooking · what to look for at each stage
Step-by-step instructions (Part 2)