Desserts · Part 2 of 3: Instructions
Dubai Pistachio Chocolate Bar With Crispy Kataifi Step-by-step instructions
- Prep
- Cook
- Total
- Serves
- 8
Before you start
Before starting, make sure the kataifi dough is fully thawed if frozen, and measure out all ingredients. Have the mold ready and a clean work surface. If using a thermometer, calibrate it. Prepare the chocolate by chopping it into small, even pieces for even melting.
The filling can be made ahead and stored in the refrigerator for up to a day; let it come to room temperature before using. The entire process moves quickly once the chocolate is tempered, so have everything within reach.
Ingredients at a glance (6)
- 2 cups shredded kataifi dough
- 2 tbsp unsalted butter, melted
- 1 cup pistachio cream
- 2 tbsp tahini
- 12 oz tempered Belgian milk chocolate
- 1/2 tsp Maldon sea salt flakes, for topping
Instructions
Toast and Mix
- Toast the KataifiHeat a small skillet over medium heat. Add the shredded kataifi dough and the melted butter. Cook, stirring constantly with a spatula, for about 3 to 4 minutes until the strands are golden brown and crisp. Remove from heat and let cool slightly.Look for The kataifi turns a deep golden color and sounds crispy when stirred.Tip Keep stirring to prevent burning; the strands go from golden to burnt quickly.
- Make the Pistachio FillingIn a medium bowl, combine the pistachio cream and tahini. Fold in the toasted kataifi strands until evenly coated. The mixture should be thick, glossy, and slightly sticky.Look for The filling is uniformly green and holds together when pressed.Tip If the filling is too stiff, warm it very briefly to soften.
At the end of this phase, the kataifi should be golden brown and crisp, with a buttery aroma. When combined with the pistachio cream and tahini, the filling is thick, glossy, and holds together when pressed.
It should not be runny or oily. The color is a vibrant pistachio green with visible golden strands. If the filling seems too dry, add a tiny bit of warm pistachio cream; if too wet, add more toasted kataifi.
Temper and Fill
- Temper the ChocolateMelt the chocolate in a heatproof bowl set over a pan of simmering water, stirring frequently, until it reaches 115°F (46°C). Remove from heat and cool to 88°F (31°C) for milk chocolate, stirring occasionally. Keep at that temperature while working.Look for The chocolate is smooth, glossy, and coats a spoon evenly.Tip Use an instant-read thermometer for accuracy; proper tempering ensures a snap.
- Fill the MoldPour a thin layer of tempered chocolate into the mold, coating the bottom and sides completely. Tap the mold gently to release air bubbles. Spoon the pistachio-kataifi filling over the chocolate and press it down evenly. Pour the remaining chocolate over the filling to seal, spreading it to the edges.Look for The mold is filled to the top with no gaps at the corners.Tip Work quickly so the chocolate doesn't set before sealing.
The chocolate is smooth, glossy, and coats a spoon evenly. The mold is lined with a thin layer of chocolate, and the filling is packed evenly, leaving no gaps. The top layer of chocolate seals the filling completely. The bar should look neat, with no chocolate smears on the outside of the mold. If the chocolate begins to thicken, reheat gently to 88°F (31°C) while stirring.
Set and Finish
- Chill and SetTap the mold on the counter to settle the layers, then place it in the refrigerator for 20 minutes until the chocolate is fully set and firm to the touch.Look for The chocolate is hard, and the bar releases cleanly from the mold.Tip Chilling longer is fine, but 20 minutes is usually enough.
- Unmold and FinishRemove the bar from the mold by flipping it onto a clean surface. Sprinkle the top with Maldon sea salt flakes. Break into pieces or serve whole.Look for The bar snaps cleanly and the filling stays intact.Tip Use a sharp knife to cut cleanly if not breaking by hand.
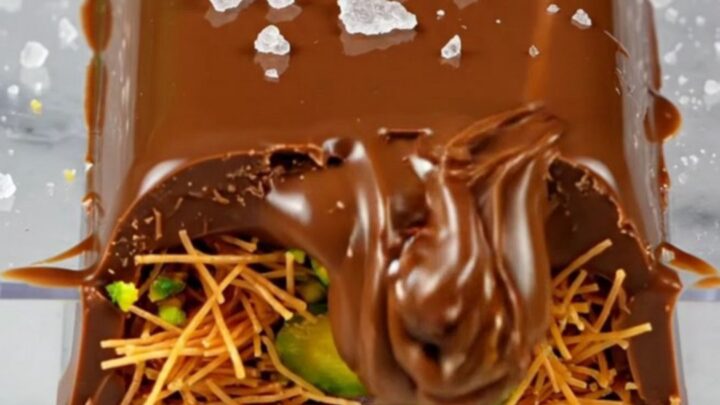
After chilling, the chocolate is hard and the bar releases from the mold cleanly. The surface is shiny, and the salt flakes are visible on top. When broken, the bar snaps with a crisp sound, revealing a clean cross-section with a thick green filling. The texture is crunchy and creamy. If the bar is too soft, chill longer; if it is sticky, the chocolate may not have been fully set.
Common mistakes
A common issue is chocolate that is not properly tempered, resulting in a dull finish and a soft, bendy bar. Use a thermometer and follow the temperature ranges precisely. Another mistake is over-toasting the kataifi, which turns bitter and burnt; keep stirring and remove it from the heat as soon as it is golden.
The filling can be too wet if the kataifi is not fully crisp, so toast it thoroughly. Also, make sure the filling is not too warm when adding to the chocolate, or it may melt the shell.
How to tell it’s done
The chocolate bar is done when the chocolate is fully set and firm to the touch after chilling. To test, gently press the top; it should be hard and not leave a dent. When unmolded, the bar should release cleanly and have a glossy finish. If it sticks, chill for a few more minutes.
For the filling, the kataifi should be golden and crisp, and the mixture should hold together when squeezed. There is no internal temperature to check for this recipe, but ensure the chocolate was tempered correctly for the signature snap.
Up next · Part 3 of 3
4 variations · storage & make-ahead · 5 answers · printable card
Tips, FAQ & printable recipe (Part 3)← Back to the ingredients (Part 1)