Dinner · Part 2 of 3: Instructions
Vintage Gingersnap Pot Roast for Tender Slow Cooker Beef Step-by-step instructions
- Prep
- Cook
- Total
- Serves
- 6
Before you start
Before beginning, ensure your slow cooker is clean and placed on a flat, heat-resistant surface. Take the beef chuck roast out of the refrigerator about 20 minutes before you are ready to start, as this allows the meat to reach a more even temperature. Have all your ingredients measured and ready to go.
If you are using store-bought gingersnap cookies, ensure they are fresh for the best flavor profile. Slice the yellow onions into consistent half-moons, taking care to keep the slices uniform so they cook evenly throughout the braising process. Having everything organized makes the assembly phase quick and simple.
Ingredients at a glance (5)
- 3 lb beef chuck roast
- 2 large yellow onions, sliced into half-moons
- 1 cup gingersnap cookies, crushed
- 2 cups beef broth
- 2 tbsp apple cider vinegar
Instructions
Assembly Phase
- Prepare the BasePlace the beef chuck roast into the bottom of the slow cooker. Arrange the sliced onions around the sides of the beef. Ensure the roast lies flat for even cooking throughout the process.Look for The beef is centered and the onions are distributed evenly around the meat.Tip Slice onions into uniform half-moons to ensure they soften at the same rate as the beef.
At the end of this phase, the beef should be positioned securely at the base of the slow cooker with onions tucked neatly around it.
The ingredients are layered to ensure the beef is sufficiently surrounded by the aromatics. Check that the roast is flat and not folded over itself, as this ensures uniform heat distribution during the long braise.
Braising Phase
- Add Aromatics and LiquidSprinkle the crushed gingersnaps over the top of the beef and onions. Pour the beef broth and vinegar over the ingredients. Cover with the lid and set to low heat for 8 hours.Look for The liquid just barely covers the base of the roast.Tip Crushing the cookies finely helps them dissolve into the liquid to create a thicker, more uniform gravy.
During this phase, the kitchen will begin to fill with the savory aroma of beef and spices. The liquid will begin to darken and thicken as the gingersnaps break down. Ensure the slow cooker is set to the correct low setting. At the end of this phase, the meat should be very soft and the liquid should be a deep, rich brown color.
Resting Phase
- Finish and ServeOnce the cooking time is complete, verify the internal temperature of the beef reaches 145°F (63°C). Carefully remove the roast from the slow cooker and let it rest for at least 10 minutes before slicing or pulling it apart for serving.Look for The meat is fork-tender and pulls apart easily with minimal pressure.Safe temperature 145°F (63°C) internal temperature (steaks, chops and roasts)Tip Skim any excess fat from the surface of the gravy before serving if preferred.
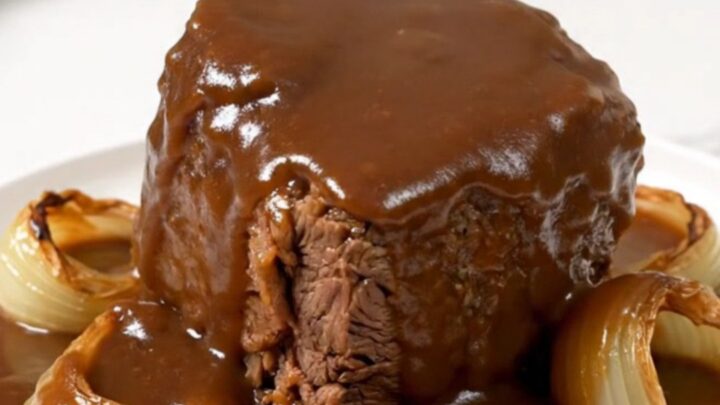
In this final phase, the beef is removed from the heat and allowed to rest. The meat should look dark, tender, and slightly glazed from the gravy. The gravy itself should be thick enough to coat the back of a spoon. Check that the beef is resting on a cutting board or platter to capture any juices before carving or shredding.
Common mistakes
A common mistake is overcrowding the slow cooker, which can prevent the meat from cooking evenly. Ensure the roast is placed directly on the bottom of the insert. Another error is checking the progress too often by removing the lid; every time you lift the lid, you lose significant heat and moisture, which extends the cooking time.
Finally, do not rush the resting phase. Allowing the beef to rest for at least 10 minutes is crucial, as it helps the juices redistribute throughout the fibers, resulting in a much more succulent final product.
How to tell it’s done
The pot roast is done when it is fork-tender, meaning it can be easily shredded with a fork with very little resistance. The internal temperature of the beef must reach at least 145°F (63°C) for safety.
The liquid in the slow cooker should have transformed into a rich, slightly thickened, and glossy gravy. If the meat still feels firm or tough when probed with a fork, continue cooking for an additional 30 to 60 minutes, as the time can vary based on the specific shape and density of the chuck roast used.
- Steaks, chops and roasts: 145°F (63°C) in the thickest part, then a 3-minute rest
Up next · Part 3 of 3
2 variations · storage & make-ahead · 3 answers · printable card
Tips, FAQ & printable recipe (Part 3)← Back to the ingredients (Part 1)