Desserts · Part 2 of 3: Instructions
2-Ingredient Cocoa Condensed Milk Truffles Step-by-step instructions
- Prep
- Cook
- Total
- Serves
- 16
Before you start
Before starting, gather all your ingredients and equipment. Line an 8-inch square baking pan with parchment paper, leaving an overhang on two opposite sides to make lifting the set chocolate easy. Have a fine-mesh sieve ready for sifting the cocoa.
Fill a small bowl with hot water and place a sharp knife nearby—this will be used to warm the blade for clean slicing. Measure out the sweetened condensed milk and cocoa powder. The active preparation takes about 15 minutes, but the truffles need at least 2 hours of chilling time, so plan accordingly.
Ingredients at a glance (3)
- 14 oz sweetened condensed milk (one can)
- 1 cup Dutch-process cocoa powder, sifted
- Dutch-process cocoa powder, for dusting, to taste
Instructions
Warm and Fold
- Warm the condensed milkPour the sweetened condensed milk into a medium saucepan. Set over low heat and warm gently, stirring occasionally, until it is warm to the touch but not simmering. This takes about 2 to 3 minutes. The milk should be fluid and slightly steaming.Look for The condensed milk is warm and flows easily when the spoon is lifted.Tip Keep the heat low to avoid scorching the milk; you only need it warm, not hot.
- Fold in the cocoaSift the Dutch-process cocoa powder directly over the warm condensed milk. Add it in three batches, folding gently with a rubber spatula after each addition. Continue folding until the mixture is completely smooth, glossy, and no streaks of cocoa remain.Look for The mixture turns into a thick, shiny, dark chocolate paste that pulls away from the sides of the pan.Tip Sifting prevents lumps. Fold patiently to keep the texture velvety.
At the end of this phase, you should have a thick, glossy, dark chocolate paste that pulls away from the sides of the pan. The aroma is deeply chocolatey, and the texture is smooth and shiny.
No streaks of dry cocoa should remain. The mixture should be fluid enough to pour into the pan but thick enough to hold its shape when spread.
Chill and Set
- Press into the panLine an 8-inch square baking pan with parchment paper, leaving an overhang on two sides. Transfer the chocolate mixture into the prepared pan and press it into an even layer with the spatula. Smooth the top as much as possible.Look for The mixture spreads evenly and the surface looks smooth and glossy.Tip Use an offset spatula for a perfectly flat top, which makes neat cubes later.
- Chill until firmRefrigerate the pan for at least 2 hours, or until the chocolate is completely firm and set. The mixture should be solid enough to slice cleanly without sticking.Look for The surface is firm to the touch and the mixture does not give when pressed gently.Tip Chilling for longer (up to 4 hours) makes slicing even easier.
After chilling, the chocolate block should be completely firm to the touch. When you press the surface, it should not indent. The block will have a matte finish and a solid, fudgy consistency. It should lift easily from the pan using the parchment overhang, and the edges should be clean and sharp.
Slice and Dust
- Slice into cubesLift the chilled block out of the pan using the parchment overhang. Place it on a cutting board. Using a sharp knife, slice the block into 1-inch cubes. For clean cuts, dip the knife in hot water and wipe it dry before each slice.Look for The knife glides through the firm chocolate, leaving smooth, neat edges.Tip A warm knife gives that signature glossy cut. Wipe the blade between cuts for the cleanest cubes.
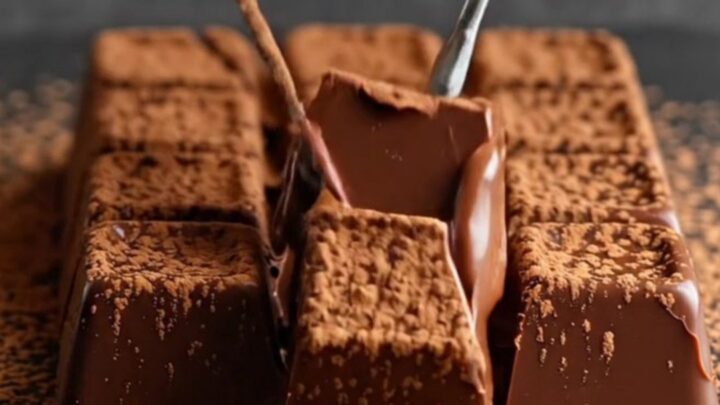
- Dust and serveArrange the truffle cubes on a serving plate. Dust generously with extra Dutch-process cocoa powder, turning the cubes to coat all sides. Serve immediately or keep chilled until ready to enjoy.Look for The cubes are coated in a fine layer of cocoa, with a soft, fudgy interior visible when cut.Tip For a lighter dusting, use a fine-mesh sieve to sprinkle the cocoa evenly.
The truffle cubes should have clean, straight edges and a smooth, glossy cut surface. When dusted with cocoa, they look like elegant, professional chocolates. The texture is firm but yielding, and a bite reveals a dense, velvety interior that melts quickly on the tongue.
Common mistakes
A common mistake is overheating the condensed milk, which can cause it to curdle or become too thick. Keep the heat low and stir constantly. Another issue is not sifting the cocoa, leading to lumps in the final texture.
Be patient and fold in three batches. If the truffles are too soft to slice, they haven't chilled long enough—refrigerate for another 30 minutes. Conversely, if they are too hard, let them sit at room temperature for a few minutes before slicing.
How to tell it’s done
The truffle mixture is done when it is completely firm to the touch and does not yield when pressed gently. When you slice into it, the knife should glide through smoothly, leaving clean edges without dragging or sticking.
The interior should be dense, fudgy, and glossy, with a soft, melt-in-the-mouth texture. If the mixture is still sticky or soft, return it to the fridge for another 30 minutes before slicing.
Up next · Part 3 of 3
4 variations · storage & make-ahead · 5 answers · printable card
Tips, FAQ & printable recipe (Part 3)← Back to the ingredients (Part 1)