Breakfast · Part 1 of 3: Ingredients
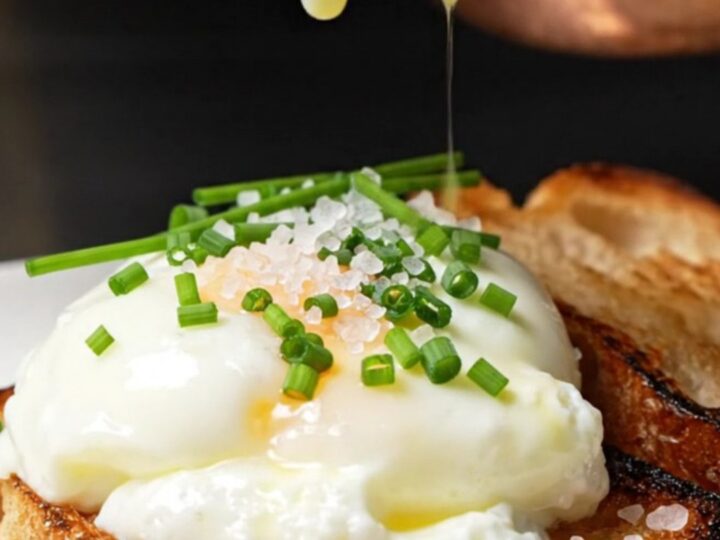
Velvety Custard-Style Scrambled Eggs on Charred Brioche
- Prep
- Cook
- Total
- Serves
- 1
Achieving the perfect, restaurant-quality scrambled egg at home is less about the ingredients and entirely about mastering heat control. This simple, elegant technique yields a result that is buttery, custard-like, and incredibly velvety.
By managing the temperature through a cycling method, you gain complete control over the coagulation of the egg proteins, ensuring a luxurious texture that is never rubbery or dry. This is the professional standard for the ultimate breakfast experience, elevating a humble staple into something truly extraordinary.
Scrambled eggs are a staple of the culinary world, yet they are often misunderstood. Most home cooks struggle with uneven textures or overcooked, dry curds. This recipe focuses on the French-influenced method of using cold ingredients and precise heat management.
By whisking the eggs directly in the pan and cycling the heat, you create a slow, controlled thickening process that results in a decadent, cream-like consistency. Served atop a piece of perfectly charred, buttery brioche, these eggs provide a sophisticated contrast in texture and flavor that is ideal for a slow weekend morning or a special breakfast occasion.
Ingredients
Main
- 3 cold pasture-raised eggs
- 25 grams cold unsalted butter, cubed
- 15 grams cold crème fraîche
Garnish
- 3 grams freshly snipped chives
- flaky Maldon salt, to taste
Serving
- 1 slice charred brioche
Why this recipe works
The method of cycling the pan on and off the heat is the technical secret to achieving a velvety consistency. By pulling the pan away from the heat source, you prevent the eggs from seizing or toughening, allowing the proteins to coagulate gently. This creates small, delicate curds rather than large, dry clumps, resulting in a finished product that is smooth, glossy, and uniformly creamy throughout.
Starting with cold ingredients, particularly cold butter and cold eggs, helps to regulate the initial rise in temperature. As the butter melts, it acts as a fat-based barrier that coats the egg proteins, further ensuring a tender outcome.
Folding in cold crème fraîche at the very end serves two purposes: it cools the mixture slightly to halt the cooking process and imparts a subtle tang and luxurious fat content that rounds out the flavor profile.
Notes and substitutions
For the best results, use a heavy-bottomed copper saucepan if available, as copper is unparalleled in its ability to distribute heat evenly and react quickly to changes in burner settings.
If you do not have a copper pan, a high-quality stainless steel pan with a thick base is an acceptable substitute. Always use a silicone spatula, as it allows you to scrape the bottom and sides of the pan efficiently, ensuring no egg remains stuck or overcooked.
The choice of brioche is essential for the serving base. Its high butter and egg content makes it the perfect companion for the richness of the scrambled eggs. If you cannot find brioche, opt for a thick-cut, high-quality white bread or sourdough that has been toasted until golden brown. The char is important, as it provides a slight bitterness that cuts through the richness of the eggs and butter, creating a balanced bite every time.
- crème fraîche: full-fat sour cream or mascarpone
- brioche: thick-cut sourdough or white toast
Equipment
- heavy-bottomed copper saucepan
- silicone spatula
- toasting rack
Up next · Part 2 of 3
3 steps · 4 min of cooking · what to look for at each stage
Step-by-step instructions (Part 2)