Dinner · Part 2 of 3: Instructions
Ultra-Creamy Five-Cheese Mac and Cheese with Garlic Panko Crust Step-by-step instructions
- Prep
- Cook
- Total
- Serves
- 8
Before you start
Grate all the cheeses and measure the other ingredients before starting. Warm the milk in a saucepan or microwave until steaming, but not boiling. Bring a large pot of salted water to a boil for the pasta.
Preheat the oven to 400°F (200°C) just before assembling. Have a colander ready for draining the pasta, and a whisk for the roux. This preparation keeps the cooking process smooth and prevents the sauce from clumping.
Ingredients at a glance (13)
- 4 tbsp unsalted butter
- 3 tbsp all-purpose flour
- 3 cups warm whole milk
- 1 3/4 cups sharp cheddar, shredded (about 7 oz)
- 1 1/2 cups Gruyère, shredded (about 6 oz)
- 1 1/4 cups Fontina, shredded (about 5 oz)
- 1 cup Gouda, shredded (about 4 oz)
- 1/2 cup Parmigiano-Reggiano, grated (about 2 oz)
- 1 lb cavatappi pasta
- 1 cup panko breadcrumbs
- 3 tbsp unsalted butter, melted
- 2 cloves garlic, minced
- 2 tbsp fresh chives, chopped
Instructions
Building the Sauce
- Make the cheese sauceIn a medium saucepan over medium heat, melt the butter. Whisk in the flour and cook for 1 minute, stirring constantly. Slowly pour in the warm milk, whisking continuously to avoid lumps. Bring the mixture to a gentle simmer and cook until thickened, about 3-4 minutes.Look for The sauce should be smooth and thick enough to coat the back of a spoon.Tip Warm the milk before adding to prevent lumps and speed up thickening.
- Melt in the cheesesReduce the heat to low. Add the shredded cheddar, Gruyère, Fontina, Gouda, and Parmigiano-Reggiano in batches, stirring until each addition is fully melted and the sauce is silky.Look for The sauce becomes glossy and smooth with no graininess.Tip Grate the cheese yourself for the smoothest melt—pre-shredded cheese contains anti-caking agents.
- Cook the pastaBring a large pot of salted water to a boil. Add the cavatappi and cook until just al dente, about 1 minute less than the package directions. Drain well and set aside.Look for Pasta is tender but still firm to the bite.Tip Undercook slightly because the pasta will continue cooking in the oven.
At the end of this phase, the saucepan holds a smooth, glossy cheese sauce with no lumps or graininess. The kitchen smells of butter and toasted cheese. The pasta is drained and ready, and the sauce is thick enough to coat a spoon. If the sauce looks thin, continue simmering for a minute; if it's lumpy, whisk vigorously to smooth it out.
Assembling and Baking
- Combine pasta and sauceFold the drained cavatappi into the cheese sauce, stirring gently until every piece is coated. The mixture will look saucy—that's perfect.Look for The pasta is fully coated in creamy sauce.Tip Use a spatula to fold without breaking the pasta.
- Prepare the garlic panko toppingIn a small bowl, mix the panko, melted butter, and minced garlic until the crumbs are evenly moistened.Look for The panko looks like wet sand and smells garlicky.Tip For extra crunch, toast the panko in a dry skillet for 2 minutes before mixing.
- Assemble and bakePreheat the oven to 400°F (200°C). Transfer the mac and cheese to a cast-iron skillet or baking dish. Sprinkle the garlic panko evenly over the top. Bake for 18 minutes, until the top is golden and the edges are bubbling.Look for The topping is golden brown and the sauce bubbles around the edges.Tip Place the skillet on a baking sheet to catch any overflow.
The skillet is filled with creamy mac and cheese, topped with an even layer of garlic panko. As it bakes, the kitchen fills with the aroma of garlic and toasting breadcrumbs.
The top turns golden brown, and the sauce bubbles around the edges. The crust feels crisp to the touch, and the edges are caramelized. It's ready when the top is deeply golden and the sauce is bubbling.
Resting and Serving
- Rest and garnishRemove the skillet from the oven and let it rest for 5 minutes. Sprinkle with chopped chives before serving.Look for The mac and cheese sets slightly, making it easier to serve.Tip Letting it rest prevents the cheese from running off the spoon.
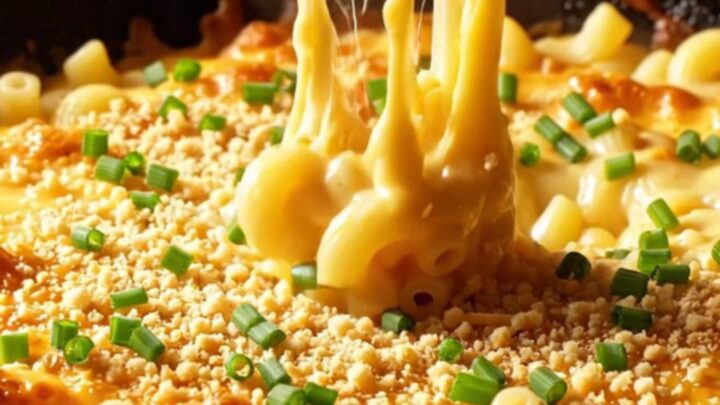
After resting, the mac and cheese is set enough to hold its shape on a spoon. The chives add freshness and color. The first spoonful reveals a creamy, cheesy interior with a crunchy crust. The cheese pull is long and satisfying. Check that the sauce is not too runny—if it is, give it another few minutes in the oven.
Common mistakes
A common mistake is overcooking the pasta before baking, which leads to a mushy casserole. Always undercook by 1-2 minutes. Another issue is using pre-shredded cheese that doesn't melt smoothly; grate your own for the best texture.
Overheating the sauce can cause it to separate, so keep the heat low when adding cheese. Finally, don't skip the resting time—it allows the dish to firm up and the flavors to meld.
How to tell it’s done
The mac and cheese is done when the top is deep golden brown and the edges are bubbling. The internal temperature should reach 165°F (74°C) if checked with an instant-read thermometer.
The sauce will be thick and creamy, and the pasta should be tender but not mushy. Letting it rest for 5 minutes allows the sauce to set slightly, making it easier to serve without losing that gooey texture.
Up next · Part 3 of 3
4 variations · storage & make-ahead · 5 answers · printable card
Tips, FAQ & printable recipe (Part 3)← Back to the ingredients (Part 1)