Desserts · Part 2 of 3: Instructions
Turkish Sütlü Nuriye: Milk-Soaked Hazelnut Baklava Step-by-step instructions
- Prep
- Cook
- Total
- Serves
- 12
Before you start
Before starting, make sure the phyllo dough is fully thawed if frozen, following the package instructions. Have all ingredients measured and ready. Set the clarified butter in a small saucepan and melt it gently over low heat.
Keep the phyllo covered with a damp, clean kitchen towel while working to prevent it from drying out. Preheat the oven to 340°F (170°C) and have a 9x13-inch baking pan ready.
Ingredients at a glance (6)
- 30 sheets paper-thin phyllo dough
- 1 cup clarified butter (sade yağ), melted
- 2 1/2 cups finely crushed roasted hazelnuts
- 2 cups whole milk
- 1 cup granulated sugar
- 1/2 cup water
Instructions
Building the Layers
- Layer the Phyllo with Butter and HazelnutsPreheat the oven to 340°F (170°C). Brush the bottom and sides of a 9x13-inch baking pan with some of the melted clarified butter. Lay one sheet of phyllo in the pan, pressing it gently into the corners. Brush the sheet lightly with butter. Repeat with 14 more sheets, brushing each layer with butter, for a total of 15 buttered phyllo sheets.Look for The phyllo should be evenly brushed but not soaking; each sheet is barely coated.Tip Keep the unused phyllo covered with a damp towel to prevent drying out.
- Spread the Hazelnut FillingEvenly scatter the finely crushed roasted hazelnuts over the buttered phyllo base, covering the entire surface. Press the nuts gently into the butter so they adhere.Look for The nuts form an even, single layer across the pastry.Tip Crush the hazelnuts to a fine crumb for a delicate texture.
- Top with Remaining Phyllo LayersPlace another sheet of phyllo over the hazelnuts and brush with butter. Repeat with the remaining 14 phyllo sheets, brushing each layer with butter. Make sure the top layer is well-brushed to promote golden browning.Look for The stack is even and the top sheet is fully coated with butter.Tip Use a light hand when brushing to avoid tearing the fragile phyllo.
- Cut Diamond ShapesUsing a sharp knife, carefully cut the layered pastry into diamond shapes. Make cuts all the way through to the bottom of the pan, first in one diagonal direction, then the opposite, forming diamonds.Look for The cuts are clean and reach the bottom, creating uniform diamonds.Tip Wipe the knife clean between cuts for neat edges.
At the end of this phase, the pan holds 15 buttered phyllo sheets, an even layer of crushed hazelnuts, and 15 more buttered sheets on top.
The surface should look smooth and evenly buttered, with no dry spots. The diamond cuts are clean and reach the bottom of the pan, and the remaining butter is ready to be poured.
Baking to Golden
- Pour Remaining Butter Over the CutsPour any remaining melted clarified butter evenly over the entire surface, especially into the cut lines. This ensures every layer gets butter and helps create crisp, flaky layers.Look for The butter pools in the cut lines and the top looks glossy.Tip Tilt the pan to distribute the butter evenly.
- Bake Until Golden AmberPlace the pan in the preheated oven and bake for 45 minutes, until the top is deep golden amber and the pastry is crisp. Rotate the pan halfway through for even browning.Look for The top is golden amber and the edges are slightly darker; the pastry sounds crisp when tapped.Tip If the top browns too quickly, tent loosely with foil.
After 45 minutes in the oven, the baklava should be deep amber, with the edges slightly darker. The top should feel crisp and firm to the touch. The aroma of toasted butter and hazelnuts fills the kitchen. The milk syrup is simmering on the stove, ready to be poured.
Soaking and Setting
- Prepare the Milk SyrupWhile the baklava bakes, combine the whole milk, granulated sugar, and water in a small saucepan. Bring to a gentle simmer over medium heat, stirring until the sugar dissolves. Simmer for 5 minutes, then remove from heat.Look for The syrup is smooth and slightly thickened, with no graininess.Tip Do not boil vigorously; a gentle simmer keeps the milk from curdling.
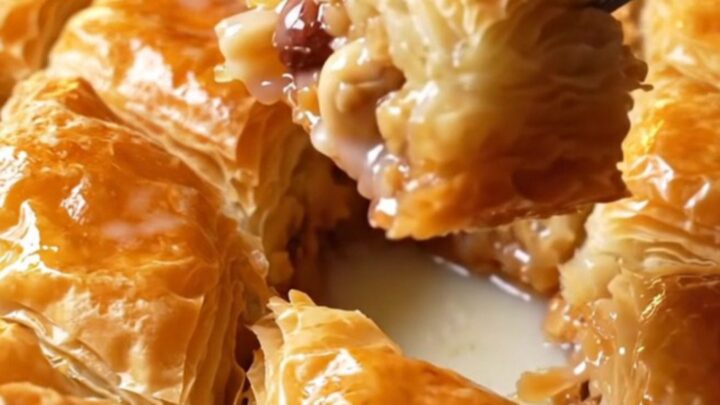
- Soak the Hot Baklava with Warm Milk SyrupRemove the baklava from the oven and immediately ladle the warm milk syrup evenly over the hot pastry. The syrup will sizzle as it is absorbed. Let the baklava cool completely in the pan, allowing the syrup to soak into every layer.Look for The syrup is absorbed, leaving the top glossy and the pastry glistening.Tip Pour slowly to let the syrup seep into all the cut lines.
- Chill and ServeOnce the baklava has cooled to room temperature, refrigerate for at least 2 hours or overnight. This allows the milk syrup to fully infuse the layers. Serve chilled or at room temperature, lifting each diamond piece with a fork.Look for The baklava is set, with flaky layers that hold their shape when lifted.Tip Chilling makes the baklava easier to cut and enhances the milk flavor.
Once the warm milk syrup is poured, the baklava sizzles and gradually absorbs the liquid. After cooling and chilling, the top is glossy, and the layers hold together when lifted. The texture is crisp on top, tender and moist inside, with a delicate milk flavor.
Common mistakes
A common mistake is using whole butter instead of clarified butter, which can burn and make the layers greasy. Another is not brushing each phyllo sheet thoroughly, leading to dry patches. When cutting the diamonds, use a sharp knife and cut all the way through; otherwise, the pieces will not separate cleanly.
Pouring the syrup too quickly can cause it to pool on top instead of soaking in — pour slowly and evenly. Finally, do not skip the chilling step; it is essential for the syrup to set and the flavors to meld.
How to tell it’s done
The baklava is done when the top is a deep golden amber and the edges look slightly darker and crisp. A gentle tap on the surface should produce a crisp sound. The phyllo should be fully cooked through, with no doughy spots.
After the milk syrup is poured, the pastry will soften slightly, but the top should remain crisp. If you insert a thin knife into a cut line, it should come out clean, and the syrup should be fully absorbed after cooling.
Up next · Part 3 of 3
4 variations · storage & make-ahead · 5 answers · printable card
Tips, FAQ & printable recipe (Part 3)← Back to the ingredients (Part 1)