Breakfast · Part 2 of 3: Instructions
Turkish Braided Feta Buns: Soft and Pillowy Step-by-step instructions
- Prep
- Cook
- Total
- Serves
- 8
Before you start
Before starting, gather all ingredients and let the milk and water warm to about 110°F (43°C). Measure the flour and have it ready. If using active dry yeast, dissolve it in the warm water with a pinch of sugar and let it foam for 5 minutes.
Prepare the feta filling by crumbling the cheese and mixing with chopped herbs. Line a baking sheet with parchment paper. Clear a workspace for kneading and shaping. Set aside a clean kitchen towel for covering the dough during rises.
Ingredients at a glance (12)
- 1 cup warm milk
- 1 cup warm water
- 1/2 cup vegetable oil
- 1 egg white
- 2 tbsp sugar
- 1 packet active dry yeast
- 5 cups all-purpose flour
- 8 oz feta cheese, crumbled
- 1/4 cup fresh herbs (dill, parsley), chopped
- 1 egg yolk
- 1 tbsp milk
- 1 tbsp nigella seeds
Instructions
Dough and Filling
- Make the DoughIn a large bowl, whisk together the warm milk, warm water, vegetable oil, egg white, sugar, and yeast. Let sit for 5 minutes until foamy. Gradually add the flour, stirring with a wooden spoon until a soft dough forms. Turn out onto a floured surface and knead for 5-7 minutes until smooth and elastic. Place in a greased bowl, cover, and let rise in a warm place for 1 hour, or until doubled in size.Look for The dough is smooth, supple, and no longer sticky after kneading.Tip If the dough is too sticky, add a little more flour, one tablespoon at a time.
- Prepare the FillingIn a small bowl, combine the crumbled feta cheese and chopped fresh herbs. Mix well. Set aside.Look for The filling is well combined and crumbly.Tip Pat the feta dry with paper towels to prevent a soggy filling.
After mixing, the dough should be smooth, elastic, and slightly tacky but not sticky. It should have risen to double its size, filling the bowl with airy, puffy dough.
The feta-herb filling should be well combined and crumbly, with the herbs evenly distributed. This is the foundation for the soft, flavorful buns.
Shaping and Second Rise
- Shape the BunsPunch down the risen dough and divide it into 8 equal pieces. Roll each piece into a ball, then flatten into a rectangle about 6 inches long. Place a spoonful of the feta mixture along the center. Fold the dough over the filling and pinch the edges to seal. Roll gently to form a log, then cut the log into three strips lengthwise, leaving one end intact. Braid the three strips loosely and pinch the ends to seal. Shape into a round bun. Repeat with remaining dough.Look for The buns are neatly braided with the filling enclosed.Tip Keep the braid loose so the buns can expand during baking.
- Second RisePlace the shaped buns on a parchment-lined baking sheet, leaving space between them. Cover loosely with a clean towel and let rise in a warm place for 20-30 minutes, until slightly puffy.Look for The buns have puffed up noticeably.Tip While the buns rise, preheat the oven to 375°F (190°C).
The braided buns should look neat and uniform, with the filling enclosed. They should have puffed up during the second rise, feeling light and airy when gently pressed. The dough should not be overly sticky, and the braids should be distinct. This stage sets the stage for a beautiful golden finish.
Baking and Finishing
- Egg Wash and BakeIn a small bowl, whisk together the egg yolk and milk. Brush the risen buns generously with the egg wash. Sprinkle with nigella seeds. Bake in the preheated oven at 375°F (190°C) for 20 minutes, until golden brown and puffed. The internal temperature of the buns should reach 160°F (71°C) to ensure the egg is fully cooked.Look for The buns are glossy, deep golden brown, and sound hollow when tapped.Safe temperature 160°F (71°C) internal temperature (egg dishes)Tip If the tops brown too quickly, tent loosely with foil.
- Cool and ServeRemove the buns from the oven and let them cool on the baking sheet for 5 minutes. Then transfer to a wire rack. Serve warm or at room temperature. The buns are best enjoyed the same day.Look for The buns are soft to the touch and spring back when pressed.Tip Warm the buns briefly in the oven before serving for maximum softness.
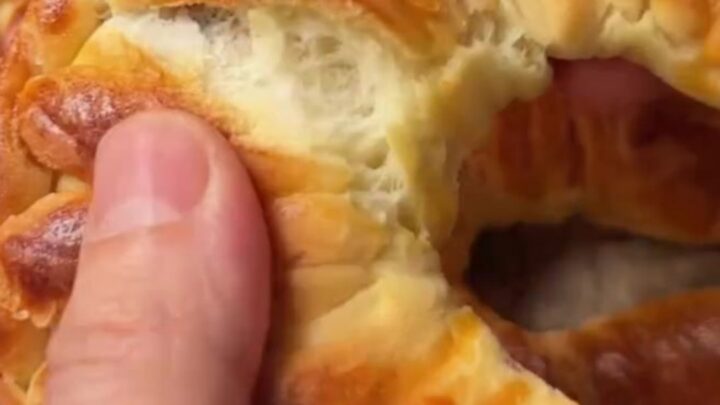
The buns should be glossy with the egg wash, deep golden brown, and fragrant. They should feel slightly firm but spring back when pressed. The internal temperature should be at least 160°F (71°C). The kitchen will smell warm and yeasty, and the buns will look irresistible.
Common mistakes
One common mistake is using milk and water that are too hot, which kills the yeast and prevents the dough from rising. Another is over-kneading, which can make the buns tough.
When shaping, be sure to seal the edges of the dough tightly around the filling; otherwise, the cheese can leak out during baking. Also, don't skip the second rise—it's crucial for a light texture. Finally, resist the urge to overcrowd the baking sheet; the buns need space to expand.
How to tell it’s done
The buns are done when they are deep golden brown on top and puffed up. The internal temperature should read 160°F (71°C) on an instant-read thermometer inserted into the thickest part of a bun. When tapped on the bottom, they should sound hollow.
Let them cool for a few minutes before serving; the crumb will be soft and pillowy, and the filling will be hot and fragrant. If the buns are not yet golden after 20 minutes, continue baking in 2-minute increments, checking frequently.
- Egg dishes: 160°F (71°C) in the thickest part
Up next · Part 3 of 3
4 variations · storage & make-ahead · 5 answers · printable card
Tips, FAQ & printable recipe (Part 3)← Back to the ingredients (Part 1)