Desserts · Part 1 of 3: Ingredients
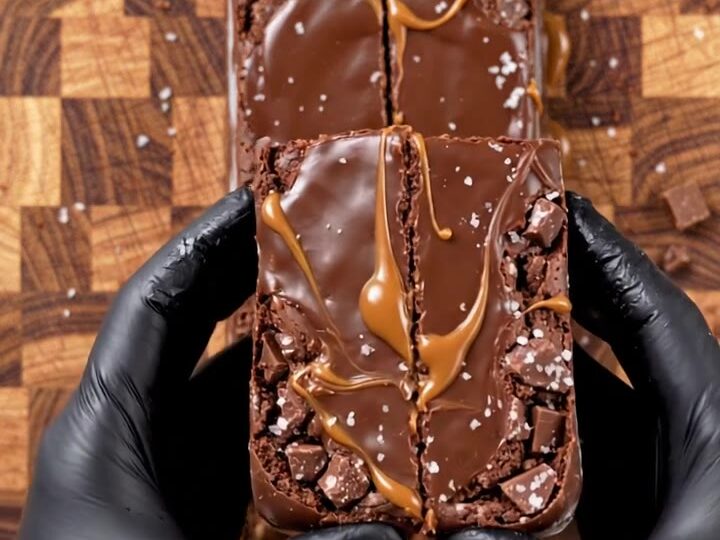
Triple Chocolate Fudge Salted Caramel Brownie Bars
- Prep
- Cook
- Total
- Serves
- 12
These triple chocolate fudge salted caramel brownie bars are the ultimate indulgence. A dense, fudgy base made with dark and milk chocolate is swirled with warm salted caramel and white chocolate, then topped with crisp chocolate curls.
Each thick bar snaps cleanly in half to reveal a beautiful layered cross-section. Perfect for holidays, parties, or any day that calls for a truly decadent chocolate dessert.
Layers of rich chocolate fudge, ribbons of salted caramel, and delicate chocolate curls come together in these showstopping brownie bars. The fudgy base is deeply chocolatey with a dense, moist crumb that contrasts beautifully with the sweet, salty caramel swirl.
White chocolate adds creamy pockets of sweetness, while the chocolate curls on top provide a satisfying crunch. These bars are easy to make, but look and taste like they came from a high-end bakery.
Ingredients
Fudge Base
- 1 1/2 cups dark chocolate chips
- 1 1/2 cups milk chocolate chips
- 1 cup unsalted butter, melted
- 1 3/4 cups granulated sugar
- 3 large eggs
- 2 tsp vanilla extract
- 1 cup all-purpose flour
- 1/2 cup unsweetened cocoa powder
- 1/2 tsp kosher salt
Caramel Swirl
- 1 cup salted caramel sauce
- 4 oz white chocolate, chopped
Topping
- 1/2 cup chocolate curls (dark and white)
Why this recipe works
The combination of dark and milk chocolate in the fudge base creates a complex, deeply chocolatey flavor that is neither too bitter nor too sweet. The dark chocolate provides intensity, while the milk chocolate adds creaminess and a hint of caramel notes. This balance ensures every bite is rich and satisfying without being overwhelming.
Swirling the salted caramel and white chocolate into the batter rather than fully mixing them creates distinct pockets of flavor and texture. The caramel becomes gooey and slightly sticky, while the white chocolate melts into creamy spots. This layering technique also yields a beautiful marbled appearance that makes the bars look as impressive as they taste.
Notes and substitutions
Use high-quality chocolate for the best results. Dark chocolate with at least 60% cocoa solids gives the bars a deep, intense flavor, while milk chocolate adds sweetness and creaminess.
For the white chocolate, choose a brand that contains cocoa butter for a smooth, rich melt. Chocolate chips can be used for the fudge base, but chopped chocolate bars often melt more evenly.
The salted caramel sauce can be store-bought or homemade. If using store-bought, look for a thick, rich caramel that is not too runny, as a thin sauce may sink into the batter.
For the chocolate curls, use a block of dark and white chocolate and grate them on the large holes of a box grater. Chilling the chocolate beforehand makes the curls cleaner and more defined.
- dark chocolate chips: semi-sweet chocolate chips or chopped dark chocolate bar
- milk chocolate chips: semi-sweet chocolate chips or a chopped milk chocolate bar
- white chocolate: white chocolate chips or chopped white chocolate bar
- salted caramel sauce: homemade caramel sauce or store-bought caramel sauce with a pinch of sea salt
Equipment
- 9x13-inch baking pan
- parchment paper
- box grater
- mixing bowls
- whisk
- rubber spatula
- offset spatula
- serrated knife
Up next · Part 2 of 3
8 steps · 45 min of cooking · what to look for at each stage
Step-by-step instructions (Part 2)