Dinner · Part 1 of 3: Ingredients
Torched Wagyu on Crispy Garlic Rice: 8-Second Blowtorch Bite
- Prep
- Cook
- Total
- Serves
- 2
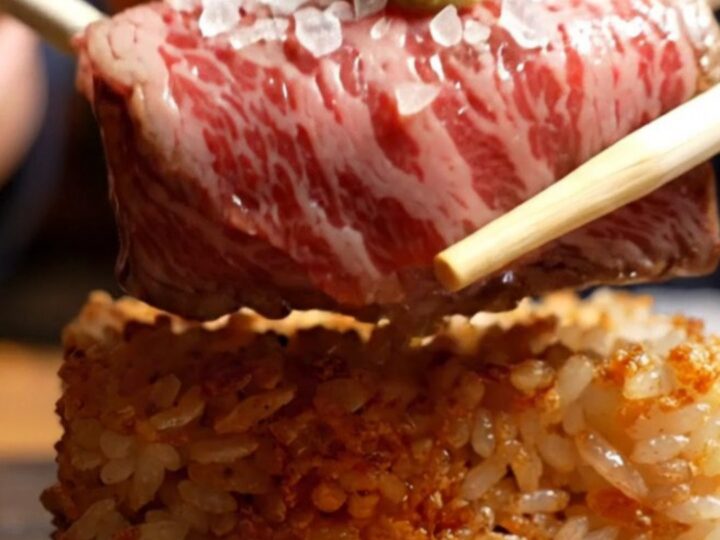
This torched Wagyu on crispy garlic rice is the ultimate indulgence: buttery A5 ribeye seared with a blowtorch until the fat renders into golden droplets, layered over a crisp rice block glazed with garlic soy, and crowned with a glossy quail egg yolk.
The contrast of warm, smoky beef, crunchy rice, and rich yolk is pure decadence. Ready in under 15 minutes, this bite-sized sensation brings the yakiniku bar home.
Torching Wagyu at home might sound intimidating, but it's actually the fastest way to achieve that perfect crust and melty interior. The high heat of a butane blowtorch caramelizes the surface in seconds, while the interior stays luxuriously tender.
Here, the beef is draped over sushi rice that's been brushed with garlic soy and torched until crisp. The result is a symphony of textures: crackly rice, silky beef, and a yolk that adds richness. This recipe is designed for a single, show-stopping bite—ideal for a special appetizer or a decadent snack.
Ingredients
- 1 cup cooked sushi rice
- 15 ml garlic soy glaze
- 4 oz A5 Wagyu ribeye, thinly sliced
- 1 golden quail egg yolk
- flaky Maldon sea salt, to taste
- fresh wasabi, grated, to taste
Why this recipe works
The blowtorch is the secret to this dish. It delivers intense, focused heat that sears the Wagyu's surface in just 8 seconds, rendering the fat into a crisp, caramelized crust while leaving the interior buttery and rare.
No pan can achieve this level of precision without overcooking the thin slices. The technique also allows you to control the exact spot you're heating, ensuring every inch of the beef gets that smoky char.
The rice blocks are the perfect canvas. Pressed firmly and brushed with garlic soy, they develop a crispy exterior when torched, providing a crunchy contrast to the tender beef. The quail egg yolk adds a luxurious creaminess that ties everything together, while flaky salt and fresh wasabi cut through the richness with bright, piquant notes.
Notes and substitutions
A5 Wagyu is prized for its intense marbling and buttery texture. If you can't find it, look for high-quality ribeye or sirloin with good marbling. The beef should be sliced paper-thin so it cooks quickly and evenly under the torch. If you're using a different cut, adjust the cooking time accordingly and always check for doneness.
Sushi rice is essential for the right texture—sticky enough to hold its shape. If you don't have sushi rice, you can use short-grain white rice and season it lightly with rice vinegar and salt.
The garlic soy glaze is a simple mix of soy sauce, garlic, and a touch of sweetness; you can adjust the ratio to your liking. For the yolk, use fresh quail eggs for the best flavor, or substitute a chicken egg yolk.
- A5 Wagyu ribeye: High-quality ribeye or sirloin steak, thinly sliced (though not as marbled)
- Quail egg yolk: Chicken egg yolk (use only the yolk, and pasteurize if serving raw)
- Garlic soy glaze: Mix 2 tbsp soy sauce, 1 tsp honey, and 1 minced garlic clove
- Fresh wasabi: Prepared wasabi paste (or horseradish, if avoiding wasabi)
Equipment
- Butane culinary blowtorch
- Small bowl for water
- Sharp knife
- Cutting board
- Basting brush
- Serving plate
Up next · Part 2 of 3
6 steps · 8 min of cooking · what to look for at each stage
Step-by-step instructions (Part 2)